8
PDEXS 150 B2
GB
CY
Refilling oil
To ensure that the compressed air-powered random
orbital sander remains operational for as long as
possible, make sure that there is sufficient pneu-
matic oil in the appliance.
The following options are available:
♦
Attach a maintenance unit with an oiler to the
compressor.
♦
Install a fitted oiler into the compressed air line
or the compressor.
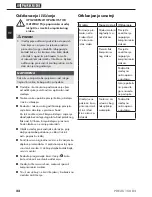
Add 3–5 drops of pneumatic oil into the
connector nipple every 15 minutes of
operation.
Connecting to a compressed air source
NOTE
►
Before connecting the compressed air source
–
the correct working pressure (3–6 bar)
must be fully reached
–
make sure that the trigger is in the upper
position
♦
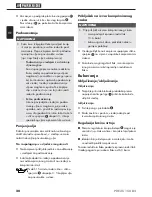
Attach the appliance to a compressor by con-
necting the connector nipple with the supply
hose of the compressed air source.
♦
To ensure that you can regulate the air pressure,
the compressed air source must be equipped
with a pressure reducer.
Handling
Switching on and off
Switching on:
♦
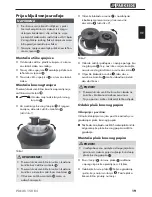
First press the locking mechanism forwards and
then the trigger to switch the appliance on.
Switching off:
♦
Let go of the trigger .
♦
When you have finished working, disconnect
the appliance from the compressed air source.
Regulation of vibration output
■
Use the speed controller to control the air-
flow and thus the vibration output (also during
operation).
■
The ideal speed depends on the material being
worked and can be determined through practical
tests.
Use the pressure reducer to set the correct working
pressure. Operate the appliance at a working pres-
sure of 6.3 bar.
Sanding
♦
Switch on the compressed air source and allow
it to run until the maximum tank pressure has
been reached.
♦
Use the pressure reducer on the compressed
air source to set the optimum working pressure.
Note that the maximum working pressure may
not be exceeded. An excessive working pressure
does not mean increased output; it merely in-
creases the air consumption and accelerates
appliance wear. Always comply with the techni-
cal information.
♦
Switch on the compressed air-powered random
orbital sander.
♦
Allow the device to reach the required speed
and adjust as necessary.
♦
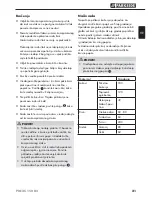
Guide the compressed air-powered random
orbital sander parallel onto the workpiece.
♦
Move the appliance parallel and in flat circles
or alternatively lengthwise and across the sur-
face. Use the housing as a handle to guide
the appliance in the desired direction.
♦
Do not press the compressed air-powered ran-
dom orbital sander down. Pressing down hard
does not increase the working efficiency!
♦
When you have finished working, let go of the
trigger to switch off the appliance.
♦
When you have finished working, disconnect
the appliance from the compressed air source.
Summary of Contents for PDEXS 150 B2
Page 3: ......
Page 15: ...12 PDEXS 150 B2...
Page 42: ...39 PDEXS 150 B2 BG ISO 15744...
Page 43: ...40 PDEXS 150 B2 BG...
Page 44: ...41 PDEXS 150 B2 BG...
Page 45: ...42 PDEXS 150 B2 BG Whipcheck...
Page 46: ...43 PDEXS 150 B2 BG 6 3 bar 6 3 bar 1 1...
Page 47: ...44 PDEXS 150 B2 BG 2 2 Liqui Moly 3 4...
Page 48: ...45 PDEXS 150 B2 BG 15 3 5 3 6 bar 6 3 bar...
Page 49: ...46 PDEXS 150 B2 BG 180 120 40 60 80 60 240 80 60...
Page 50: ...47 PDEXS 150 B2 BG 6 3 bar...
Page 53: ...50 PDEXS 150 B2...


