19
GB
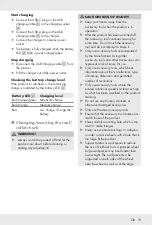
Start charging
Connect the USB-C plug on the USB
charging cable
[
5]
to the charging socket
[
4]
.
Connect the USB-A plug on the USB
charging cable
[
5]
to the charger .
Connect the charger to a mains power
socket .
The battery is fully charged when the battery
LED
[
2]
lights up red/orange/green .
Stop charging
Disconnect the USB charging cable
[
5]
from
the product .
Pull the charger out of the power outlet .
Checking the battery charge level
If the product is switched on, the remaining
charge is indicated by the battery LED
[
2]
:
Battery LED
[
2]
Charging level
Red/orange/green Maximum charge
Red/orange
Medium charge
Red
Low charge: Charge the
battery
Changing/inserting the tool/
collet chuck
m
WARNING!
u
Always switch the product off and let the
product cool down before cleaning or
making any adjustments!
m
CAUTION! RISK OF INJURY!
u
Keep your hands away from the
accessory tool when the product is in
operation .
u
After the product has been switched off,
the accessory tool continues moving for
some time . Do not touch the accessory
tool and do not attempt to brake it .
u
Only use accessory tools recommended
by the manufacturer . Using other
accessory tools and other accessories can
represent a risk of injury for you .
u
Only use accessory tools, which bear
information about the manufacturer, type
of binding, dimension and permitted
number of revolutions .
u
Only use accessory tools where the
printed rotational speed is at least as high
as what has been specified on the product
marking .
u
Do not use any broken, cracked, or
otherwise damaged accessories .
u
Only use flawless accessory tools .
u
Ensure that the accessory tool dimensions
match those of the product .
u
Never re-drill a locating hole which is too
small to make it larger .
u
Never use separate bushings or adaptors
in order to make wheels with a hole that is
too large fit the product .
u
Support plates or workpieces to reduce
the risk of kickback from a jammed wheel .
Large workpieces may bend under their
own weight . The workpiece must be
supported on both sides of the wheel,
near the wheel as well as at the edge .
Summary of Contents for PFBS 12 C5
Page 3: ...B A 1 2 3 4 7 6 8 9 10 20 21 17 16 18 19 11 12 14 15 13 5 ...
Page 25: ...26 GB EC Declaration of conformity ...
Page 48: ...49 HU EK megfelelőségi nyilatkozat ...
Page 71: ...72 SI Izjava ES o skladnosti ...
Page 93: ...94 CZ ES Prohlášení o shodě ...
Page 115: ...116 SK EÚ vyhlásenie o zhode ...


