PFDFA 20-Li A1
■
8
│
GB
│
IE
Setting the biscuit groove size
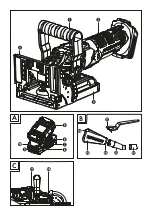
(see fig . C)
The appliance can cut biscuit grooves in six sizes .
To do this, use the depth adjustment
i
.
Setting
Biscuit type Cutting depth
0
No . 0
approx . 8 mm
10
No . 10
approx . 10 mm
20
No . 20
approx . 12 .3 mm
S
Simplex
approx . 13 mm
D
Duplex
approx . 14 .7 mm
Max .
‒
approx . 20 mm
♦
Turn the depth adjustment
i
until the desired
biscuit groove size is set on the ▼ marking on
the upper side .
Setting the biscuit groove depth
(see fig . C)
You can adjust the depth of the biscuit groove if the
depth of the biscuit groove does not correspond
with the size of the biscuit you are using .
♦
Turn the depth adjustment screw
u
with a
Phillips screwdriver (not supplied):
clockwise:
reduce cutting depth
anticlockwise:
increase
♦
Carry out a test on some scrap material to
check that the setting is correct .
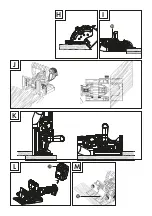
Angle setting (see fig . E)
The angle stop
4
is adjustable to cut slots with
different angles .
♦
Loosen the angle stop screw
d
by turning it
anticlockwise .
♦
Set the desired angle using the angle scale
g
and the ▼ marking above it .
♦
Re-tighten the angle stop screw
d
by turning it
clockwise .
Height stop
The height stop
a
is fitted in front of the angle
stop
4
. The height stop can be adjusted to match
the thickness of the workpiece .
Fit the height stop (see fig. D)
♦
Undo the height stop lock
s
.
♦
Align the lower part of the height stop
a
with
the upper side of the angle stop
4
. Press the
height stop
a
downwards . The gear wheel on
the back of the height adjustment knob
p
must
engage in the grooves of the angle stop
4
.
♦
Turn the height adjustment knob
p
in both
directions to test whether the height stop
a
can move in both directions .
CAUTION!
►
If you use the angle stop
4
and the height
stop
a
at the same time, make sure that the
saw disc
j
does not come into contact with
the height stop
a
!
Adjusting the height stop
♦
Undo the height stop lock
s
. Turn the height
adjustment knob
p
until you reach the desired
setting .
♦
The values in the scale windows
o
serve as
reference value . The set height is shown by the
► marking .
♦
After you have set the height, retighten the
height stop lock
s
.
Removing the height stop
♦
Undo the height stop lock
s
.
♦
Turn the height adjustment knob
p
clockwise
until you reach the highest setting and you can
remove the height stop
a
.
Summary of Contents for PFDFA 20-Li A1
Page 3: ...A B C...
Page 4: ...D E F G 27a...
Page 5: ...H I J K L M...
Page 36: ...PFDFA 20 Li A1 30 DE AT CH...
Page 54: ...PFDFA 20 Li A1 48 FR BE...
Page 70: ...PFDFA 20 Li A1 64 NL BE...
Page 86: ...PFDFA 20 Li A1 80 CZ...
Page 102: ...PFDFA 20 Li A1 96 PL...
Page 132: ...PFDFA 20 Li A1 126 ES...
Page 162: ...PFDFA 20 Li A1 156 IT...
Page 178: ...PFDFA 20 Li A1 172 HU...

