6 GB/IE/CY
Sabre saw PFS 710 A
All-purpose electric saw for house and garden
Q
Introduction
Please make sure you familiarise yourself
fully with the way the device works before
you use it for the first time and that you
understand how to handle electrical power tools
correctly. Further details can be found in the operating
instructions. Keep these instructions in a safe place. If
you pass the device on to anyone else, please ensure
that you also pass on all the documentation.
Q
Proper use
The device is intended for sawing, cutting to length or
trimming of securely supported objects made of wood,
plastic and building materials. The sabre saw is suita-
ble for rough sawing work, straight and curved cuts
and sawing flush. Please heed the information on saw
blades and the advice on working with your saw. The
device is not intended for commercial use. Any other
use or modification to the device shall be considered
as improper use and could give rise to considerable
dangers. The manufacturer will not accept liability for
loss or damage arising from improper use.
Q
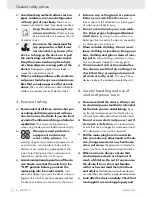
Features and equipment
1
Oscillation speed setting wheel
2
Lock button
3
On / Off switch
4
Pendulum-action rotary switch
5
Allen key for saw blade replacement
6
Hexagonal socket head screw for saw blade
replacement
7
Shoe
8
Saw blade
9
Plunger
10
Locating pin
11
Clamping plate
12
Saw blade for wood (finer cuts)
Q
Included items
1 Sabre saw PFS 710 A
1 Allen key
1 Saw blade
1 Operating instructions
1 “Warranty and service” booklet
Introduction
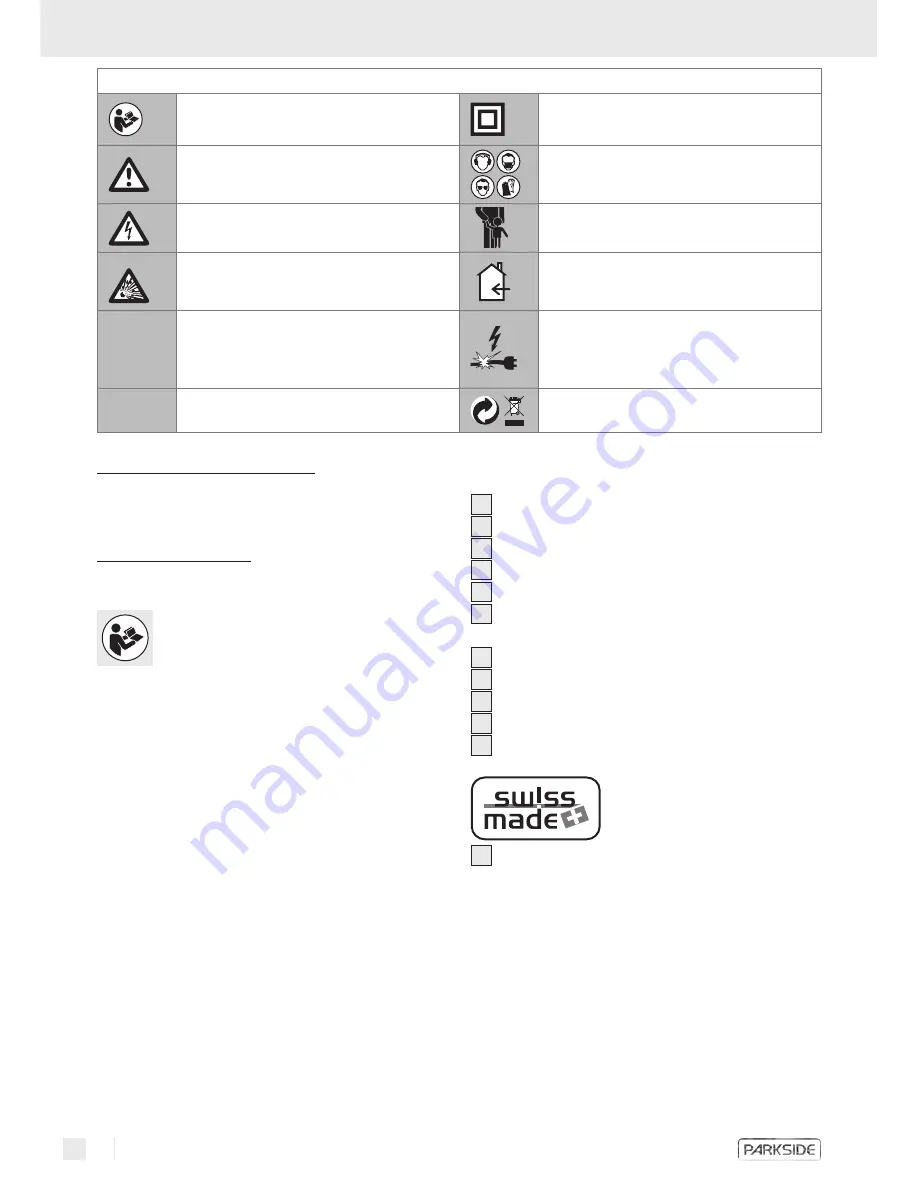
The following icons / symbols are used in this instruction manual:
Read instruction manual!
Safety class II
Observe caution and safety notes!
Wear hearing protection, dust protection mask,
protective glasses and protective gloves.
Caution – electric shock!
Dangerous electric current – danger to life!
Keep children and other unauthorised personnel
at a safe distance when using electrical tools.
Explosive material!
Keep the device away from rain or moisture.
Water entering an electrical device increases the
risk of electric shock.
V~
Voltage
Damaged appliances, power cables and power
plugs mean potentially fatal risks from electric
shock. Regularly check the condition of the appli-
ance, the power cables and the power plugs.
W
Watts (Effective power)
Dispose packaging and appliance in an
environmentally-friendly way!


