PFSA 20-Li C3
GB
│
IE
│
7
■
NOTE
►
Ensure that the spray material and thinning
agent are compatible. Using an unsuitable
thinning agent may cause clots that clog the
appliance. Never mix synthetic resin var-
nishes with cellulose thinners.
►
To find out which thinning agent is suitable
for your spray material (water, paint thinner),
refer to the manufacturer’s notes provided
with the spray material.
►
Granular products and products containing
solids must not be sprayed. Their abrasive
effect shortens the service life of the appliance.
Preparing the spray surface
♦
Cover the area around the spray area thoroughly
and over a wide area. Any surface that is not
masked could become contaminated.
♦
Make sure that the spray surface is clean, dry
and free of grease.
♦
Polished surfaces should be lightly sanded and
the sanding dust removed.
Before use
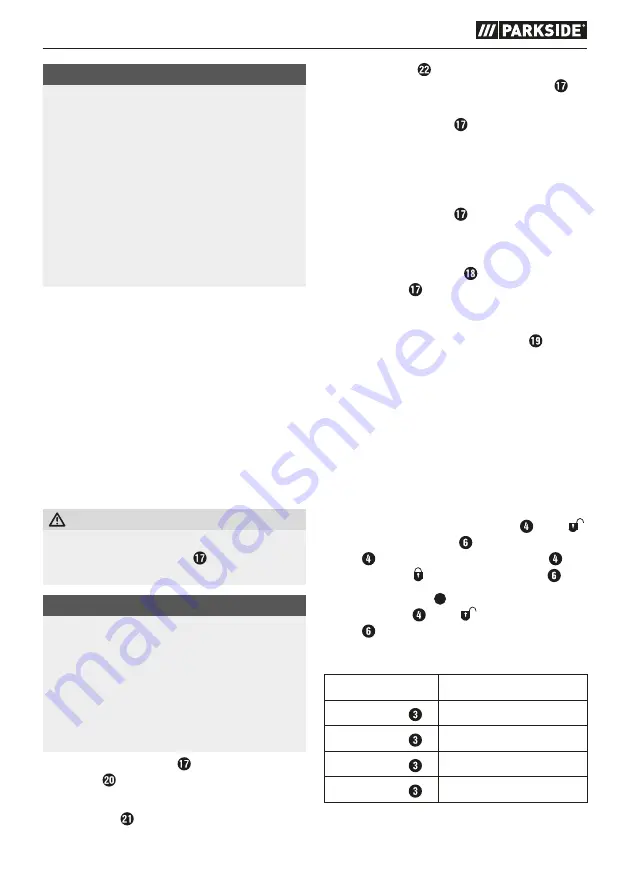
Charge battery pack (see fig. B)
CAUTION!
►
Always unplug the appliance before you
remove the battery pack from or connect it
to the charger.
NOTE
►
Never charge the battery pack at an ambient
temperature of below 10°C or above 40°C.
If a lithium-ion battery is to be stored for an
extended period, the charge level must be
checked regularly. The optimum charge level
is between 50% and 80%. The storage climate
should be cool and dry and the ambient tem-
perature should be between 0°C and 50°C.
♦
Insert the battery pack into the high-speed
charger .
♦
Insert the power plug into the socket. The red
control LED lights up to indicate that the
appliance is charging.
♦
The green LED indicates that the charging
process is complete and the battery pack
is ready.
♦
Push the battery pack into the appliance.
Attaching/disconnecting the battery
pack to/from the appliance
Attaching the battery pack
♦
Push the battery pack into the handle until
it clicks into place.
Removing the battery pack
♦
Press the release button and remove the
battery pack .
Checking the battery charge level
♦
Press the battery charge level button to
check the charge level of the battery. The status
is indicated in the adjacent battery display LED
as follows:
RED/ORANGE/GREEN = maximum charge
RED/ORANGE = medium charge
RED = low charge – charge the battery
Setting up
Assembly/disassembly
♦
Move the ▸ mark on the spray unit to the
mark on the motor unit . Now, turn the spray
unit until the ▸ mark on the spray unit
locks into the
mark on the motor unit .
♦
Release the catch
5a
. Turn the ▸ mark on
the spray unit to the mark on the motor
unit to separate the two units.
Selecting/changing the nozzle
Nozzle
Use
1.5 mm nozzle
Low viscosity
1.8 mm nozzle
Water-based paints
2.2 mm nozzle
High viscosity
2.6 mm nozzle
Oil-based paints
Summary of Contents for PFSA 20-Li C3
Page 3: ...A 5a 15a...
Page 4: ...B...
Page 19: ...PFSA 20 Li C3 14 GB IE...
Page 77: ...PFSA 20 Li C3 72 CZ...
Page 93: ...PFSA 20 Li C3 88 PL...
Page 135: ...PFSA 20 Li C3 130 DK...
Page 177: ...PFSA 20 Li C3 172 SI...
Page 209: ...PFSA 20 Li C3 204 BG 1 a 2 a 3 a...
Page 210: ...PFSA 20 Li C3 BG 205 4 a 5 a...
Page 211: ...PFSA 20 Li C3 206 BG 6 a 21 C PARKSIDE...
Page 213: ...PFSA 20 Li C3 208 BG 10 C 40 C 50 80 0 C 50 C 5a 1 5 mm 1 8 mm...
Page 214: ...PFSA 20 Li C3 BG 209 2 2 mm 2 6 mm 15 cm 10 cm...
Page 215: ...PFSA 20 Li C3 210 BG 2012 19 EU...
Page 216: ...PFSA 20 Li C3 BG 211 2006 66 a b 1 7 20 22 80 98 3 X12V X20V Team 3 II 3...
Page 217: ...PFSA 20 Li C3 212 BG IAN 418086_2210...
Page 220: ...PFSA 20 Li C3 BG 215 www kompernass com QR QR IAN 418086_2210...
Page 221: ...PFSA 20 Li C3 216 BG...
Page 225: ...PFSA 20 Li C3 220 GR 1 2 3...
Page 226: ...PFSA 20 Li C3 GR 221 4 5...
Page 227: ...PFSA 20 Li C3 222 GR 6 21 C PARKSIDE...
Page 229: ...PFSA 20 Li C3 224 GR B 10 C 40 C 50 80 0 C 50 C LED LED LED 5a 1 5 mm 1 8 mm 2 2 mm 2 6 mm...
Page 230: ...PFSA 20 Li C3 GR 225 15 10...
Page 231: ...PFSA 20 Li C3 226 GR 2012 19 U 2006 66 C...
Page 232: ...PFSA 20 Li C3 GR 227 a b 1 7 20 22 80 98 Kompernass Handels GmbH 3 X12V X20V Team 3...


