background image

21 

GB/MT

and stop the spraying process approximately 
10 cm outside the surface to be sprayed.  

Note:

 The distance between the nozzle and 

the workpiece depends on the material being 
sprayed (approx. 20 to 35 cm spraying dis-
tance, depending on the spray cone and the 
desired amount of material to be applied).

j

   Use the device in a horizontal orientation only 

(as shown in Fig. D).

j

   Carry out a trial in each case to determine the 

most effective spraying distance. 

j

  Start with a longer distance.

3.   Spray corners or small decorative details first 

using short bursts of spray.  
Then go on to the actual spraying process.

4.   The spray process should follow the sequence 

shown in Fig. E – keep the spray gun moving 
parallel to the surface 


– Do not incline the spray gun


– Move the spray gun at a constant speed


–  Apply the sprayed medium as thinly as possible


–  The layer(s) of sprayed medium need(s) to 

be allowed to dry for some time before you 
apply the next coat Fig. F) at right angles to 
the previous coat. 

5.   Do not allow the paint cup 

7

 to empty com-

pletely while spraying – drops may form!

Q

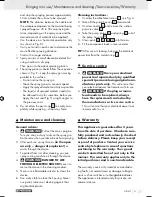
  Maintenance and cleaning

General advice:

1.   

WArNING!

 Pull out the mains plug be-

fore you carry out any tasks on the spray gun. 
Do the same when you take a break from spraying.

2.   After each use, spray thinners 

(in the open 

air only – danger of explosion!)

 or 

water through the device.

3.   To protect from rust after cleaning, you can 

spray sewing machine oil through the device.

4.   

WArNING!


DANGer to LIFe 

tHroUGH eLeCtrIC SHoCK! 

Never im-

merse the device in the cleaning medium.

5.   Never use inflammable solvents to clean the 

device.

6.   Use a dry cloth to clean the housing. Never 

use petrol, solvents or cleaning agents that 
might attack plastic.

Cleaning instructions:

1.  Unscrew the attachment screw 

1

, see Fig. A.

2.  Take off the pump housing 

10

 downwards.

3.   Unscrew nozzle 

8

 and remove the suction-

pressure valve 

9

.

4.   Take the pump piston 

4

 and spring 

5

 out of 

the pump housing 

10

.

5.  Clean parts 

4

5

8

9

 with thinners.

6.   Fit the components back in reverse order.

tIP: 

After use or cleaning, hang up the electrical 

power tool from the metal stirrup 

14

.

Service centre

J   

WArNING!


Have your electrical 

power tool repaired only by qualified 
specialist personnel using original man-
ufacturer parts only. 

This will ensure that 

your electrical power tool remains safe to use.

J   

WArNING!


If the plug or mains 

lead needs to be replaced, always 
have the replacement carried out by 
the manufacturer or its service centre. 

This will ensure that your electrical power tool 
remains safe to use.

Q     

Warranty

this appliance is guaranteed for 3 years 
from the date of purchase. It has been care-
fully produced and meti-culously checked 
before delivery. Please keep your receipt 
as proof of purchase. Contact your service 
centre by telephone in case of questions 
pertaining to the warranty. Your goods 
can be transmitted free of cost only in this 
manner. this warranty applies only to the 
initial purchaser and is non-transferable.

The warranty covers only material or manufactur-
ing faults, not normal wear or damage to fragile 
parts such as switches or rechargeable batteries.  
The appliance is intended solely for private, not 
commercial, use. 

Bringing into use / Maintenance and cleaning / Service centre / Warranty

37666_PAINT SPRAY GUN_Content_LB5 (ohne ES-PT).indd   21

12.10.09   15:30

Summary of Contents for PFSP 100 - MANUEL 4

Page 1: ...PFSP 100 FARBSPRITZPISTOLE Bedienungs und Sicherheitshinweise PISTOLA A SPRUZZO PER COLORE Indicazioni per l uso e per la sicurezza PAINT SPRAY GUN Operation and Safety Notes...

Page 2: ...ere aprire le due pagine con le immagini e prendere confidenza con le diverse funzioni dell apparecchio Before reading unfold both pages containing illustrations and familiarise yourself with all func...

Page 3: ...a 1 2 8 9 10 3 5 6 7 4 b 11 13 12 8 9...

Page 4: ...F E D 14 C x x...

Page 5: ...Utilizzo attento di dispositivi elettrici Pagina 8 Indicazioni di sicurezza aggiuntive per pistole a spruzzo Pagina 9 Indicazioni di lavorazione DIN Sec Viscosit Pagina 9 Preparazione del liquido da...

Page 6: ...pola di regolazione 3 Interruttore di ON OFF 4 Pistone della pompa 5 Molla 6 Tubo di aspirazione 7 Serbatoio colore 8 Ugello 9 Valvola di aspirazione e di pressione 10 Alloggiamento della pompa 11 Uge...

Page 7: ...u forte mente ridurre il carico di vibrazioni Istruzioni di sicurezza generali per utensili elettrici Attenzione Leggere tutte le indica zioni e gli avvisi di sicurezza Eventuali man canze nell osserv...

Page 8: ...e personale quale una mascherina antipolvere scarpe di sicurezza antisdrucciolevoli un casco di protezione o una protezione auricolare a seconda del tipo e dell utilizzo dell apparec chiatura elettric...

Page 9: ...pericolo Indicazioni di sicurezza aggiuntive per pistole a spruzzo J La pistola a spruzzo non deve essere utilizzata per la spruzzatura di mate riali infiammabili Le pistole a spruzzo non devono esse...

Page 10: ...le informazioni necessarie sul tipo di diluizione adatto acqua solvente al liquido da spruzzare dalle indicazioni fornite dal pro duttore 1 Miscelare il liquido da spruzzare non diluito in modo accur...

Page 11: ...spruzzatura come illustrato nella Fig E condurre la pistola in modo parallelo alla superficie non agitarla condurre la pistola sempre con la medesima velocit uniforme applicare uno strato di vernice...

Page 12: ...llo commerciale La garanzia decade in caso di impiego improprio o manomissione uso della forza e interventi non ese guiti dalla nostra filiale di assistenza autorizzata Questa garanzia non limita i di...

Page 13: ...seguenti direttive UE Direttiva macchine 98 37 EC Direttiva CE sulla bassa tensione 2006 95 EC Compatibilit elettromagnetica 2004 108 EC Marchio Descrizione della macchina Pistola a spruzzo per colore...

Page 14: ...14...

Page 15: ...Careful handling and use of electrical power tools Page 18 Additional safety advice for paint spray guns Page 19 Advice on use DIN sec Viscosity Page 19 Preparing the sprayed medium Page 19 Preparing...

Page 16: ...for loss or damage aris ing from improper use The device is intended for private domestic use only Q Features and equipment 1 Attachment screw 2 Regulator button 3 On Off switch 4 Pump piston 5 Spring...

Page 17: ...s not actually in use This can result in a much lower vibration load over the whole of the period of working General safety advice for electrical power tools Warning Read all the safety advice and ins...

Page 18: ...f elec trical power tool used and work undertaken reduces the risk of injury c Avoid unintentional operation of the device Check that the electrical power tool is switched off before you connect it to...

Page 19: ...ng dust mask The inhalation of paint mist and sol vent vapour is hazardous to health J Work in adequately ventilated spaces only J Wear protective glasses J Never aim the spray at living creatures J D...

Page 20: ...e 25 30 DIN sec Hammer finish paint 30 35 DIN sec Emulsion paint 40 80 DIN sec This device cannot be used to spray media contain ing discrete particles solids The abrasive effect of these media shorte...

Page 21: ...cleaning medium 5 Never use inflammable solvents to clean the device 6 Use a dry cloth to clean the housing Never use petrol solvents or cleaning agents that might attack plastic Cleaning instruction...

Page 22: ...ispose of your worn out electrical devices Environmental compatibility and disposal of materials j Paint varnishes etc are special wastes which must be disposed of in the appropriate manner j Observe...

Page 23: ...cherheit von Personen Seite 26 4 Verwendung und Behandlung des Elektrowerkzeugs Seite 27 Erg nzende Sicherheitshinweise f r Farbspritzpistolen Seite 27 Arbeitshinweise DIN Sec Viskosit t Seite 27 Spri...

Page 24: ...ine Haftung Das Ger t ist nur f r den privaten Einsatz bestimmt Q Ausstattung 1 Feststellschraube 2 Regulierknopf 3 Ein Aus Schalter 4 Pumpenkolben 5 Feder 6 Saugrohr 7 Farbbecher 8 D se 9 Saug Druck...

Page 25: ...ft aber nicht tats chlich im Einsatz ist Dies kann die Schwingungsbelastung ber den gesamten Arbeitszeitraum deutlich reduzieren Allgemeine Sicherheitshinweise f r Elektrowerkzeuge Warnung Lesen Sie a...

Page 26: ...rowerkzeug wenn Sie m de sind oder unter dem Einfluss von Drogen Alkohol oder Medikamenten stehen Ein Moment der Unachtsamkeit beim Gebrauch des Elektrowerkzeuges kann zu ernsthaften Verletzungen f hr...

Page 27: ...enden Sie Elektrowerkzeug Zubeh r Einsatzwerkzeuge usw entsprechend diesen Anweisungen Ber cksichtigen Sie dabei die Arbeits bedingungen und die auszuf hrende T tigkeit Der Gebrauch von Elektrowerkzeu...

Page 28: ...Verd nnung entstehen Klumpen die das Ger t verstopfen Kunstharzlacke nie mit Nitroverd nnung mischen J Entnehmen Sie Informationen ber die pas sende Verd nnung Wasser L sungsmittel den jeweiligen Her...

Page 29: ...tzvorgang gem Abb E durch f hren Sie die Spritzpistole dabei parallel zur Fl che nicht schwenken die Spritzpistole mit gleichbleibender Geschwindigkeit f hren das Spritzgut so d nn wie m glich auftrag...

Page 30: ...ich f r den privaten und nicht f r den gewerblichen Ge brauch bestimmt Bei missbr uchlicher und unsachgem er Behand lung Gewaltanwendung und bei Eingriffen die nicht von unserer autorisierten Service...

Page 31: ...biet sind daher unzul ssig j Achten Sie beim Kauf von Farben Lacken auf deren Umweltvertr glichkeit Q Konformit tserkl rung Hersteller Wir Komperna GmbH Burgstr 21 D 44867 Bochum Deutschland erkl ren...

Page 32: ...IAN 37666 KompernaSS GmbH Burgstra e 21 D 44867 Bochum by ORFGEN Marketing Versione delle informazioni Last Information Update Stand der Informationen 10 2009 Ident No PFSP100102009 IT MT GB DE AT CH...

Reviews: