16
GB
IE
NI
(e.g. health resorts, clinics etc.) is
restricted or forbidden.
Chain lubrication
The blade bar and saw chain must
never be operated without oil. If the
pole-mounted pruner is used with too
little oil, the cutting performance and
lifespan of the saw chain will decrease
as the saw chain will become blunt
more quickly. You can identify when
there is too little oil if smoke develops
or the blade bar changes colour.
The oil lows to the blade bar as soon as
the motor starts working.
Filling with chain oil:
• Check the oil level indicator on the oil
tank (
32) regularly and top-up the oil
if the minimum mark „MIN“ (
33) is
reached on the oil level indicator. The oil
tank holds about 120 ml of oil.
• Use bio-oil containing additives to redu-
ce friction and wear. You can order this
from our service centre.
Alternatively, use chain lubricating oil with
a low proportion of adhesion additives.
• Empty the oil tank if it will not be used
for a prolonged period of time (6-8
weeks).
1. Unscrew the oil tank cap (34) and
pour the chain oil into the tank.
2. Wipe away any spilt oil and clo-
se the oil tank cap (34).
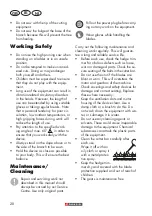
Always turn off the device and
let the motor cool down before
illing with chain oil. Over
-
lowing oil can cause a ire.
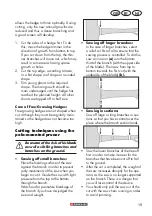
Swivelling Out the Blade
Beam
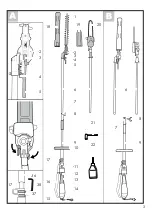
1. Hold the safety blade beam (
A
1) on
the handle to adjust the blade beam (5).
2. Unlock the safety lever (3) and keep it
pressed.
3. By simultaneously exerting pressure on
the lock lever (4), you will loosen the
ixation of the cutter bar (
A
1).
4. The safety blade beam (
A
1) can now
be swivelled out. Use the stop stages
and allow the stop lever (4) to click
back in. You can choose 9 stop stages.
5. Then, release the safety lever (3) again
and ensure that it latches back into its
initial position.
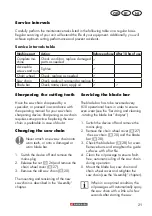
Pivoting the pole-
mounted pruner
1. Unlock the safety lever (3) and keep it
pressed.
2. By simultaneously exerting pressure on
the lock lever (4) you can loosen the
ixation of the cutter unit.
3. You can now pivot out the cutting unit
(
A
1). Use the ratchet steps and al-
low the lock lever (4) to click back into
place. There are 3 possible positions.
4. Then, release the safety lever (3) again
and ensure that it latches back into its
initial position.
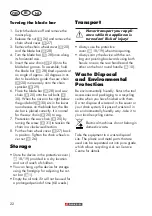
Attach the shoulder strap
Attach the shoulder strap spring clip (
A
16)
to the carrying eyelet (
A
17) on the tubular
shank of the device. Set the strap length
such that the spring clip on the shoulder
strap is roughly at the height of your hip.
You can vary the strap length using the
buckle on the shoulder strap.
Summary of Contents for PHSHE 900 A1
Page 3: ...3 A B 1 2 3 4 5 6 6 8 8 9 9 10 11 36 38 37 12 13 14 15 16 17 17 18 20 19 7 7 2 3 4 5 21 22...
Page 4: ...4...
Page 49: ...49...
Page 52: ...52...
Page 53: ...53 20181203_rev02_sh Explosionszeichnung Exploded Drawing PHSHE 900 A1 informativ informative...
Page 54: ...C E 5 3 3 4 4 10 23 9 25 32 33 11 34 21 31 35 26 20 30 29 28 27 24 D...
Page 55: ......

