22
GB
IE
NI
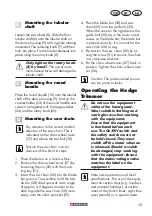
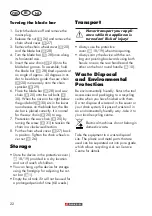
Turning the blade bar
1. Switch the device off and remove the
mains plug.
2. Release the nut (
26) and remove the
chain wheel cover (
27).
3. Remove the chain wheel cover (
20)
and the blade bar (
28).
4. Turn the blade bar (
28) once along
its horizontal axis.
5. Insert the saw chain (
20) into the
blade bar groove. To assemble, hold
the blade bar (
28) tilted upwards at
an angle of approx. 45 degrees in or-
der to be able to guide the saw chain
(
20) more easily onto the chain
sprocket (
29).
6. Place the blade bar (
28) and saw
chain (
20) onto the rail bolts (
30). When the nose on the right below
the guide bolt (
30) sits in the lower
round recess on the blade bar, the bla-
de bar is placed correctly. It is normal
for the saw chain (
20) to sag.
7. Pre-tension the saw chain (
20) by
turning the screw (
31) to tension the
chain in a clockwise direction.
8. Put the chain wheel cover (
27) back
in position. Tighten the chain wheel co-
ver nut (
26).
Storage
• Store the device in the protective cover (
A
18/19) provided in a dry location
and out of reach of children.
• You can hang up the device for storage
using the handgrip for adjusting the cut-
ter bar (
A
1).
• Empty the oil tank if it will not be used for
a prolonged period of time (6-8 weeks).
Transport
Never transport your appli-
ance while the appliance is
turned on! Risk of injury!
• Always use the protective
cover (
A
18/19) when transporting.
• Always carry the device with the cut-
ting unit pointing backwards using both
hands: one on the rear handle and the
other on the front round handle (
A
10).
Waste Disposal
and Environmental
Protection
Be environmentally friendly. Return the tool,
accessories and packaging to a recycling
centre when you have inished with them.
Do not dispose of waste oil in the sewer or
your drain system. Dispose of waste oil in
an environmentally friendly way - take it to
your local recycling centre.
Electrical machines do not belong in
domestic waste.
Take the equipment to a waste disposal
site. The plastic and metal parts that are
used can be separated out into pure grade,
which allows recycling. Ask our Service
Centre for details.
Summary of Contents for PHSHE 900 A1
Page 3: ...3 A B 1 2 3 4 5 6 6 8 8 9 9 10 11 36 38 37 12 13 14 15 16 17 17 18 20 19 7 7 2 3 4 5 21 22...
Page 4: ...4...
Page 49: ...49...
Page 52: ...52...
Page 53: ...53 20181203_rev02_sh Explosionszeichnung Exploded Drawing PHSHE 900 A1 informativ informative...
Page 54: ...C E 5 3 3 4 4 10 23 9 25 32 33 11 34 21 31 35 26 20 30 29 28 27 24 D...
Page 55: ......

