11
GB
CY
Safety instructions for
hammer
1) Safety instructions for all work
a)
Wear ear protection.
Exposure to
noise can cause hearing loss.
b)
Use additional handles if they
are supplied with the power
tool.
Loss of control can result in injuries.
c)
Ensure the power tool is well
supported before use.
This power
tool generates high torque. Not sup-
porting the power tool securely during
operation may lead to loss of control
and injury.
d)
Hold the power tool by the in-
sulated gripping surfaces when
performing work in which the
drilling tool may come into con-
tact with hidden wiring.
Contact
with a live wire can also cause a char-
ge in metal parts of the tool and result
in an electric shock.
2) Safety information for using
long drills with hammer drills
a)
Always begin drilling at a low
speed and when the drilling tool
is in contact with the workpie-
ce.
Higher speeds can cause the drill
to bend slightly when rotating freely
without contact with the workpiece and
can also cause injury.
b)
Do not apply excessive pressure
to the drill. Only apply pressure
lengthwise along the drill.
Drills
can bend and break or cause a loss in
control, thus resulting in injuries.
Residual risks
Even if properly operating and handling this
electric tool, some residual risks will remain.
Due to its construction and build, this electric
tool may present the following hazards:
a) Ear damage if working without ear
protection.
b) Damage to your health caused by
swinging your hands and arms when
operating the appliance for longer pe-
riods of time or if the unit is not held or
maintained properly.
Warning! During operation, this
electric tool generates an electro-
magnetic field which, under certain
circumstances, may impair the
functionality of active or passive
medical implants. To reduce the risk
of serious or lethal injuries, we rec-
ommend that persons with medical
implants consult their doctor and the
manufacturer of their medical im-
plant before operating the machine.
Initial start-up
Place the rotational direction switch (
7) into the central position before
carrying out any work with the elect-
rical tool (e.g. maintenance, change
of tool etc.), as well as during trans-
portation and storage. There is a risk
of injury if the on-off switch (
6) is
accidentally activated.
Checking the battery
charge level
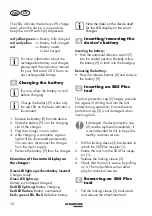
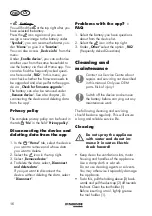
The battery’s (9) charge level is indicated
by the charge state indicator (12).
Summary of Contents for PKHAP 20-Li B2
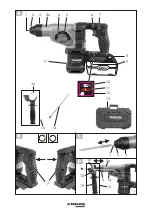
Page 3: ...28 4 mm x 28 4 19 18 14 3a 1 2 3 6 5 4 13 8 16 17 9 15 10 14 7 7 16 2 3 11 12 1 15 3 3a...
Page 78: ...78 GR CY 1 A...
Page 79: ...79 CY GR 2 3...
Page 80: ...80 GR CY 4 N...
Page 81: ...81 CY GR 5 130 C 6 1...
Page 82: ...82 GR CY 2 A O B 7...
Page 85: ...85 CY GR 4 18 14 5 18 14 5 5 4 5 4 1 5 2 1 3 5 7 1 2 7 3 7 4 7...
Page 88: ...88 GR CY Lidl Home 1 2 3 4 1 2 3...
Page 89: ...89 CY GR 3 2 1 1 13 0 C 45 C 2012 19...
Page 90: ...90 GR CY 800 25 2006 66 EG 5...
Page 91: ...91 CY GR 391005_2201 e mail...
Page 93: ...93 CY GR www grizzlytools shop Service Center 92 91110028 91110029 9 9 6 6...
Page 112: ...112...
Page 118: ...118...
Page 120: ...120...

