29
GB
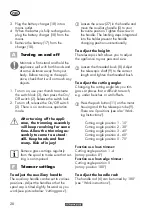
• Setting the line length manually:
Remove the battery from the device!
Lightly pull on the thread ends and
press the locking button (23) repeat-
edly if necessary until the thread ends
protrude beyond the line cutter (24).
Manner of operation
WARNING. Danger of injury!
• Do not cut moist or wet grass.
• Before starting the unit, make
sure that the spool is not touch-
ing any stones, scree, or other
foreign objects.
• Switch on the trimmer before you
approach the grass that is to be
cut.
• Do not overload the trimmer dur-
ing operation.
• Avoid contact with obstacles
(stones, walls, fences, etc.). The
nylon thread on the spool would
wear out quickly.
• Avoid using the device in bad
weather, especially if there is a
danger of lightning!
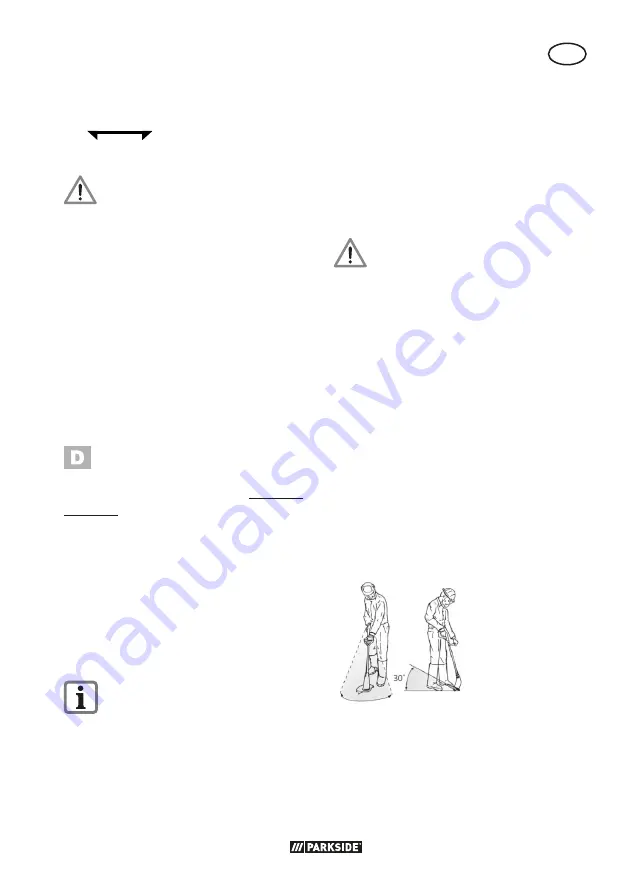
Cutting grass
Cut the grass by
swaying the trimmer
sideways to the
right and left. Cut
slowly while the
trimmer is tilted for-
wards by approx.
30°.
Cut tall grass by a series of levels from top
to bottom.
Press the latch (7) to release the
lock and rotate the handle section
0°
180°
(6) until it latches into the
desired position.
Leave the handle (6) in the
0°-position when using the
device as a lawn trimmer in
the cutting angle positions
1-4. The protective cover
must not be pointing away
from the user. Risk of injury.
To adjust the spacer bow
(fl ower guard):
The spacer bow keeps
the trimming assembly away from plants
and trunks not to be cut.
Fold down the distance bracket (16).
If the distance bracket is not required,
fold it up into the park position.
Extend the cutting line:
Your device is equipped with a dual line
auto-feed mechanism.
The line extends automatically every time
the device is switched on. For proper
functioning of the automatic line extension
mechanism, the spool must have stopped
completely before you restart the device.
If the lines are initially longer than the cut-
ting diameter, they are automatically short-
ened to the right length by the line cutter
(24).
Check the nylon line regularly for
damage and make sure the cutting
line still has the length specifi ed by
the thread cutter.
• If no line ends are visible:
Re-
place the spool (14) (see “Cleaning
and Maintenance”).
Summary of Contents for PRTA 20-Li C3
Page 119: ...119 BG X 20 V TEAM...
Page 120: ...120 BG...
Page 121: ...121 BG PARKSIDE a...
Page 122: ...122 BG Parkside X 20 V Team 1 15 10 15 2 12 10 3 12 19 4 27 5 5 5 26 4 6 27 26 7 5 27...
Page 123: ...123 BG 1 17 17a 2 17 17 17b 1 17 2 17 18 3 18 4 18 5 17 18 1 3 2 2 2 27 5...
Page 124: ...124 BG 8 9 11 9 5 1 15 2 30 3 45 4 60 5 75 1 4 0 5 180 90 180 7 6 0 180 6 0 1 4 16 24 14...
Page 125: ...125 BG 23 24 180 5 u...
Page 126: ...126 BG 14 13 1 17 2 13 20 3 14 4 22 5 13 6 21 7 20 8 23 1 24 24...
Page 127: ...127 BG 1 25 2 14 14 0 C 45 C 2012 19...
Page 129: ...129 BG 17 17 17 17 2 2 u 14 13 u 17 17...
Page 130: ...130 BG 3 II 3...
Page 131: ...131 BG IAN 419713_2204 BG 0800 12220 info kaufland bg IAN 419713_2204 20 63762 33 3 II III...
Page 141: ...141 20220915_rev02_mt...
Page 142: ...27 8 9 9 15 1 75 5 11 7 6 16 27 5 4 26 5 2 3 4...
Page 143: ......

