background image

20

GB

Noise and vibration

m

 Warning: Noise can have serious effects on your health. If 

the machine noise exceeds 85 dB (A), please wear suitable 
hearing protection.

Noise data

The noise levels have been determined in accordance with EN 
ISO 3744:1995.
Sound power level L

WA

 .............................................. 95.5 dB(A) 

Sound pressure level L

pA

 ............................................ 75.5 dB(A)

Uncertainty K

wa/pA

 .........................................................1.9 dB(A)

Vibration parameters

Vibration a

h

 .............................................................18.313 m/s² 

Uncertainty K

h

................................................................ 1.5 m/s² 

Wear hearing protection.


-

The total vibration emission values specified and the de-
vice emissions values specified have been measured in 
accordance with a standardised test procedure and can 
be used for comparison of one electric tool with another.


-

The total vibration emission values specified and the de-
vice emissions values specified can also be used for an 
initial estimation of the load. 

A warning: 


-

The vibration values and noise emission values can vary 
from the specified values during the actual use of the elec-
tric tool, depending on the type and the manner in which 
the electric tool is used, and in particular the type of work-
piece being processed. 


-

It is necessary to determine the safety measures for the pro-
tection of the operator based on an assessment of the vibra-
tion load during the actual conditions of use (In doing so, all 
parts of the operating cycle must be taken into account such 
as times in which the electric tool is switched off or times in 
which it is switched on, but is not running under a load). 

8.  Unpacking

• Open the packaging and carefully remove the device.
• Remove the packaging material, as well as the packaging 

and transport safety devices (if present).

• Check whether the scope of delivery is complete.
• Check the device and accessory parts for transport damage. 

In the event of complaints the carrier must be informed im-
mediately. Later claims will not be recognised.

• If possible, keep the packaging until the expiry of the war-

ranty period.

• Familiarise yourself with the product by means of the operat-

ing instructions before using for the first time.

• With accessories as well as wearing parts and replacement 

parts use only original parts. Replacement parts can be ob-
tained from your dealer.

• When ordering please provide our article number as well as 

type and year of manufacture for your equipment.

m

 WARNING! 

The device and the packaging material are not children‘s toys! 
Do not let children play with plastic bags, films or small parts! 
There is a danger of choking or suffocating!

9.  Before commissioning

• Before connecting the machine, make certain that the data 

on the type plate matches with the mains power data.

• Check the device for transport damage. Immediately report 

any damage to the transport company that delivered the 
compressor.

• The compressor must be installed close to the consumer.
• Long air lines and supply cables (extension cable) should 

be avoided.

• Ensure that the intake air is dry and dust-free.
• Do not deploy the compressor in damp or wet areas.
• Operate the compressor only in suitable areas (well venti-

lated, ambient tempe5°C to 40°C). There must be 
no dust, acids, vapours, explosive or flammable gases in the 
room.

• The compressor is suitable for use in dry rooms. It must not be 

used in areas where splashed water is present.

• The compressor may only be used outdoors briefly when the 

ambient conditions are dry.

• The compressor must always be kept dry and must not be left 

outdoors after work is complete.

10. Assembly and operation

m

 Attention!

Always make sure the device is fully assembled 
before commissioning!

You require the following for assembly:

2 x open-ended spanner, 13 mm (not included in the scope 
of delivery)

10.1 Installing the wheels (Fig. 5)

• Feed the wheel bolt (12) through the hole in the wheel (4).
• Screw the nut (B) onto the wheel bolt (12). Make sure that 

the wheel (4) can still be turned on the screw. 

• Feed the wheel bolt (12) through the hole in the wheel link-

age.

• Fasten the wheel (4) with the flange nut (D). If necessary, 

use an open-ended spanner (not included in the scope of 
delivery).

• Repeat the steps with the other tyre (4).

10.2 Installing the foot (Fig. 4)

• Fit the enclosed feet (6) with the 2 hexagonal bolts (A), 2 

washers (C) and 2 flange nuts (D) as shown in Fig. 4.

10.3 Mains power connection

• The compressor is equipped with a mains cable with an 

earthed plug.  This can be connected to any mains socket 
230 V~ / 50 Hz with an earth contact and that is protected 

at 16 A.

• Before commissioning, ensure that the mains voltage match-

es with the operating voltage and the machine‘s power rat-
ing on the type plate.

• Long supply lines, as well as extensions, cable drums etc. 

cause voltage drop and can prevent the motor from starting.

• In the case of temperatures below +5°C, motor starting can 

be endangered by sluggishness.

Summary of Contents for PVKO 50 B2

Page 1: ...VKO 50 B2 CH AT VERTIKALER KOMPRESSOR 50L Bedienungs und Sicherheitshinweise Originalbetriebsanleitung DE AT IAN 373215_2104 VERTICAL COMPRESSOR 50L Operating and Safety Instructions Translation of Or...

Page 2: ...ructions Page 14 Klappen Sie vor dem Lesen die Seite mit den Abbildungen aus und machen Sie sich anschlie end mit allen Funktionen des Ger tes vertraut DE AT CH Before reading unfold the page containi...

Page 3: ...1 5 6 4 3 7 2 1 3 2 8 10 9 11 2 1 7 5...

Page 4: ...5 4 A C 6 D A C 6 D 12 4 B D 6 7 7 7 1 7 3 7 2...

Page 5: ...kstoff Ma stab Roh Gew Blatt EDV Nr 01 09 2021 Administrator 1 A3 G nzburger Str 69 89335 Ichenhausen Fabrikation von Holzbearbeitungsmaschinen GmbH Prof Nr Rohteil Nr Fert Nr Fert Gew DIN Oberfl Berm...

Page 6: ...inweise f r Elektrowerkzeuge 4 7 Technische Daten 7 8 Auspacken 8 9 Vor Inbetriebnahme 8 10 Aufbau und Bedienung 8 11 Verwendung Zubeh r Lieferumfang Abb 7 9 12 Elektrischer Anschluss 10 13 Reinigung...

Page 7: ...ei en Oberfl chen DE AT CH Warnung vor elektrischer Spannung DE AT CH Warnung Kompressor kann ohne Warnung anlaufen DE AT CH Setzen Sie die Maschine nicht dem Regen aus Das Ger t darf nur unter trocke...

Page 8: ...die damit verbundenen Ge fahren unterrichtet sind Das geforderte Mindestalter ist einzuhalten Neben den in dieser Bedienungsanleitung enthaltenen Sicher heitshinweisen und den besonderen Vorschriften...

Page 9: ...erh ht das Risiko eines elektrischen Schlages d Zweckentfremden Sie die Anschlussleitung nicht um das Elektrowerkzeug zu tragen auf zuh ngen oder um den Stecker aus der Steck dose zu ziehen Halten Sie...

Page 10: ...ele Unf lle haben ihre Ursache in schlecht gewarteten Elektrowerkzeugen f Halten Sie Schneidwerkzeuge scharf und sau ber Sorgf ltig gepflegte Schneidwerkzeuge mit scharfen Schneidkanten verklemmen sic...

Page 11: ...nnen Halten Sie beim L sen der Schlauchkupplung das Kupp lungsst ck des Schlauches mit der Hand fest So vermeiden Sie Verletzungen durch den zur ckschnellenden Schlauch Bei Arbeiten mit der Ausblaspis...

Page 12: ...bstaste nicht gedr ckt werden Verwenden Sie das Werk zeug das in dieser Bedienungsanleitung empfohlen wird So erreichen Sie dass Ihre Maschine optimale Leistungen erbringt Halten Sie Ihre H nde vom Ar...

Page 13: ...ht im Freien verbleiben 10 Aufbau und Bedienung m Achtung Vor der Inbetriebnahme das Ger t unbedingt kom plett montieren Zur Montage ben tigen Sie 2 x Gabelschl ssel 13 mm nicht im Lieferumfang enthal...

Page 14: ...Verwendung Das Druckluft Reifenf llmessger t 14 erf llt drei Funktionen Druck messen Auff llen von Druckluft Ablassen von Druckluft Druck messen Setzen Sie die Ventilsteckverbindung 14 2 auf das Reife...

Page 15: ...nde Daten angeben Stromart des Motors Daten des Maschinen Typenschildes Daten des Motor Typenschildes 13 Reinigung Wartung und Lagerung und Ersatzteilbestellung m Achtung Ziehen Sie vor allen Reinigun...

Page 16: ...w folgende Teile als Verbrauchsmaterialien ben tigt werden Verschlei teile Kupplung nicht zwingend im Lieferumfang enthalten 14 Entsorgung und Wiederverwertung Das Ger t befindet sich in einer Verpack...

Page 17: ...g beseitigen Kompressor l uft jedoch kein Druck R ckschlagventil undicht R ckschlagventil austauschen Dichtungen kaputt Dichtungen berpr fen kaputte Dich tungen bei einer Fachwerkstatt ersetzen lassen...

Page 18: ...eits Eingriffe vorgenommen wurden Die Garantiezeit betr gt 3 Jahre und beginnt mit dem Kaufdatum des Ger tes Garantieanspr che sind vor Ablauf der Garantiezeit innerhalb von zwei Wochen nachdem Sie de...

Page 19: ...y warnings 17 7 Technical data 19 8 Unpacking 20 9 Before commissioning 20 10 Assembly and operation 20 11 Using the accessories included in the scope of delivery Fig 7 21 12 Electrical connection 22...

Page 20: ...ng GB Warning Hot surfaces GB Warning against electrical voltage GB Warning Compressor can start up without warning GB Do not expose the machine to rain The device may only be stationed stored and ope...

Page 21: ...ho have been instructed with respect to the associated hazards The required minimum age must be observed In addition to the safety instructions in this operating manual and the separate regulations of...

Page 22: ...idual current circuit breaker with a trigger current of 30 mA or less to protect the power supply Using a fault current circuit breaker reduces the risk of an electric shock Personal safety a Stay ale...

Page 23: ...lectric tool Check whether the moving parts function faultlessly and do not jam or whether parts are damaged All parts must be correctly mounted and all conditions must be fulfilled to ensure fault fr...

Page 24: ...ompressor so that it cannot come into direct contact with the working medium Operation of pressure vessels Anyone who operates a pressure vessel must keep this in good working order operate and monito...

Page 25: ...equipment m WARNING The device and the packaging material are not children s toys Do not let children play with plastic bags films or small parts There is a danger of choking or suffocating 9 Before c...

Page 26: ...mpressed air tyre inflation meter 14 Note The compressed air required to fill a tire must be oil free No oiler may be connected in front of the device It is better to use your own compressed air hose...

Page 27: ...ion H05VV F The printing of the type designation on the connection cable is mandatory Safety instructions for the replacement of dam aged or defective power supply cables Type X If the power cord of t...

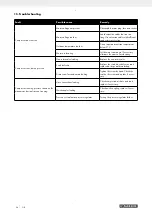
Page 28: ...ordering spare parts Device type Device article number 13 7 Service information With this product it is necessary to note that the following parts are subject to natural or usage related wear or that...

Page 29: ...use of overheating Compressor runs but no pressure Non return valve leaking Replace the non return valve Seals defective Replace the seals have defective seals replaced at a specialist workshop Drain...

Page 30: ...e device The guarantee is rendered null and void if any attempt is made to tamper with the device The guarantee is valid for a period of 3 years starting from the purchase date of the device Guarantee...

Page 31: ...explosi n 17 Vista explodida 17 Eksplosionstegning 17 Pove ani crte 17 Znak eksplozije 17 Vedere explodat 17 17 R j ytyskuva 17 Explosionsm rkning 17 Rysunek eksplozji 17 Perspektyvinis br inys 17 Pl...

Page 32: ...27...

Page 33: ...robok HR ovime izjavljuje da postoji sukladnost prema EU smjernica i normama za sljedece artikle RS potvr uje slede u uskla enost prema smernicama EZ i normama za artikal RO declar urm toarea conform...

Page 34: ......

Page 35: ......

Page 36: ...FABRIKATION VON HOLZBEARBEITUNGSMASCHINEN GMBH G nzburger Str 69 D 89335 Ichenhausen Stand der Informationen Last Information Update Update 09 2021 Ident No 373215_2104_3906131974 1 FSC C164682 IAN 37...

Reviews: