19
GB/IE/NI
Attaching and removing
sanding paper
(Fig . J)
Attaching:
Align the holes on the sanding
paper
[
33]
with the holes on the sanding
pad
[
2]
. The holes allow the dust to be
extracted from the sanding guard
[
1]
.
Press the sanding paper against the sanding
pad . The sanding paper is held in position by
the hook-and-loop fastener .
Removing:
Peel off the edge of the sanding
paper
[
33]
. Pull the sanding paper off the
sanding pad
[
2]
.
Function of the brush edge
(Fig . J)
The brush edge
[
7]
protrudes beyond the
sanding pad
[
2]
. The brush edge is the first
part to touch the surface to be sanded . This
allows the sanding pad to be positioned in
parallel to the surface before the sanding
paper
[
33]
touches the surface . This prevents
the formation of sickle-shaped recesses
caused by the edge of the rotating sanding
paper .
The brush edge
[
7]
prevents excessive sand
dust escaping from the sanding guard
[
1]
.
Before each use:
Check the brush
edge
[
7]
for damages . If the brush edge is
damaged or worn out, have it replaced by a
qualified person .
Operation
Connecting to power supply
NOTES
u
Before you connect the product to the
power supply, make sure that the data on
the rating plate are identical to the power
supply data .
u
Avoid long supply lines (extension cables) .
u
Do not operate the product in a damp or
wet room .
u
The product may only be operated in
suitable rooms (well ventilated) .
Connect the power plug
[
15]
to a socket-outlet .
The product is now ready for use .
Switching on and off
(Fig . K)
Switching on:
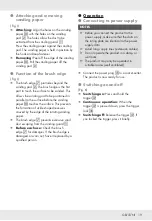
Press and hold the
trigger
[
19]
.
Continuous operation:
When the
trigger
[
19]
is pressed down, press the trigger
lock
[
18]
.
Switching off:
Release the trigger
[
19]
. If
you locked the trigger, press it briefly .
Summary of Contents for PWDS 920 B2
Page 3: ...A B 1 2 12 3 4 6 11 5 9 10 13 14 15 8 7 C 13 11 Max D 21 22 14 20 E 14 24 29 28 26 20 23...
Page 5: ...J 1 2 33 7 K 17 16 18 19 L 4 3 1 1 M 12 N 30 30 5 0 30 90 5...
Page 6: ...P Q 180 R 31 37 2 37 38 40 39 S 32 34 6...
Page 28: ...26 GB IE NI EC declaration of conformity...
Page 50: ...48 FR BE D claration de conformit CE...
Page 72: ...70 NL BE EG verklaring van overeenstemming...


