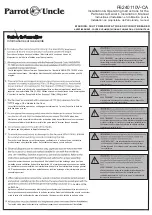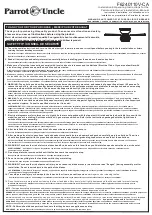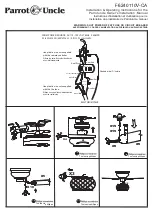
Installation & Operating Instructions for the
Parrotuncle Owner's Installation ,Manual
WARNING: SHUT POWER OFF AT FUSE OR CIRCUIT BREAKER
Instructions d'installation et d'utilisation pour le
Installation du propriétaire de Parrotuncle, manuel
AVERTISSEMENT : COUPER L'ALIMENTATION AU FUSIBLE OU AU DISJONCTEUR
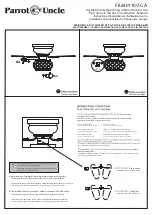
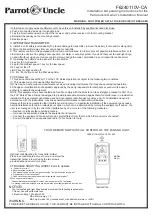
AFTER INSTALLATION APRÈS L'INSTALLATION
/
WOBBLE”
/
OSCILLER"
The fan blades have been adjusted in the factory to minimize any wobble
Les pales du ventilateur ont été ajustées en usine pour minimiser toute oscillation
NOTE:CEILING FANS TEND TO MOVE DURING OPERATION DUE TO THE FACT THAT THEY
OUNTED N A RUBBER
CROMMET. IF THE FAN WAS MOUNTED RIGIDLY TO THE
AUSE EXCESS
IBRATION. MOVEMENT OF A
FEW CENTIMENTERS IS QUITE ACCEPTABLE AND OES NOT SUGGEST ANY PROBLEM
ARE
M
CEILING, IT WOULD C
D
REMARQUE : LES VENTILATEURS DE PLAFOND ONT TENDANCE À BOUGER PENDANT LEUR FONCTIONNEMENT PARCE QU'ILS SONT
CROMMET EN CAOUTCHOUC. SI LE VENTILATEUR ÉTAIT MONTÉ DE MANIÈRE RIGIDE AU PLAFOND, CELA
UN MOUVEMENT DE QUELQUES CENTIMÈTRES EST TOUT À FAIT ACCEPTABLE ET NE SUGGÈRE AUCUN PROBLÈME.
O
V
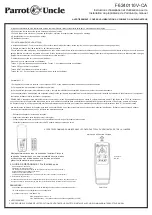
TO REDUCE THE FAN WOBBLE: PLEASE CHECK THAT ALL SCREWS WHICH SECURED THE MOUNTING
BALANCING A WOBBLING CEILING FAN:
BRACKET AND DOWNROD ARE SECURE.
POUR RÉDUIRE L'OSCILLATION DU VENTILATEUR : VEUILLEZ VÉRIFIER QUE TOUTES LES VIS QUI ONT FIXÉ LE SUPPORT DE MONTAGE ET LA TIGE DESCENDANTE SONT BIEN FIXÉES.
ÉQUILIBRER UN VENTILATEUR DE PLAFOND QUI OSCILLE :
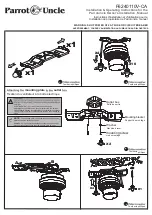
For your convenience, a Balancing Kit is included; please follow this procedure when balancing the fan:
Pour votre commodité, un kit d'équilibrage est inclus ; veuillez suivre cette procédure lors de l'équilibrage du ventilateury :
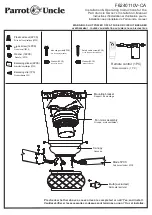
1.Check that all blade and blade arm screws are secure.
Vérifiez que toutes les vis de la lame et du bras de la lame sont bien fixées.
2.Most fan wobbling problems are caused when blade levels are unequal. Check this level
by selecting a point on the ceiling above the tip of on of the blades. Measure this
distance.Rotate the fan until the next blade s positioned for measurement. Repeat for
each blade. The distance eviation should be equal within
e
i
d
1/8"(0.32cm).
La plupart des problèmes d'oscillation du ventilateur sont causés lorsque les niveaux de lame sont inégaux. Vérifiez ce niveau en
en sélectionnant un point au plafond au-dessus de la pointe de l'un des lames. Mesurez cette distance. Faites tourner le ventilateur
la mesure. Répétez l'opération pour chaque lame. L'écart de distance doit être égal dans
1/8 "(0,32 cm).
jusqu'à ce que la pale suivante soit positionnée pour
3 .
Utilisez le kit d'équilibrage de la lame fourni si l'oscillation de la lame est toujours perceptible.
4.If the blade wobble is still noticeable, interchanging two adjacent (side by side) blades can redistribute
the weight and possibly result in smoother operation.
ERSONAL INJURY, DO NOT BEND THE BLADE ARM WHILE
THE BLADES, OR CLEANING THE FAN. DO NOT INSERT FOREIGN OBJECTS BETWEEN ROTATING FAN BLADES.
MONTÉS SUR UN
PROVOQUERAIT DES VIBRATIONS EXCESSIVES.
Use the enclosed Blade Balancing Kit if the blade wobble is still noticeable.
WARNING: TO REDUCE THE RISK OF P
Si l'oscillation de la lame est toujours perceptible, interchangez deux les lames adjacentes (côte à côte) peuvent redistribuer le poids et
opération.
AVERTISSEMENT : POUR RÉDUIRE LE RISQUE DE BLESSURE, NE PAS PLIER LE BRAS DE LA PALE LORS DE L' INSTALLATION
éventuellement entraîner une
INSTALLING,
ÉTRANGERS ENTRE LES
PALES OU DU NETTOYAGE DU VENTILATEUR. NE PAS PAS INSÉRER DE CORPS
DU VENTILATEUR EN ROTATION.
PALES
DE L'ÉQUILIBRAGE DES
NOISE
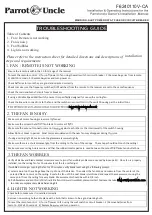
When it is quiet(especially at night) you may hear occasional small noises. This is normal. Please allow
“breaking-in” period, most noises associated with a new fan disappear during the time.
BRUIT
Lorsqu'il est calme (surtout la nuit), vous pouvez entendre de petits bruits occasionnels. Ceci est normal. Veuillez prévoir une
la plupart des bruits associés à un nouveau ventilateur disparaissent pendant cette période.
/
période de "rodage" de 24 heures
CARE AND CLEANING
1.Periodic cleaning of your ceiling fan is the only maintenance required. Use a soft brush or lint free cloth to avoid
scratching the pain
t fi
nish. Please make sure to turn o electricity power before you clean your fan
2.Do not use water when cleaning your ceiling fan. It could damage the motor or the blades and create
the possibility of an electrical shock.
3.Motor has permanently lubricated ball bearing. No need to oil
NOTE: MAKE SURE THE POWER IS OFF AT THE ELECTRICAL PANEL BOX BEFORE YOU ATTEMPT
ANY CLEANING OR REPAIRS.
ff
E
G
A
Y
O
T
T
E
N
T
E
N
E
I
T
E
R
T
N
E
/
BALANCING
a 24-hour
x
u
e
h
c
u
l
e
p
n
o
n
n
o
ff
i
h
c
n
u
u
o
e
c
u
o
d
e
s
s
o
r
b
e
n
u
z
e
s
il
it
U
.
s
i
u
q
e
r
n
e
it
e
r
t
n
e
l
u
e
s
e
l
t
s
e
d
n
o
f
a
l
p
e
d
r
u
e
t
a
li
t
n
e
v
e
r
t
o
v
e
d
e
u
q
i
d
o
ir
é
p
e
g
a
y
o
tt
e
n
e
L
e
r
t
o
v
r
e
y
o
tt
e
n
e
d
t
n
a
v
a
e
u
q
ir
t
c
e
l
é
n
o
it
a
t
n
e
m
il
a
'l
r
e
p
u
o
c
e
d
s
u
o
v
-
z
e
r
u
s
s
A
.
e
r
u
t
n
i
e
p
a
l
e
d
i
n
if
e
l
r
e
y
a
r
e
d
r
e
ti
v
é
r
u
o
p
ventilateur
.
a
l
r
e
é
r
c
t
e
s
e
m
a
l
s
e
l
u
o
r
u
e
t
o
m
e
l
r
e
g
a
m
m
o
d
n
e
t
i
a
r
r
u
o
p
a
l
e
C
.
d
n
o
f
a
l
p
e
d
r
u
e
t
a
li
t
n
e
v
e
r
t
o
v
r
e
y
o
tt
e
n
r
u
o
p
u
a
e
'
d
s
a
p
z
e
s
il
it
u
'
N
.
e
u
q
ir
t
c
e
l
é
c
o
h
c
n
u
'
d
é
ti
li
b
i
s
s
o
p
.
e
li
u
h
'
d
n
i
o
s
e
b
s
a
P
.
e
c
n
e
n
a
m
r
e
p
n
e
é
if
ir
b
u
l
s
e
ll
i
b
à
t
n
e
m
e
l
u
o
r
n
u
a
r
u
e
t
o
m
e
L
.
E
U
Q
I
R
T
C
E
L
É
U
A
E
N
N
A
P
U
D
R
E
I
T
Î
O
B
U
A
E
É
P
U
O
C
T
S
E
N
O
I
T
A
T
N
E
M
I
L
A
'
L
E
U
Q
S
U
O
V
-
Z
E
R
U
S
S
A
:
E
U
Q
R
A
M
E
R
AVANT
.
N
O
I
T
A
R
A
P
É
R
U
O
E
G
A
Y
O
T
T
E
N
T
U
O
T
R
E
Y
A
S
S
E
'
D
Toucher
au Plafond
/
F6240110V-CA


