background image

WARNING: SHUT POWER OFF AT FUSE OR CIRCUIT BREAKER

F8279110V

Installation & Operating Instructions for the

Parrot Uncle Owner's Installation, Manual

12

13

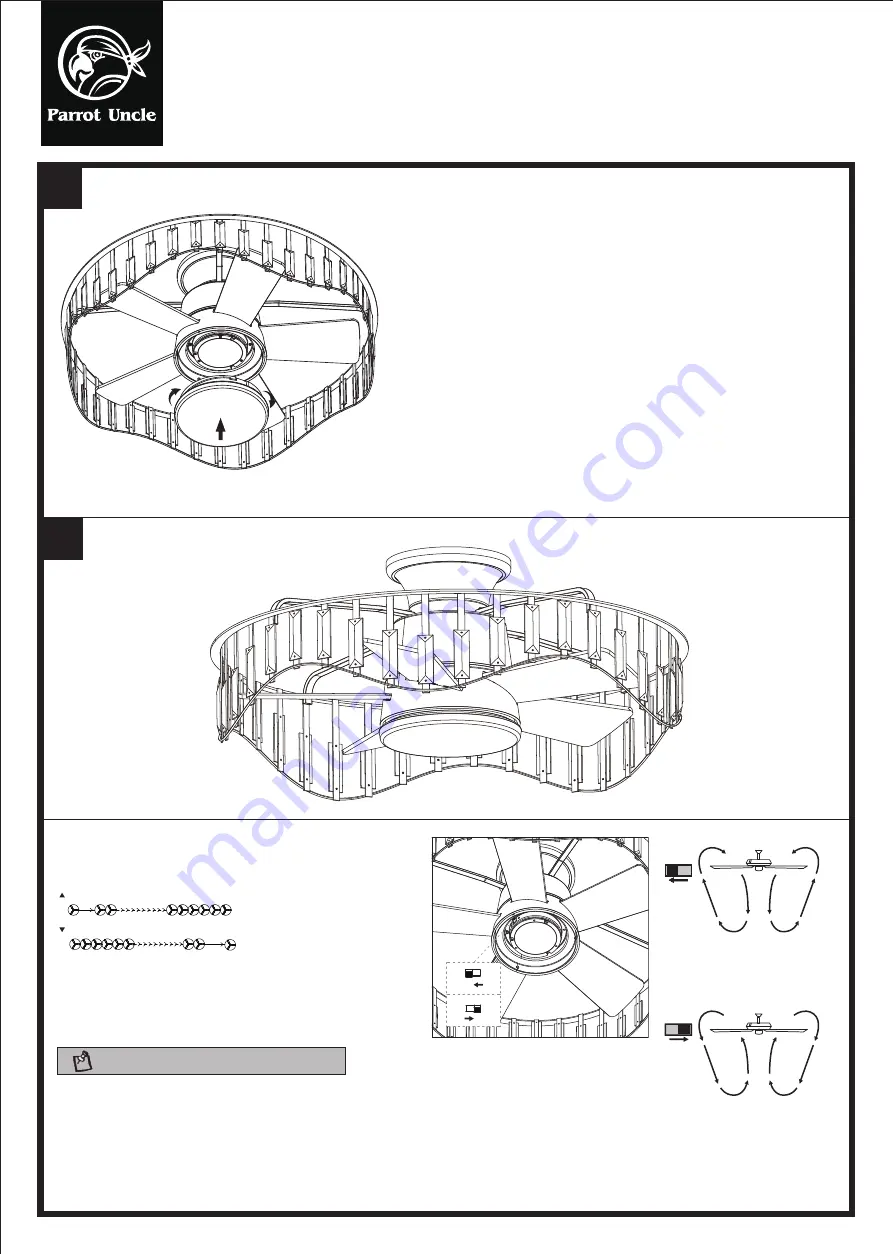
NOT: Wait for the fan to stop before  reversing the 
direction of the blade rotation

A. warm weather-(Forward) A Downward airflow creates 

     a cooling effect.

     This allows you to set your air conditioner on a higher 

     setting without affecting your comfort.

B. Cool weather-(Reverse) An upward airflow moves warm 

     air off the ceiling area. This allows you to set heating 

    unit on a lower setting without affecting your comfort.

OPERATING YOUR FAN

The appropriate speed settings for warm or cool weather 

depends on factors such as the room size, ceiling height, 

and number of fans.

The slide switch controls the directionof the blades: forward

(switch left) or reverse (switch right).

Turn on the power and check the operation of the fan.

Fan Speed:

“  ”Turn on the fan and turn speed up.

“  ”Turn on the fan and turn speed down.

A.Warm Weather

(SUMMER TIME)

B.Cool Weather

(WINTER TIME)

Whole structure

Secure the shade to switch housing by twisting in a
clockwise direction. Twist the shade gradually until 
it snaps on to the switch housing. Do not over-tighten.

Summary of Contents for F8279110V

Page 1: ...www parrotuncle com English Francais Espanol F8279110V...

Page 2: ...n 2 All wiring must be in accordance with the National Electrical Code NASI NFPA70 1999 and local electrical codes Electrical installation should be performed by a qualified licensed electrician 3 The...

Page 3: ...rot Uncle Owner s Installation Manual Pls check whether above accessories are completed or not Yes and install x6 REMOTE CONTROL 1PC Blade screw 16PCS Washer 2PCS Plastic wire nut 4PCS Screws 2PCS Mou...

Page 4: ...structural ceiling member and can support the full weight of the fan Once verified install ceiling plate to the outlet box using the screws and washers provided DANGER A loose outlet box can cause th...

Page 5: ...the black leads towards the other side the connection should be turned upward and carefully push leads into the outlet box The wires should be spread apart with the grounded conductor and the equipmen...

Page 6: ...fan by sliding the motor assembly over the mounting bracket with the two loosened screws going into the L slots in the ceiling bracket Be sure all wiring is tucked into the motor housing and is not p...

Page 7: ...ting tabs seat into the dimpled grooves in the ceiling bracket midway between the screws Slide blades through slots in motor housing and attach to the motor hub using the screws Make sure the screws s...

Page 8: ...ing to the support bracket using the two key slots in the switch housing Replace the previously removed screw and securely tighten all three screws Remove the three screws in the switch housing Retain...

Page 9: ...you to set heating unit on a lower setting without affecting your comfort OPERATING YOUR FAN The appropriate speed settings for warm or cool weather depends on factors such as the room size ceiling h...

Page 10: ...WARNING SHUT POWER OFF AT FUSE OR CIRCUIT BREAKER F8279110V Installation Operating Instructions for the Parrot Uncle Owner s Installation Manual...

Page 11: ...ce if damaged Receiver can be controlled by any angles of the emitter in prescriptive space unrestricted by direction With the memory function the controller can save the status light and direction wh...

Page 12: ...WARNING SHUT POWER OFF AT FUSE OR CIRCUIT BREAKER F8279110V Installation Operating Instructions for the Parrot Uncle Owner s Installation Manual SIZE OF PRODUCT 7 09 2 87 11 14 27 2 24...

Page 13: ...motor housing screws are tight Make sure the screws that attach fan blade to motor are tight Make sure the wire nut connectors are not rattling against each other or the interior wall of the switch h...

Page 14: ...blade The distance deviation should be equal within 1 8 0 32cm 3 If the blade wobble is still noticeable Interchanging two adjacent side by side blades can redistribute the weight and possibly result...

Page 15: ...120Vac 25W 18W...

Page 16: ......

Page 17: ......

Page 18: ......

Page 19: ......

Page 20: ......

Page 21: ...Conecte los cables del motor a los cables del kit de luces mediante el conector molex de 9 patillas Vuelva a colocar los tornillos retirados del paso 10 y asegure los tres tornillos...

Page 22: ......

Page 23: ......

Page 24: ......

Page 25: ......

Page 26: ......

Page 27: ......

Page 28: ......

Page 29: ......

Page 30: ......

Page 31: ......

Page 32: ......

Page 33: ......

Page 34: ...Connectez les fils du moteur aux fils du kit d clairage en utilisant la fiche molex 9 broches Replacez les vis retir es l tape 10 et fixez les trois vis...

Page 35: ......

Page 36: ......

Page 37: ......

Page 38: ......

Page 39: ......

Page 40: ......

Page 41: ......

Reviews: