background image

10    

 Flying

Navigation

Navigation  depends  on  the  settings  for  the  selected  control  mode:  

Controller

,

Normal

 or 

Expert

Normal

 mode  is  selected  by default. To  change  the  control

mode, see the Control Settingssection.

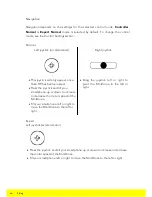
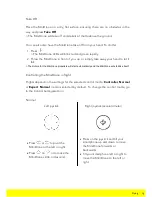
Normal

Left joystick (accelerometer)

Right joystick

·

This joystick will only appear once
Take Off has been pressed.

·

Press the joystick and tilt your
smartphone up or down to increase
or decrease the motor speed of the
MiniDrone.

·

Tilt your smartphone left or right to
move the MiniDrone to the left or
right.

·

Drag  the  joystick  left  or  right  to
pivot  the  MiniDrone  to  the  left  or
right.

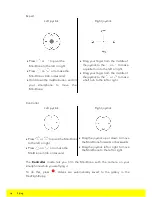
Expert
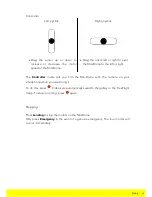
Left joystick (accelerometer)

·

Press the joystick and tilt your smartphone up or down to increase or decrease
the motor speed of the MiniDrone.

·

Tilt your smartphone left or right to move the MiniDrone to the left or right.

Summary of Contents for NEWZ

Page 1: ...User Guide Hydrofoil Drone NEWZ ORAK ...

Page 2: ...ing the MiniDrone 16 Battery 16 Photos 16 Retrieving or deleting photos 17 Videos 18 Settings 18 Max Altitude 18 Max Tilt 18 Left handed mode 18 Control Settings 19 Automatic Recording 19 Max Vertical Speed 19 Max Rotation Speed 19 Accessory 19 Short Circuit 19 Charge Settings 20 Network Name 20 Versions 21 Academy Drone 23 Updates 24 General Information 24 Precautions for use and maintenance 24 A...

Page 3: ... 26 Declaration of Conformity 26 Registered trademarks 27 Notice regarding the right to privacy ...

Page 4: ...t the MiniDrone support into the slot on the central spindle diagram B 4 Screw the central spindle onto the hull with 4 screws diagram C 5 Insert the two lateral floats into the ends of the arm 6 Insert then screw the two lateral fins into the floats with 2 screws diagram D 7 Insert then screw the tail fin into the slot located at the rear of the hull with 1 screw diagram E In order to avoid any r...

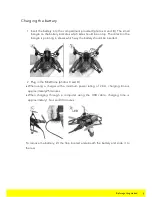
Page 5: ...iangle is pointing in shows which way the battery should be inserted 2 Plug in the MiniDrone photos C and D When using a charger with a minimum power rating of 2 4 A charging time is approximately 25 minutes When charging through a computer using the USB cable charging time is approximately 1 hour and 30 minutes To remove the battery lift the flap located underneath the battery and slide it to the...

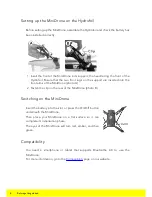
Page 6: ...ted into the front arms of the MiniDrone photo A 2 Fasten the clip on the rear of the MiniDrone photo B Switching on the MiniDrone Insert the battery into the slot or press the On Off button underneath the MiniDrone Then place your MiniDrone on a flat surface so it can complete its initialisation phase The eyes of the MiniDrone will turn red amber and then green Compatibility You need a smartphone...

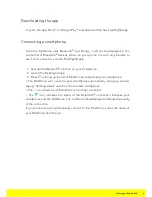
Page 7: ...tion on your smartphone 2 Launch the FreeFlight3 app 3 Press to bring up the list of MiniDrones located near your smartphone The MiniDrone will connect to your smartphone automatically A pop up window saying Sending status and then Connected will appear The icon shows which MiniDrone is currently connected The icon indicates the status of the Bluetooth connection between your smartphone and the Mi...

Page 8: ... the MiniDrone in Controller mode Controller mode lets you film your MiniDrone with your smartphone while you are flying it For more information on control modes see the Controlling the MiniDrone in flight section The control screen will appear A pop up will ask you to choose the control mode for your MiniDrone the MiniDrone with hulls the MiniDrone without hulls ...

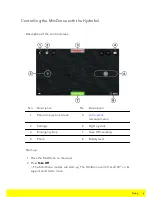
Page 9: ...ption 1 Return to previous screen 5 Left joystick accelerometer 2 Settings 6 Right joystick 3 Emergency stop 7 Take Off Landing 4 Photo 8 Battery level Start up 1 Place the MiniDrone on the water 2 Press Take Off The MiniDrone motors will start up The MiniDrone will lift itself 90 on its support and start to move ...

Page 10: ...as been pressed Press the joystick and tilt your smartphone up or down to increase or decrease the motor speed of the MiniDrone Tilt your smartphone left or right to move the MiniDrone to the left or right Drag the joystick left or right to pivot the MiniDrone to the left or right Expert Left joystick accelerometer Press the joystick and tilt your smartphone up or down to increase or decrease the ...

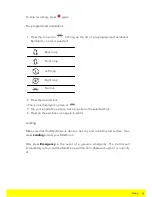
Page 11: ...left or right The Controller mode lets you film the MiniDrone with the camera on your smartphone while you are driving it To do this press Videos are automatically saved to the gallery in the FreeFlight 3 app To stop recording press again Stopping Press Landing to stop the motors on the MiniDrone Only press Emergency in the event of a genuine emergency The four motors will cut out immediately ...

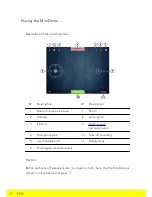
Page 12: ...screen 7 Photo 2 Settings 8 Left joystick 3 Flat trim 9 Right joystick accelerometer 4 Emergency stop 10 Take off Landing 5 Launched take off 11 Battery level 6 Pre programmed aerobatics Flat trim Before each take off especially after an impact or fall check that the MiniDrone is placed on a flat surface and press ...

Page 13: ...one propellers will start automatically and the MiniDrone will stabilise itself Controlling the MiniDrone in flight Flights depend on the settings for the selected control mode Controller Normal or Expert Normal mode is selected by default To change the control mode go to the Control Settingssection Normal Left joystick Right joystick accelerometer Press or to pivot the MiniDrone to the left or ri...

Page 14: ...iddle of the joystick to the or to make a half turn to the left or right Controller Left joystick Right joystick Press or to pivot the MiniDrone to the left or right Press on or to make the MiniDrone climb or descend Drag the joystick up or down to move the MiniDrone forwards or backwards Drag the joystick left or right to move the MiniDrone to the left or right The Controller mode lets you film t...

Page 15: ...ed trick The icon is displayed in place of 3 Tap your smartphone screen twice to perform the selected trick 4 Press on the aerobatic icon again to edit it Landing Make sure that the MiniDrone is above a flat dry and unobstructed surface then press Landing to land your MiniDrone Only press Emergency in the event of a genuine emergency The motors will immediately cut out and the MiniDrone will fall ...

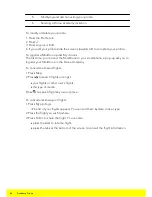
Page 16: ...ear telling you it is no longer possible to take photos Retrieving or deleting photos To retrieve or delete photos your smartphone must be connected to the MiniDrone 1 Bring up the context menu To do this If the control screen is open press then If the main screen is open press 2 Press Internal Memory The list of stored photos in the MiniDrone memory will appear 3 Select one or more files 4 Press ...

Page 17: ...ormation go to the Control Settingssection To record a video press The icon will flash during recording Frame your MiniDrone with your smartphone To stop recording press The icon will change to The videos will be automatically saved in the FreeFlight3 gallery and in your phone s memory To open the gallery 1 Open the FreeFlight3 home screen 2 Press then Gallery ...

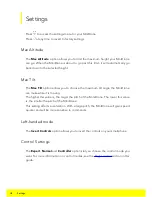
Page 18: ...m tilt angle the MiniDrone can make while it is moving The higher this value is the larger the pitch of the MiniDrone The lower this value is the smaller the pitch of the MiniDrone This setting affects acceleration With a large pitch the MiniDrone will gain speed quicker and will be more sensitive to commands Left handed mode The Invert Controls option allows you to invert the controls on your sma...

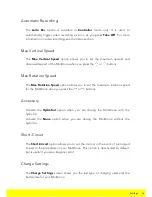
Page 19: ...Speed option allows you to set the maximum rotation speed for the MiniDrone when you press the or buttons Accessory Activate the Hydrofoil option when you are driving the MiniDrone with the hydrofoil Activate the None option when you are driving the MiniDrone without the hydrofoil Short Circuit The Short Circuit option allows you to cut the motors in the event of prolonged impact to the propellers...

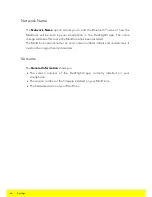
Page 20: ...e effect once the MiniDrone has been restarted The MiniDrone network name can only contain numbers letters and underscores It must not be longer than 32 characters Versions The General Information shows you The version number of the FreeFlight3 app currently installed on your smartphone The version number of the firmware installed on your MiniDrone The hardware version of your MiniDrone ...

Page 21: ...y A profile is necessary to access the Drone Academy To create a profile 1 Press Sign upnow 2 Type a user name a password and an e mail address 3 Press Register your profile The Drone Academy main screen appears N Description 1 Accessing the FreeFlight3 application home screen 2 Visualizing the map of the flights 3 Accessing your list of drones 4 Accessing your list of flights ...

Page 22: ...hone a pop up ask you to register your MiniDrone in the Drone Academy To consult the shared flights 1 Press Map 2 Press to search flights amongst your flights or other user s flights the type of media Press to search flights by user or place To consult and share your flights 1 Press My pilotings The list of your flights appears You can sort them by date rank or type 2 Press the flight you wish to ...

Page 23: ...MiniDrone There are two ways to update your MiniDrone Via USB by downloading the update file from our website This method requires a computer Check that the MiniDrone battery is installed and fully charged before carrying out updates via USB link Via the FreeFlight3 app by pressing Updates ...

Page 24: ...omponents are fragile and should be handled with care Only use the MiniDrone on fresh water If sand sea salt seaweed or any other biological matter gets into the MiniDrone irreversible damage may be caused and it will no longer function properly Do not use the MiniDrone in adverse weather conditions rain strong winds snow or when visibility is poor at night Ensure you keep the MiniDrone within a r...

Page 25: ...arranty For the warranty conditions please refer to the retailer s General Conditions of Sale where you purchased your MiniDrone Modifications The explanations and specifications in this guide are given for information purposes only and may be modified without prior notice They are deemed to be correct at time of going to press The utmost care has been taken when writing this guide as part of the ...

Page 26: ...sponsibility that the product described in this user guide complies with EN 301489 17 EN300328 EN71 1 EN71 2 EN62115 technical standards following the provision of the Radio Equipment Telecommunication Equipment directive 1999 5 EC R TTE and of the General Safety directive 2001 95 EC The Declaration of Conformity is available on our website www parrot com fr ce airborne cargo drone Registered trad...

Page 27: ... their consent could constitute a violation of their privacy for which you may be held liable Ask for permission before filming individuals particularly if you want to keep your recordings and or share them online Do not distribute any degrading images or those that could undermine an individual s reputation or dignity ...

Reviews: