PAR POS Installation Manual for TACO DEL MAR
Page
8
Note:
On Station 1 you will see a black or yellow Pixel License key.
Ensure this key is securely connected to the USB port. This
looks like a USB thumb drive. See Figure 7.
Also, on Station 1 only you will see the F7552 Zoom modem,
if
your store ordered it
,
and gray telephone cable. We will set
these up later.
Figure 7: Pixel Key Inserted, Pixel Key with Tape, Pixel Key Alone
3.
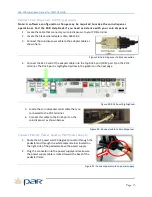
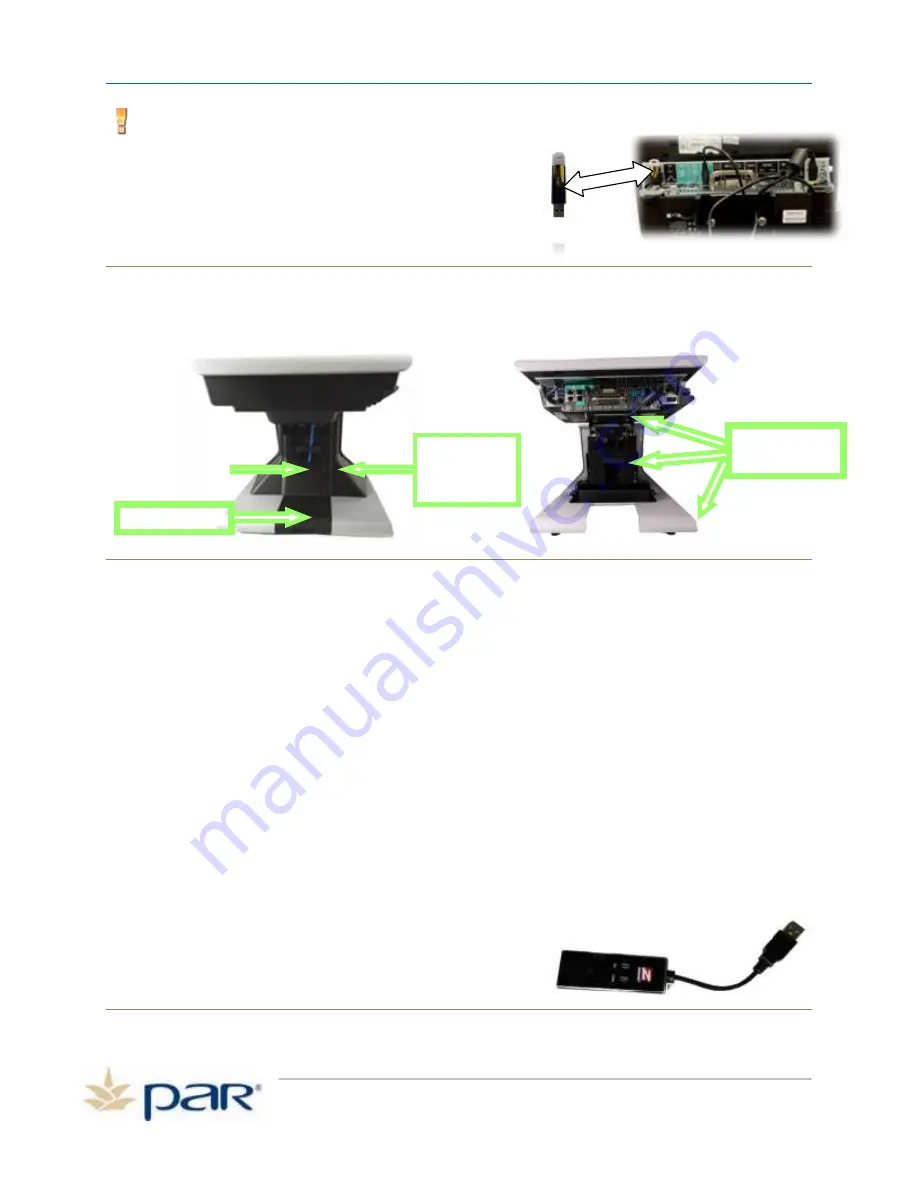
Loosen the two thumb screws on the pedestal cover and slide out toward the front of the
register.
Figure 8: Loosen two thumb screws
4.
Lift the cut out at the base and by lifting upward and pulling forward. This will allow easy access
when routing the peripheral cables.
5.
Unclip the retaining clamps to access cables. Your ES7700 POS terminal has cable retainers
located in the pedestal and on the bottom of the pedestal for securing your cables in place to
keep them neat and organized and prevent unintentional disconnection. A cable retainer is
located in the middle of the pedestal, a second cable retainer has been added under the top
cover and three more are located in the base of the unit.
Now you have complete access to the connection ports on the POS terminal.
Set Up K7552 Zoom Modem
–
Optional
If the store ordered the optional K7552 Zoom modem, this will be set up now. The Zoom Modem
provides connection to the Internet via Dial-Up connection. If your store uses a high-speed (Broadband)
Internet connection, the Zoom modem acts as a back-up if the high-speed connection fails.
1.
Peel the backing off of the Velcro material on the K7552 Zoom modem (optional) and apply the
modem to the bottom of the top cover as shown on
the following page.
Figure 9: K7552 Zoom Modem (Optional)
Loosen thumb
screws and pull
panel forward
Lift out cutout
Unclip retaining
Clamps


