background image

ii

ENGLISH

Add a User Account  ............................................................................. 35
Modify a User Account  ......................................................................... 35
Delete a User Account  ......................................................................... 36

Configure Location Access  ........................................................................... 36
Configure Security Settings  .......................................................................... 37
Configure Language and Input Settings  ....................................................... 38
Backup and Reset  ........................................................................................ 39
Configure Email Account  .............................................................................. 39
Configure Date and Time Settings ................................................................ 40
Configure Accessibility Options  .................................................................... 41
Developer Options  ........................................................................................ 42
About Tablet  ................................................................................................. 43

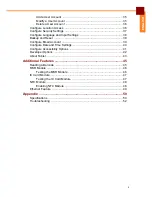
Additional Features ........................................................................... 45

Reading a Barcode  ....................................................................................... 45
MSR Module  ................................................................................................. 46

Testing the MSR Module ...................................................................... 46

IC Card Module ............................................................................................. 47

Testing the IC Card Module  ................................................................. 47

NFC Module .................................................................................................. 48

Enabling NFC Module  .......................................................................... 48

Ethernet Feature ........................................................................................... 49

Appendix ............................................................................................ 50

Specifications ................................................................................................ 50
Troubleshooting ............................................................................................ 52

Summary of Contents for EM-70

Page 1: ...EM 70 Tablet PC User s Manual ...

Page 2: ...Sleep Mode 14 Unlocking the Screen 14 Using the Handheld Computer 15 Using the Touch Screen 15 Understanding the Interface 16 Home Screen Overview 16 Status and Notifications 17 Opening Applications 18 Accessing the Quick Menu 18 Settings and Operation 19 Access the Settings Menu 19 Manage Wireless Settings 19 Manage Bluetooth Settings 21 Manage Ethernet Settings 22 Manage Data Usage 24 Configure ...

Page 3: ...kup and Reset 39 Configure Email Account 39 Configure Date and Time Settings 40 Configure Accessibility Options 41 Developer Options 42 About Tablet 43 Additional Features 45 Reading a Barcode 45 MSR Module 46 Testing the MSR Module 46 IC Card Module 47 Testing the IC Card Module 47 NFC Module 48 Enabling NFC Module 48 Ethernet Feature 49 Appendix 50 Specifications 50 Troubleshooting 52 ...

Page 4: ...egistered trademarks of their respective owners Safety Information Read the following safety information before using the device Use only the power adaptor provided by the manufacturer Use of unauthorized accessories may void the warranty Avoid using the device near electromagnetic sources such as TVs radios and microwave ovens Unplug the power adaptor from the wall outlet during lightning storms ...

Page 5: ...The device could be used with a separation distance of 0 cm to the human body Federal Communications Commission Statement This device complies with part 15 of the FCC Rules Operation is subject to the following two conditions 1 This device may not cause harmful interference and 2 this device must accept any interference received including interference that may cause undesired operation This device...

Page 6: ...www fcc gov oet ea fccid after searching on FCC ID NDPEM 70 This device is compliance with SAR for general population uncontrolled exposure limits in ANSI IEEE C95 1 1999 and had been tested in accordance with the measurement methods and procedures specified in OET Bulletin 65 Supplement C WEEE Notice The WEEE logo on the product or on its box indicates that this product must not be disposed of or...

Page 7: ...adio or television reception which can be determined by turning the equipment off and on the user is encouraged to try to correct the interference by one or more of the following measures Reorient or relocate the receiving antenna Increase the separation between the equipment and receiver Connect the equipment into an outlet on a circuit different from that to which the receiver is connected Consu...

Page 8: ...tures are combined in various ways to satisfy transportation and logistics public sector and hospitality related application settings Features Standard features Freescale i MX 6 CPU Android 4 2 x OS WLAN 802 11a b g n Accelerometer e compass gyroscope ambient light vibrator 5 0 Megapixels camera AF with LED flash 1 2M drop resistance and IP65 Optional features 1D barcode scanner laser or 2D barcod...

Page 9: ...INTRODUCTION Package Contents 6 ENGLISH Package Contents Optional Items Handheld computer Power adaptor cord USB cable MSR Barcode scanner module Cradle ...

Page 10: ...put 2 Power and Status LED Light green when the power is turned on Light red when the battery is charging 3 RFID Antenna Read NFC tags and wireless smartcards 4 Speaker Emit audio output 5 I O Connector Connect to the Magnetic Stripe Reader MSR Barcode scanner module 6 Flash Provide additional lighting when taking pictures 7 Camera For taking pictures or recording videos 2 6 3 4 1 5 7 ...

Page 11: ...ack Connect to an earphone 6 Micro USB Port Connect to a computer using the supplied USB cable for data transfer or for charging the battery 7 Reset Button Press the reset button to revert the Tablet to default factory settings 8 DC Jack Connect to the power adapter for power supply 9 Cradle Connector Connect to the cradle unit 10 SIM Card Slot Insert a SIM card for data connection 11 Memory Card ...

Page 12: ...tive cap 2 Insert the SIM card into the SIM card slot as shown in the illustration 3 Close the protective cap Charging the Battery The device battery can be charged directly from a power outlet or by connecting the device to a computer When the battery is charging The status LED lights red When the device is turned on the icon is displayed on the top right corner of the screen Charging by Power Ou...

Page 13: ...harging NOTE Use only the supplied power adaptor and cord to charge the battery Using other power adaptor and cord not authorized by the manufacturer may damage the device and void the warranty Charging by Computer 1 Open the protective cap 2 Connect the micro USB end of the supplied USB cable to the device 3 Connect the other end of the USB cable to the computer ...

Page 14: ...ripheral devices to the tablet Place the tablet on the cradle as shown below No Item Description 1 Connectors Connect the tablet to the cradle 2 Status LED Lights red when the battery is charging Lights green when the battery is fully charged 3 DC Jack Connect to the power adapter for power supply or to charge the tablet battery 4 USB Port Connect to USB peripheral devices such as a mouse and keyb...

Page 15: ...ack on the bottom of the crade 2 Route the power adaptor cable through the gap on the cradle 3 Connect one end of the power cable to the adaptor and the other end to a power outlet Connecting to Power 1 Connect the USB peripheral devices to the USB port on the bottom of the crade 2 Route the USB cable through the gap on the cradle ...

Page 16: ...rough the card reader This module also has a built in barcode scanner To install the MSR module to the tablet follow the procedures below 1 Remove the screw to open the I O connector cover 2 Connect the MSR cable connector to the I O connector of the tablet And align the tabs on the MSR to the tablet 3 Attach the screw to secure the MSR module to the tablet See for information on how to use the MS...

Page 17: ...ce off Sleep Mode To save power put the device to Sleep mode when not in use In Sleep mode the device is in Power On mode but the screen backlight is turned off To put the device to Sleep mode press the Power button once The screen backlight turns off To turn the backlight on press the Power button again Unlocking the Screen By default the screen is locked after turning the device on or after a pe...

Page 18: ...elect it A pop out menu may appear depending on the function in use by touching and holding on the screen Scrolling Scroll up down slide the finger up down on the screen Scroll right left slide the finger right left on the screen Dragging Touch and hold an icon to move its position Pinching Zoom in move the two fingers apart from each other at the specific area on the screen to zoom in Zoom out mo...

Page 19: ... an application Swipe the finger left or right to change panels 4 Back icon Touch to go back to a previous screen display 5 Home icon Touch to go back to the Home screen 6 Recent Apps icon Touch to view the thumbnails of all previously opened applications Drag the thumbnail downwards to remove the application from the Recent Apps list 7 Shortcut application icon Browser Messaging People Touch to o...

Page 20: ...cation and available features for the device the icons displayed on the status bar may vary No Item Description 1 Wi Fi icon Indicate the Wi Fi signal strength To enable this function see Manage Wireless Settings on page 19 2 Network icon Indicate the network signal strength 3 Battery icon Indicate the battery status 4 Time Display the system time To correct the time see Configure Date and Time Se...

Page 21: ...ttings Touch an icon to open the application Swipe the finger left or right to view more applications Accessing the Quick Menu The Quick Menu provides the quickest way to access Settings and modify common device settings such as screen brightness rotation Wi Fi Bluetooth and others Drag the top right side of the status bar downwards to access the Quick Menu ...

Page 22: ...reen touch Settings to access the settings menu Manage Wireless Settings To connect to an available wireless network perform the following 1 On the Home screen touch Settings 2 In WIRELESS NETWORKS set Wi Fi to ON to enable the Wi Fi function or touch the Wi Fi icon in Quick menu More information on accessing the Quick menu please see Accessing the Quick Menu on page 18 The device searches for ava...

Page 23: ...Password entry is required only for first time connection Once the device is connected to a network and Wi Fi is enabled on the device the device will automatically connect to that network 5 If your preferred wireless network is not in the list you can add it manually by touching Enter the network SSID and security information Then touch Save 6 Touch to see more Wi Fi networking options ...

Page 24: ...on accessing the Quick menu please see Accessing the Quick Menu on page 18 The device searches for compatible Bluetooth devices in range NOTE Touch SEARCH FOR DEVICES to manually search for compatible Bluetooth devices in range 3 To connect to a device touch the device name 4 Enter the passkey to connect and touch Pair The passkey must be the same passkey on the other device 5 Touch to rename the ...

Page 25: ...ion and then the Ethernet tab becomes visible on Settings To connect the Ethernet adapter please see Ethernet Feature on page 49 To configure the Ethernet parameters perform the following 1 On the Home screen touch Settings 2 In WIRELESS NETWORKS set Ethernet to ON 3 If your network type is DHCP the IP address and MAC address parameters are displayed on the screen automatically To configure static...

Page 26: ...commas Touch OK when done Netmask Enter the netmask address separated by commas Touch OK when done DNS 1 Enter the main DNS DNS1 server address separated by commas Touch OK when done DNS 2 Enter the secondary DNS DNS 2 server address separated by commas Touch OK when done 5 If you need to configure Proxy server settings touch the Ethernet tab to access the Ethernet main menu Then do the following ...

Page 27: ...s 2 In WIRELESS NETWORKS touch Data usage 3 Touch and check the Show Wi Fi usage checkbox to view both Mobile and Wi Fi data usage on the screen The device data usage screen opens On this screen you will see the overall data usage within a time period NOTE To change the time period drag the left or right white indicator bar on the graph to the left or right side ...

Page 28: ...reen opens 5 Touch to configure other settings including data roaming restrict background data auto sync data show wi fi usage or view mobile hotspots Configure More Wireless and Networks Features In More tab you can set Airplane mode configure VPN tethering and portable hotspot NFC Android Beam and mobile network settings 1 On the Home screen touch Settings 2 In WIRELESS NETWORKS touch More ...

Page 29: ...NOTE To use VPN you need to set Screen lock on the device Please see Configure Security Settings on page 37 Tethering portable hotspot Touch to configure USB tethering enable or disable portable Wi Fi hotspot set up Wi Fi hotspot enable or disable Bluetooth tethering NFC Near Field Communication Touch to enable or disable the data exchange when the tablet touches another device Android Beam Touch ...

Page 30: ...stment is done NOTE You can also use the Volume up and Volume down keys on the front panel of the device to regulate the volume Please see Front and Back on page 7 Default notification sound Choose your preferred default notification sound and touch OK Touch sounds Enable or disable the sound when you touch the keys on the screen For example touch OK to confirm the parameters you will hear a speci...

Page 31: ...e options Configure the code options Intent mode settings Configure the intent action and category Data code type Set the data code type among UTF 8 GB2312 or GBK Handle barcode with URI content Enable or disable reading the barcode with URI content Restore factory default settings Return all barcode reader settings to the factory default settings Backup current settings Backup the current barcode...

Page 32: ... Track setting Configure tracks order start sentinels and end sentinels settings Prefix and suffix settings Configure the prefix and suffix characters for package track settings Output setting Configure the output mode reader and buzzer settings Restore factory default settings Return all MSR settings to the factory default settings Backup current settings Backup current MSR settings Restore setti...

Page 33: ...ider left or right to adjust screen brightness Wallpaper Select the preferred Home screen background from the gallery live wallpapers or static wallpapers Sleep Set the period of time when the device will switch to sleep mode Daydream Set the screen action that is displayed clock or colors when the device is in daydream mode Font size Set the preferred text font size Wireless display Mirror your d...

Page 34: ...e the storage settings perform the following 1 On the Home screen touch Settings 2 In DEVICE touch Storage The overall storage usage information is displayed on the screen as a graph and as individual components 3 Touch any of the category below the graph to view more detailed information on its storage usage ...

Page 35: ...y usage perform the following 1 On the Home screen touch Settings 2 In DEVICE touch Battery The overall battery usage information is displayed on the screen as a graph and as individual components 3 Touch the cell standby Wi Fi tablet idle or screen component to optimize its battery usage by adjusting the settings ...

Page 36: ...touch Apps By default are displayed all apps and their storage usage The apps are divided into three categories DOWNLOADED RUNNING and ALL 3 Touch the app on each category to manage its settings such as force stop or enable disable the app show notifications clear data cache configure permissions and many other settings NOTE The Android default applications and services cannot be uninstalled ...

Page 37: ...Users To view and configure user accounts perform the following 1 On the Home screen touch Settings 2 In DEVICE touch Users 3 Touch Owner field to add your information My local profile screen opens 4 Enter your information and touch DONE to save the information ...

Page 38: ...be displayed on the lock screen Add a User Account 1 In DEVICE Users section touch ADD USER on the top right side of the screen to add a new user account 2 Touch OK to the Add new user notification message 3 Touch Set up now to create the user account and log in with the new user account or Not now to create the user account only Modify a User Account 1 In DEVICE Users section touch the user accou...

Page 39: ... access parameters perform the following 1 On the Home screen touch Settings 2 In PERSONAL touch Location access 3 Touch any of the following options Access to my location Set Access to my location to ON to let apps that have asked your permission use your location information GPSsatellites CheckthisoptiontoletappsuseGPSonyourtablet to pinpoint your location Wi Fi mobile network location Check thi...

Page 40: ...y locks Check this option to allow pressing the Power button to instantly lock the screen Owner info Check to display owner information on the lock screen Encrypt tablet Apply this option to require a numeric PIN or password to decrypt your device each time you power it on Make passwords visible Check this option to make passwords visible on the screen when you type them Device administrators Touc...

Page 41: ...se your preferred language Spell checker Enable disable spelling check For more spell checker options touch Personal dictionary Touch ADD to add words into the personal dictionary Default Set up input methods Touch next to the keyboard to configure its parameters such as input language auto capitalization auto correction and many others Text to speech output Configure preferred engine for example ...

Page 42: ...wing 1 On the Home screen touch Settings 2 In PERSONAL touch Backup reset 3 Touch Factory data reset to erase all data on the device 4 Touch Reset Tablet to confirm the reset action Configure Email Account To configure the email account perform the following 1 On the Home screen touch Settings 2 In ACCOUNTS touch Email ...

Page 43: ...figure the date and time settings perform the following 1 On the Home screen touch Settings 2 In SYSTEM touch Date time 3 Touch any of the following Automatic date time Check this option to obtain date and time settings automatically from the network Automatic time zone Check this option to obtain the time zone automatically from the network Set date Touch the desired field and scroll up or down t...

Page 44: ...on to enable large font Auto rotate screen Check this option to allow the display to rotate when you turn the device between landscape and portrait Speak passwords Check this option to enable speak passwords feature Text to speech output Configure preferred engine for example Pico TTS set the speech rate or play a short demonstration of speech synthesis Enhance web accessibility Allow if you wish ...

Page 45: ...ns in this section are intended for Android system developers To access the developer options perform the following 1 On the Home screen touch Settings 2 In SYSTEM touch Developer options 3 Touch the various options to check HDCP protect SD card switch the device to debug mode and many more ...

Page 46: ...reen touch Settings 2 In SYSTEM touch About tablet 3 Touch System updates to select the method to update the software or configure the settings To configure the setting touch Update Setting and configure the following parameters a Check the Auto check for updates option b Touch Update mode to configure the update mode c Touch Server address and enter ftp1 partner com tw ...

Page 47: ... network signal strength mobile network type service state roaming and mobile network state Firmware version View the information on barcode reader cellular modem MSR NFC touch panel module and Wi Fi module Legal information View the legal information Model number View the device model number Android version View the operating system version Baseband version View the baseband version Kernel versio...

Page 48: ...Enable the barcode reader in the Settings menu Please see Configure Bar code Reader Options on page 28 2 Press the barcode scanner trigger 3 Aim the scanning beam at the barcode 4 The scanned data appears on the screen To read a 2D barcode perform the following 1 Enable the barcode reader in the Settings menu Please see Configure Bar code Reader Options on page 28 2 Press the barcode scanner trigg...

Page 49: ...ossible reading methods currently in use Testing the MSR Module 1 Enable the MSR module in the Settings menu Please see Configure MSR Options on page 29 2 Touch MSR Demo 3 Swipe a magnetic stripe card through the MSR module Make sure the magnetic stripe is facing upward 4 Data appears on the screen if the test is successful ...

Page 50: ...ISH IC Card Module Testing the IC Card Module 1 On the Home screen touch pcsctest 2 Open the protective cover and insert an IC card into the IC card reader 3 Touch Connect to read the data 4 Data appears on the screen if the test is successful ...

Page 51: ...scan NFC tags Enabling NFC Module 1 Enable the NFC module in the Settings menu Please see Configure More Wireless and Networks Features on page 25 2 On the Home screen touch TagInfo 3 Place the NFC tag on the tablet as shown below 4 Data appears on the screen if the test is successful ...

Page 52: ... connect the Ethernet adapter perform the following 1 Remove the Ethernet adapter from the packaging 2 Connect a micro USB cable to the USB connector on the Ethernet adapter a 3 Using the micro USB cable connect the Ethernet adapter to the mini USB port on the device b 4 Connect the network cable to the Ethernet adapter c 5 Configure the network parameters on the device Please see Manage Ethernet ...

Page 53: ...C Jack 1 x Earphone Jack 1 x Micro USB Female type OTG Charging function 1 x Power button 2 x Volume button 1 x POGO Pins for Cradle 1 x Internal Host USB for MSR 1 x Internal RS232 for 1D 2D barcode scanner Button 1 x Power button 2 x Volume button Battery Lithium ion 6000 mAh Sensor Accelerometer Ambient light sensor Gyroscope sensor Vibrator E compass sensor Camera 5MP with LED flash RFID NFC 1...

Page 54: ...D Laser Barcode Reader 2D Image Barcode Reader MSR IC card reader ISO7816 or MSR ISO7811 Track 1 2 3 RFID NFC 13 56MHz ISO 14443 A B FeliCa R W Optional Accessories Cradle with DC Jack and USB port Hand strap Storage Temperature 20º 60º C Operating Temperature 0º 40º C Packing Adaptor Power cord Quick start guide USB cable EM 70 Specifications ...

Page 55: ...her the micro SD card capacity is full Try to delete or move some files to free space 4 Cannot connect to the Internet Check whether the device is connected to a wireless network If no wireless network is available try to use the SIM card s data network connection The battery may be too low Network connectivity uses more power Be sure to charge the battery 5 Captured photos are too dark Check whet...

Page 56: ......

Reviews: