background image

14 – 

English

MAINTENANCE

Maintenance

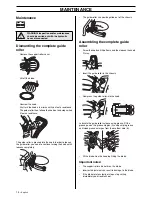
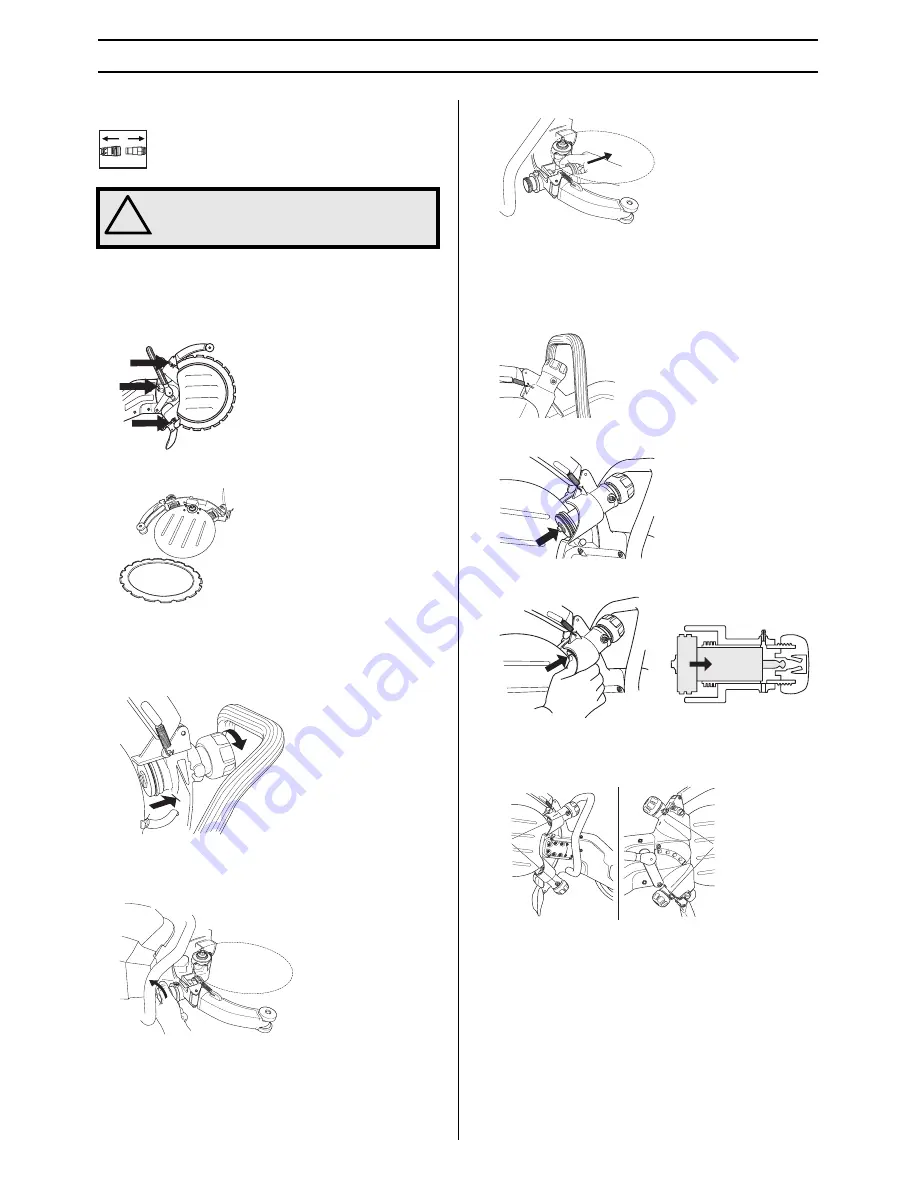
Dismantling the complete guide 
roller

Remove the support roller cover.

Lift off the blade.

Unscrew the knob. 

First turn the knob a few turns until you feel a resistance. 
The guide roller then follows the knob out and stops when 
it feels a resistance.

The guide roller is pressed into the knob. In order to loosen 
the guide roller, you need to continue turning the knob until it 
loosens completely.

The guide roller can now be pulled out of the chassis

Assembling the complete guide 
roller

Screw the knob until it bottoms, and then loosen the knob 
2 turns.

Insert the guide roller in the chassis

Now press the guide roller into the knob.

Lubricate the guide roller’s sleeve using grease. Fit the 
grease gun on the grease nipples (A) and pump in grease 
until clean grease emerges from the overflow hole (B).

Fit the blade. See the heading Fitting the blade.

Important notes:

The support rollers do not drive the blade.

Incorrect adjustment can result in damage to the blade.

If the blade rotates slowly or stops, stop cutting 
immediately and trouble shoot.

!

WARNING! Inspection and/or maintenance 
should be carried out with the hydraulic 
hoses disconnected.

A

B

Summary of Contents for K3600 MKII

Page 1: ...K3600 MKII Operator s manual Please read the operator s manual carefully and make sure you understand the instructions before using the machine ...

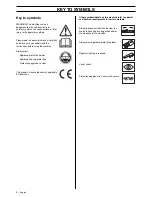
Page 2: ...achine Always wear Approved protective helmet Approved hearing protection Protective goggles or a visor This product is in accordance with applicable EC directives Other symbols decals on the machine refer to special certification requirements for certain markets Always disconnect the machine from the hydraulic hoses before inspection and or maintenance of the machine Always wear approved protecti...

Page 3: ...tions 7 SETTINGS AND ADJUSTMENTS Drive 10 Fitting the blade 10 Hydraulic hoses 12 Water hose 12 Water supply 12 Water dosage 12 STARTING AND STOPPING Starting and stopping 13 MAINTENANCE Maintenance 14 Dismantling the complete guide roller 14 Assembling the complete guide roller 14 Drive wheel 15 Replacing the support rollers guide rollers 15 Reconstructing the blade 16 Couplings 16 Hydraulic hose...

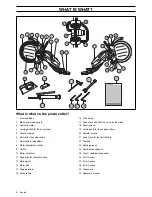
Page 4: ...witch 10 Water connector 11 Couplings for hydraulic hoses 12 Rating plate 13 Water disc 14 Support rollers 15 Guide rollers 16 Drive wheel 17 Switch lock and ON OFF valve for the water 18 Cover screws 19 Locking nuts for the support rollers 20 Adjuster screws 21 Switch lock for the front handle 22 Tool bag 23 Bearing grease 24 Combination spanner 25 19 mm combination spanner 26 4 mm hex key 27 5 m...

Page 5: ...t and stop the machine Switch lock and ON OFF valve for the water The switch lock is designed to prevent accidental operation of the switch The ON OFF valve for the water supply is also controlled with the switch lock When the switch lock A is pressed in this opens the water valve and releases the switch B As long as the switch is pressed in the switch lock remains pressed in and the water valve o...

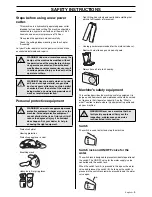
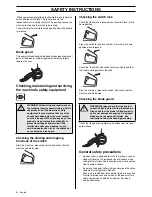
Page 6: ...Check that the guard is complete and without any cracks or deformations General safety precautions A power cutter is designed to cut hard materials such as masonry Observe the increased risk of kickback when cutting soft materials See instructions under the heading How to avoid kickback Do not use the power cutter until you have read the entire contents of this Operator s Manual All servicing in a...

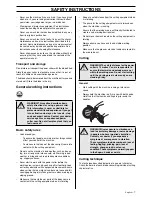
Page 7: ... injury Take great care when working on sloping ground Make sure that no clothes or parts of the body come in contact with the cutting equipment when it is rotating Keep at a safe distance from the cutting equipment when it is rotating The guard for the cutting equipment must always be on when the machine is running Ensure that the working area is sufficiently illuminated to create a safe working ...

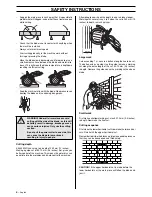
Page 8: ...ntire depth in one run takes longer Working with several runs 3 to 4 when the cut is 260 mm 10 inches in depth is much quicker Large work Cuts exceeding 1 m secure a batten along the line to be cut The batten acts as a guide Use this guide to make a marking cut along the entire length of the cut 50 70 mm 2 3 inches in depth Remove the guides once the marking cut has been made Small work First make...

Page 9: ...iamond blades are available in several hardness classes A soft diamond blade has a relatively short service life and large cutting capacity It is used for hard materials such as granite and hard concrete A hard diamond blade has a longer service life and reduced cutting capacity and should be used for soft materials such as brick and asphalt Diamond blades are ideal for masonry reinforced concrete...

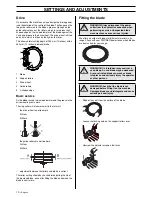
Page 10: ...he guide rollers are not too worn A New B Worn adjustment between the rollers and blade is correct The roller setting should be checked twice during the life of the diamond blade once after fitting the blade and when the blade is semi worn Fitting the blade We offers a number of blades for different materials in its range Check with your PARTNER dealer to see which blades are best suited for your ...

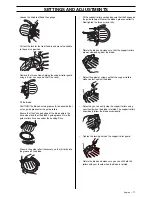
Page 11: ... Press in the guide roller if necessary so that it climbs into the groove on the blade Fit the support roller guard and ensure that the flanges on the guide rollers still enter the blade s grooves correctly Now tighten the three screws fully Rotate the blade and make sure that the support rollers are not clamped against the blade Adjust the adjuster screws so that the support rollers make contact ...

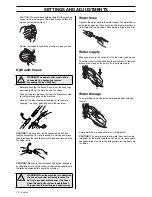
Page 12: ...locked position before using the machine Water hose Connect the water hose to the water supply The water flow is activated by opening the check valve Minimum water flow 4 l min Note that the machine s hose nipple is fitted with a filter Water supply When you press in the switch lock A the water valve opens The water valve remains open and the switch lock A remains pressed in as long as the switch ...

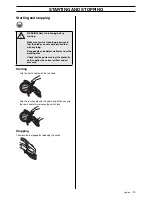
Page 13: ...e this releases the switch lock Stopping The machine is stopped by releasing the switch WARNING Note the following before starting Make sure you are standing properly and that the blade can not come into contact with anything Keep people and animals well away from the working area Check that the power source the hydraulic unit supplies the correct oil flow and oil pressure ...

Page 14: ...mbling the complete guide roller Screw the knob until it bottoms and then loosen the knob 2 turns Insert the guide roller in the chassis Now press the guide roller into the knob Lubricate the guide roller s sleeve using grease Fit the grease gun on the grease nipples A and pump in grease until clean grease emerges from the overflow hole B Fit the blade See the heading Fitting the blade Important n...

Page 15: ... Replacing the support rollers guide rollers Remove the support roller cover Check the rollers for wear Use a 19 mm spanner and 5 mm hex key to replace the rollers Lubricate using bearing grease inside the rollers before the new rollers are fitted Replace the guide rollers when half of the flange on the rollers is worn A New B Worn Replace the support rollers when the roller surface is flat or whe...

Page 16: ... a ring cutter blade is exposed to other strains than a centre driven 14 inch diamond blade Firstly the drive wheel is driven on the inner diameter of the blade so that both the surfaces of the drive wheel and the blade are exposed to wear The core of the blade becomes thinner and the guide wider which prevents the blade being driven by the wheel Secondly the blade is exposed to loads from the rol...

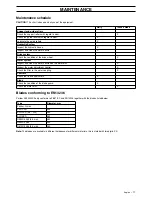
Page 17: ...rd to wear X Check the guide rollers with regard to wear X Lubricate the guide rollers X Hydraulic System Inspect the hydraulic hoses X Inspect and clean the water nozzle X Drive system Check the condition of the drive wheel X Water system Inspect and clean the water nozzles on the water disc X Inspect the water adjustment control X Check the filter in the water coupling X Controls Check that the ...

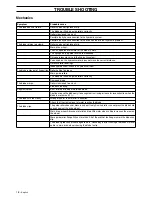
Page 18: ...er setting too loose Worn guide rollers The blade not fitted on guide rollers correctly Damaged blade The blade warps Rollers tensioned too much Blade overheating Segments break Bent twisted or badly maintained blade Continue to use the blade only if one segment is missing or leave for reconstruction when the blade is worn max 50 The blade cuts too slowly Wrong blade for the material in question C...

Page 19: ...r open centre valve Max hydraulic pressure bar psi 150 2200 Oil flow min max l min 35 42 Height mm inches 410 16 Length mm inches 715 28 Width mm inches 260 10 Weight excl blade kg 8 3 Weight ring blade kg 0 8 Specifications hydraulic oil 150 VG 32 10W Oil temperature operational C 60 Water consumption l min 4 Hydraulic couplings 1 2 FF according to HTMA regulations thread 3 8 Noise emissions see ...

Page 20: ... number complies with the requirements of the COUNCIL S DIRECTIVES of June 22 1998 relating to machinery 98 37 EC annex IIA of May 8 2000 relating to the noise emissions in the environment 2000 14 EC The following harmonised standards have been applied ISO DIS 15744 ISO DIS 11201 SMP Svensk Maskinprovning AB Fyrisborgsgatan 3 SE 754 50 Uppsala Sweden has carried out voluntary type approval for Hus...

Page 21: ......

Page 22: ... z x 6r z x 6r ...

Page 23: ......

Page 24: ... z x 6r 2004 12 22 z x 6r 1088929 26 www partner industrial com ...

Reviews: