28
C H A P T E R 2 B I O S S E T U P
Set Supervisor and User Passwords
These items can be used to install a password. A Supervisor password takes precedence over a User password,
and the Supervisor can limit the activities of a User. To install a password, follow these steps:
1. Highlight the item Set Supervisor/User Password on the main menu and press <Enter>.
2. The password dialog box appears.
Enter Password:
3. If you are installing a new password, type in the password. You cannot use more than eight
characters or numbers. The Set Supervisor/User Password item differentiates between upper and
lower case characters. Press <Enter> after you have typed in the password. If you are deleting a
password that is already installed press <Enter> when the password dialog box appears. You see a
message that indicates that the password has been disabled.
PASSWORD DISABLED !!!
Press any key to continue . . .
4. Press any key. You are prompted to confirm the password.
Confirm Password:
5. Type the password again and press <Enter>, or press <Enter> if you are deleting a password that is
already installed.
Write the passwords down and keep them in a safe place.
IMPORTANT
If you do not save changes when you exit BIOS, changes to the pass-
words are saved anyway.
Save & Exit Setup
Highlight this item and press <Enter> to save the changes that you have made in the Setup Utility and exit the
Setup Utility. When the Save and Exit dialog box appears, press <Y> to save and exit, or press <N> to return
to the main menu.
Exit Without Saving
Highlight this item and press <Enter> to discard any changes that you have made in the Setup Utility and exit
the Setup Utility. When the Exit Without Saving dialog box appears, press <Y> to discard changes and exit,
or press <N> to return to the main menu.
NOTE
If you have made settings that you do not want to save, use the “Exit
Without Saving” item and press Y to discard any changes you have
made.
Summary of Contents for PT-6212
Page 1: ...All in one POS Terminal PT 6212 Service Manual...
Page 2: ......
Page 8: ...vi...
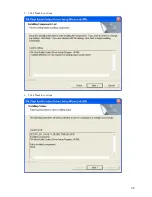
Page 43: ...35 Click 5 Next to continue Click 6 Next to continue...
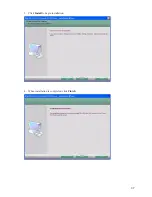
Page 45: ...37 Click 3 Install to begin installation When installation is completed click 4 Finish...
Page 68: ...60 C H A P T E R 5 R E P L A C I N G F I E L D R E P L A C E A B L E U N I T S F R U s...
Page 69: ...61 APPENDIX PART LIST AND SPECIFICATION Exploded diagram main parts Figure 6 1...
Page 70: ...62 A P P E N D I X Exploded diagram printer parts Figure 6 2...


