Getting star
Getting started
ted
Perform the tasks in this section before using this device in the
classroom.
Step 1: Char
Step 1: Charge the batter
ge the batteryy
Connect the //control.Node USB port
to a USB charger using
the included USB cable. The battery light
displays yellow while
charging and changes to green when fully charged.
Step 2: Get the softwar
Step 2: Get the softwaree
You can use the //control.Node with SPARKvue or PASCO Capstone
software. If you're not sure which app to use, visit
pasco.com/products/guides/software-comparison
pasco.com/products/guides/software-comparison for help. SPARKvue
is available as a free app for Chromebook, iOS, and Android devices.
We offer a free trial of SPARKvue and Capstone for Windows and Mac.
W
W
INDOWS
AND
M
M
AC
C
C
HROMEBOOK
, ,
I
OS,
OS,
AND
A
A
NDROID
Go to pasco.com/downloads
Search for SPARKvue
SPARKvue in your
device's app store.
If you already have the software, check that you have the latest
update installed:
SP
SPARK
ARKvue
vue
Go to the Main Menu
Main Menu
then select Check for Updates
Check for Updates.
P
PASCO Capst
ASCO Capstone
one
In the menu bar, click Help
Help then select Check for updates
Check for updates.
Step 3: Connect t
Step 3: Connect to the softwar
o the softwaree
SP
SPARK
ARKvue
vue
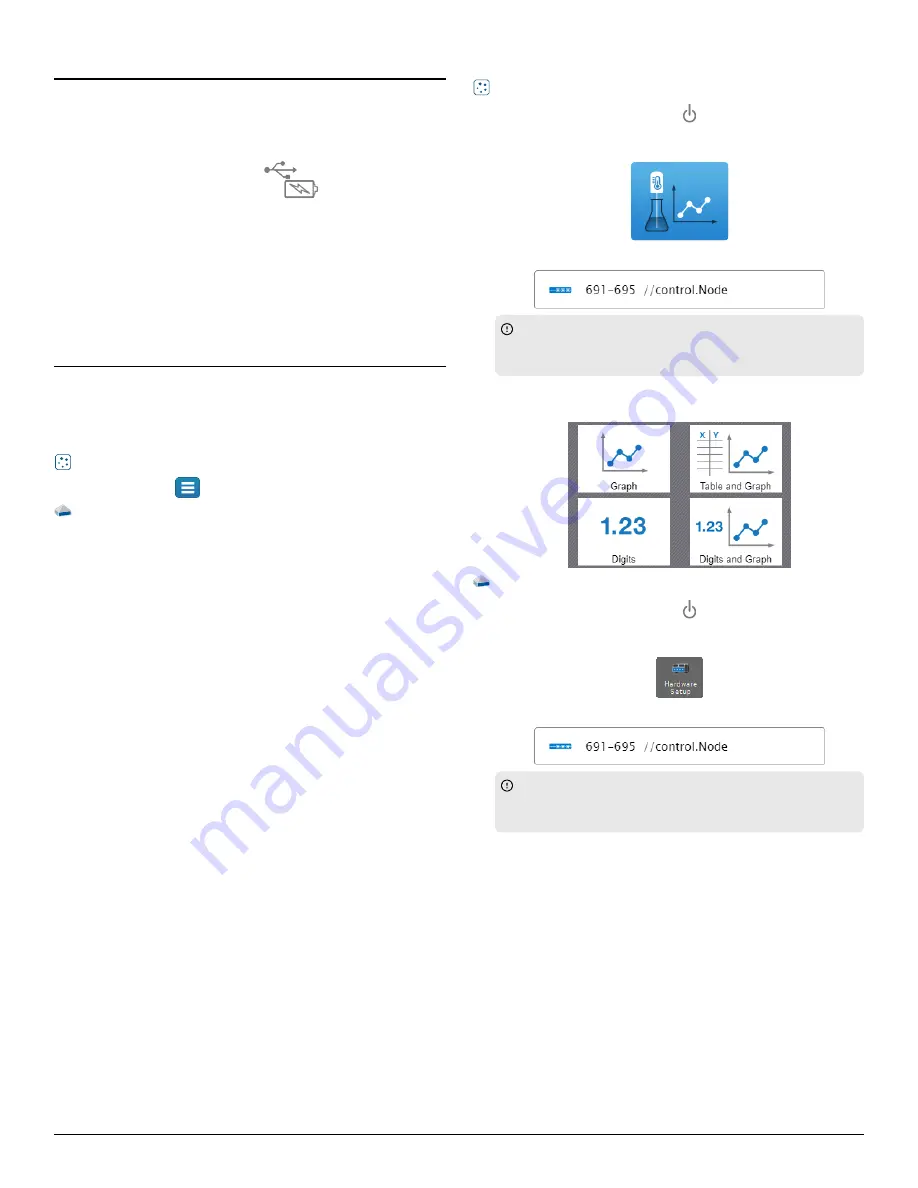
1. Press and hold the power button
until the lights turn on.
2. Open SPARKvue.
3. Select Sensor Data
Sensor Data on the Welcome Screen.
4. Select the //control.Node that matches its device ID.
Important:
Important: You may be prompted to update the firmware if
a new version is available. If so, click Yes
Yes to update the
firmware.
5. Select a template. If you're not sure which to choose, select
Graph
Graph.
P
PASCO Capst
ASCO Capstone
one
1. Press and hold the power button
until the lights turn on.
2. Open PASCO Capstone.
3. Click Hardware Setup
Hardware Setup.
4. Select the //control.Node that matches its device ID.
Important:
Important: You may be prompted to update the firmware if
a new version is available. If so, click Yes
Yes to update the
firmware.
5. Click Hardware Setup
Hardware Setup again to close the panel.
//control.Node | 3


