5.
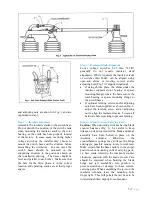
Lower the blade to approximately a 15
degree angle
6.
At or near this point, the counterbalance
plunger can be connected to the proper point
for vertical mounting.
7.
Raise the blade to relieve pressure.
8.
Remove the vise grip pliers
9.
File off any burrs on the counterbalance
shaft.
CHANGE TO INVERTED
WARNING
When performing this procedure, use care
because parts are in tension.
Additional parts are required, contact the
factory before proceeding.
1.
Start with the switch blade in the CLOSED
position.
2.
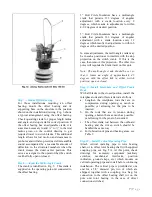
Clamp the counterbalance plunger with the
vise grip pliers against the face of the
housing.
3.
Raise the blade slightly to relieve pressure.
4.
Remove pin (A) which attaches the plunger
to the blade hinge casting. Since this pin is
larger in diameter at the center and two
shoulders hold it in place, the pin may be a
bit difficult to remove.
5.
Remove pin (B) at the rear of the
counterbalance. The unit is now free to
invert, so that drain holes will be located as
shown for inverted mounting.
6.
Re-connect the rear of the counterbalance
with Pin B.
7.
Remove the jaw assembly from its support
insulator.
8.
Lower the blade below the CLOSED
position and connect the counterbalance
9.
plunger to the proper point for inverted
mounting with pin (A).
10.
Raise the blade to relieve pressure.
11.
Remove the vise grip pliers.
12.
File off any burrs on the counterbalance
shaft created from the vise grip pliers.
13.
Re-install the jaw assembly; hand tighten the
bolts.
BEARINGS
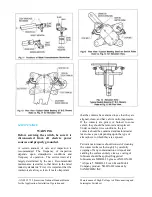
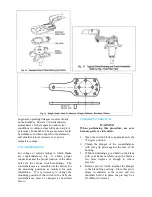
The bearing of each switch and offset bearing is
a greaseless type. Fig. 12 shows the location of
stop bolts and switch cranks on all switch
bearings. Fig. 13 shows the required location of
stop blots (5) and stop cranks (9) with a typical
location of the adjustable radius crank (8) on the
offset bearing. Fig. 14 is an elevation view of a
switch bearing.
Summary of Contents for TTR6
Page 1: ...IB TTR6 B May 2012 ...
Page 6: ...5 P a g e ...

