background image

7

Safety Instructions

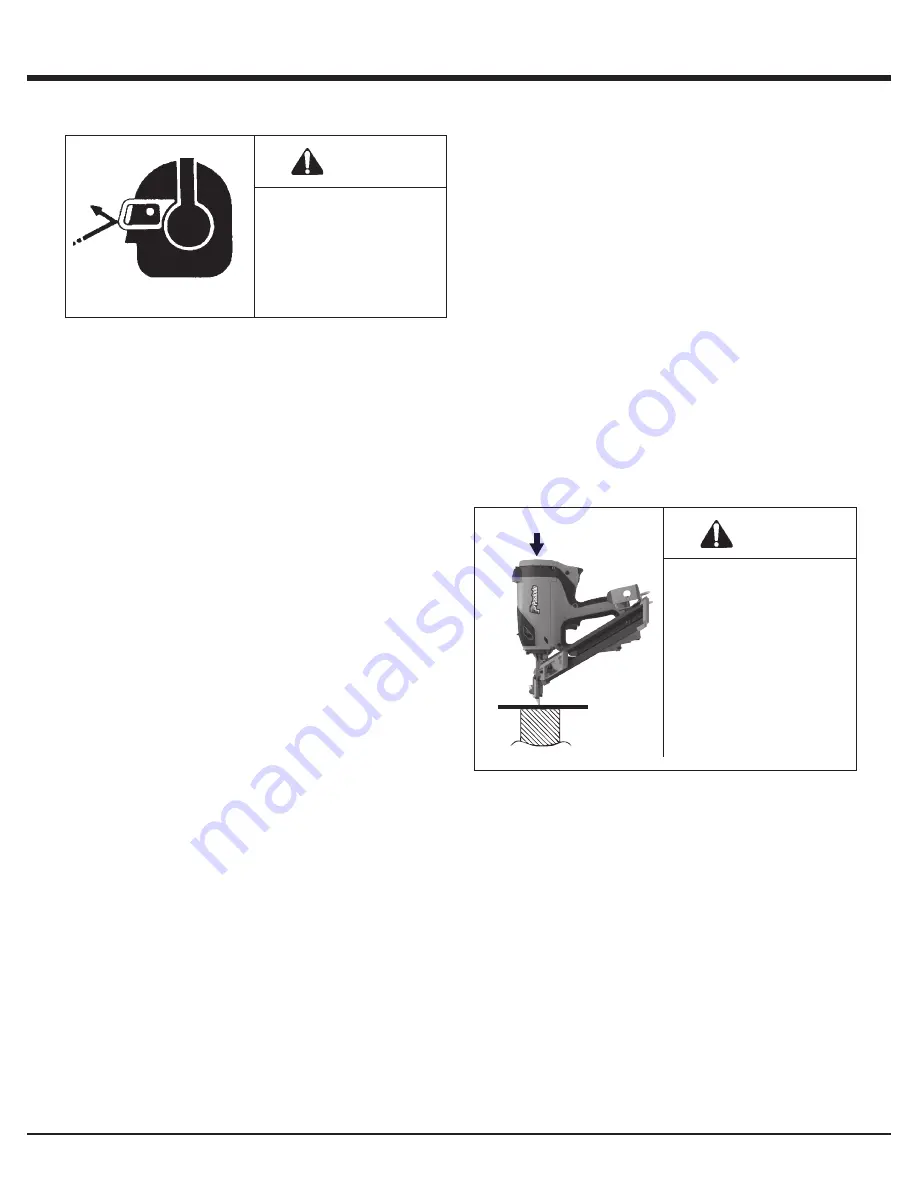
          WARNING

EYE and EAR safety gear

must  be  worn  when

working  with  or  in  the

vicinity  of  the  Paslode

Cordless Framing Nailer.

7. NEVER  OPERATE  THE  TOOL  WITH  THE  WORK

CONTACTING ELEMENT REMOVED OR DISABLED.
This device helps reduce the possibility of accidental

fastener discharge by preventing the tool from operating

until it is completely against the work surface.
NEVER operate the tool if the work contacting element

is not working properly.

8. ALWAYS POINT THE TOOL AWAY FROM YOURSELF

AND  OTHERS  WHEN  CLEARING  JAMS  OR

REMOVING  FASTENERS.  REMOVE  THE  FUEL

CARTRIDGE AND BATTERY.
Pull  the  follower  slightly  back  and  push  the  release

lever. Tip the tool nose up slightly and fasteners should

slide out of the rear of the magazine. If fasteners are

jammed, refer to the appropriate servicing section of

this manual.

9. NEVER  OPERATE  THE  CORDLESS    FRAMING

NAILER  IF  PARTS  ARE  LOOSE,  DAMAGED  OR

MISSING.

10. NEVER DRIVE FASTENERS INTO KNOTS OR ON

TOP OF OTHER FASTENERS.
A fastener may ricochet and cause serious injury.

11. OPERATE THE TOOL ONLY ON THE WORKPIECE.

1. Eye protection must meet the requirements of ANSI

Standard  Z87.1  and  should  have  side  shields  for

increased  protection.  As  an  employer  you  are

responsible  for  enforcing  the  use  of  eye  protection

equipment by the tool operator and all personnel in the

work area.

2. NEVER ASSUME THE TOOL IS EMPTY.

Never point the tool at yourself or anyone else.

3. NEVER  ENGAGE IN "HORSEPLAY" WITH THE TOOL.

The Cordless Framing Nailer is not a toy – it is a tool.

Careless  and  improper  use  may  result  in  a  serious

accident.

4. NEVER CARRY THE TOOL WITH YOUR FINGER ON,

OR SQUEEZING, THE TRIGGER.
This practice may result in the accidental discharge of

a fastener.

5. NEVER OPERATE A MALFUNCTIONING TOOL.

Refer to the servicing or troubleshooting section of this

manual to correct the problem. If the problem cannot be

corrected,  stop  using  the  tool  and  report  it  to  your

supervisor or Paslode representative.

6. DO NOT LOAD FASTENERS WITH THE TRIGGER

AND/OR WORK CONTACTING ELEMENT PRESSED

IN. A fastener may be accidentally discharged.

          WARNING

The    Cordless  Framimg

Nailer must  be operated

only when it is in contact

with  the  work  surface.

When  fastening  thin

materials  such  as

plywood,  be  sure  to

position  the  tool  so  that

the fastener is driven into

the underlying piece.

12. NEVER  DRIVE  FASTENERS  INTO  AREAS  WITH

CONCEALED HAZARDS.
Always  check  the  area  behind  the  work  surface  for

electrical wiring, gas pipes, water pipes, sewer drains or

other potential hazards.

Summary of Contents for CF150-PP

Page 1: ...nsibility to have all operators and service personnel read and understand this manual CORDLESS 1 1 2 POSITIVE PLACEMENT NAILER OPERATING MANUAL Part No 906200 Printed in U S A 2023 IllinoisTool Works...

Page 2: ...less 1 1 2 Positive Placement Nailer Operation 15 Safety Instructions 6 Battery and Charger 9 Fuel Cartridge 11 Servicing 16 Troubleshooting 18 The battery charger system meets all safety requirements...

Page 3: ...slode speci cation size or quality improperly maintained repaired with other than genuine Paslode replacement parts damaged in transit or handling or which in Paslode s opinion has been altered or rep...

Page 4: ...uel Cartridge Fuel cartridge Provides enough fuel to drive approximately 800 fasteners Overview of the Paslode Cordless 1 1 2 Positive Placement Nailer By using this Paslode Cordless Nailer at its rec...

Page 5: ...1 2 Positive Placement Nailer DEPTH OF DRIVE ADJUSTMENT ERGONOMIC RUBBER HAND GRIP NAIL HOLE LOCATION PROBE FUEL CELL LOADING STAND REST BELT HOOK BYPASS FOLLOWER ADJUSTABLE RAFTER HOOK FLASHING GREEN...

Page 6: ...flammable chemicals adhesives gasoline or solvents WARNING Never attempt to operate this tool until you have read and understood all safety precautions and manual instructions Failure to follow all s...

Page 7: ...side shields for increased protection As an employer you are responsible for enforcing the use of eye protection equipment by the tool operator and all personnel in the work area 2 NEVER ASSUME THE T...

Page 8: ...uel cartridge and battery where they will not be exposedtoanopenflame sparks or temperatures above 120 F 49 C WARNING A fastener may exit at an angle unexpectedly and cause injury IMPORTANT SAFETY INS...

Page 9: ...stem Accessories Battery Charger Part No 902672 Note Important Charging Notes Remove the charger unit from the tool case and plug it into a 120V AC outlet Set the charger base on a stable surface A gr...

Page 10: ...le is a small plastic lens This is the battery indicator light When you insert a fully charged battery into the tool you will see a blinking green light If the indicator light blinks red recharge the...

Page 11: ...to install the fuel cartridge cap on other fuel cells This may result in damage to the tool and injury to the user and by standers e c a p s e h T l e u f e h t s d l o h r e n i a t n o c s i h T r e...

Page 12: ...PA regulations Hazardous waste generated by homeowners and contractors who perform routine maintenance for homeowners in their homes are not regulated by RCRA In general household wastes generated by...

Page 13: ...To close Push forward then down to lock fuel door Raise fuel tube block assembly it will lock in up position Load fuel cell Carefully align fuel adaptor and cell stem To open Push forward lift then ba...

Page 14: ...s Nailer outdoors in dry weather when the nailer fuel cartridge and battery are between 45 7 2 C and 120 F 49 C The Cordless Nailer requires cooling of the motor assembly to operate properly The fan n...

Page 15: ...ary to repeat these steps CAUTION The Cordless Nailer should not be used in the rain or where excessive moisture is present The use of the Paslode Cordless Technology under these conditions may result...

Page 16: ...pear wrong with the Cordless Nailer should only be diagnosed and repaired by a fully trained service technician If you have any reason to believe that your problem is beyond the service procedures in...

Page 17: ...assemble tool attach magazine to nose replace cap screws and nut Tool is ready to use Remove nut from rear of magazine When you get home 1 Place the battery in its charger if it needs charging as indi...

Page 18: ...y is discharged Charge battery Clean battery terminals with soft cloth Charge battery SYMPTOM POSSIBLE PROBLEMS SERVICE Nail Hole Locating Probe does not depress fully tool does not operate Tool will...

Page 19: ...when material density or thick ness of material being fastened changes Use only fasteners meeting Paslode speci cations Check Fasteners and Ap plications section for fastener types and sizes recommend...

Page 20: ...1 Handle LH Mod 23 919004 1 Ring Retaining Circlip 66 906118 1 Belt Hook Bracket Assy 24 906120 1 Driver Piston Assembly 67 906114 2 Bracket Belt Hook screws 25 900612 2 Seal Ring Piston 68 901066 2...

Page 21: ...in an assembly 1 2 3 4 5 6 12 7 8 11 13 14 15 16 17 23 24 25 15 26 30 28 27 31 32 33 29 34 35 40 85 SERVICE KIT 010031 Service Kit Item Loctite 242 43 Torque Values in lb Item Torque Item Torque 3 55...

Page 22: ...ssembly 44 45 46 48 49 47 56 50 51 52 64 63 54 61 54 55 50 54 65 57 46 45 67 67 69 68 53 68 69 75 53 74 Torque Values in lb Item Torque Item Torque 45 30 35 70 35 40 54 6 8 76 35 40 67 18 22 82 18 22...

Reviews: