PAGE 5
SPECIFICATIONS ARE SUBJECT TO CHANGE WITHOUT NOTICE
Lektron Series
®
PROFESSIONAL AUDIO & SOUND
®
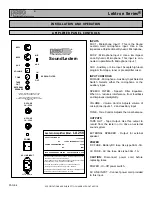
INSTALLATION AND OPERATION
MICROPHONE
Mount microphone holder on to gooseneck and insert
microphone into holder provided. Insert the microphone
connector into jack marked Mic. on the lectern amplifier
panel. Be sure the Mic/Aux. switch located next to the micro-
phone jack is set to the Mic. position and that the micro-
phone On-Off switch is turned On if the microphone is pro-
vided, with a switch.
A second microphone may be used simultaneously if
desired. use optional low impedance unidirectional micro-
phone (see accessories) and insert into the second micro-
phone input jack.
POWER
Insert power cord jack into connector marked AC LINE
INPUT located on the power supply panel. Connect power
cord into a wall outlet supplying 117 Volts AC 60 hz. Turn
lectern ON by setting the Power switch to the On position.
The pilot light should glow.
VOLUME CONTROL
While speaking into the microphone in a normal tone of
voice, slowly turn clockwise the volume control knob until
the desired output level is achieved.
NOTE: High volume settings may cause feedback "HOWL".
therefore the output level should be properly adjusted for
best performance and minimum interference.
ALWAYS SPEAK AS CLOSE TO THE MICROPHONE AS
POSSIBLE.
TONE
Adjust the Tone control knob for the desired tonal balance.
This control can also be used to minimize the feedback howl
effect should it occur.
SPEECH FILTER
A speech filter is provided to improve speech intelligibility
and sound penetration. In applications where the acoustic
environment does not allow efficient voice amplification set
the Speech Filter switch to the IN position. This will minimize
feedback as well as reverberation effects.
AUXILIARY INPUT
A Tape Recorder, Tuner or Wireless Microphone Receiver,
may be directly connected to this input. Use a shielded sin-
gle conductor audio cable terminated in a standard phono
plug (RCA type). Set MIC/AUX switch to the AUX position,
insert cable plug to the input marked AUX and adjust vol-
ume control for the desired output sound level.
TAPE OUT
To record speeches, conferences. etc. from the Sound
Lectern a tape out jack is available. Use a shielded audio
cable terminated in a standard phono plug. Connect cable
to the Tape Out jack and to the Tape Recorder input.
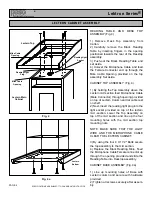
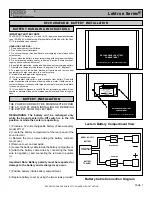
BATTERY INSTALLATION
The sound lectern may be operated on an optional internal
rechargeable battery. The battery should be mounted in the
compartment provided and located at the bottom of the unit.
For the safe installation and handling of the battery refer to
the Battery Installation Instructions in this manual.
IMPORTANT NOTE: The battery will be recharged only
while the lectern is On or in use.
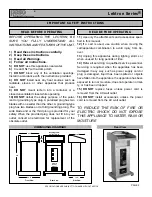
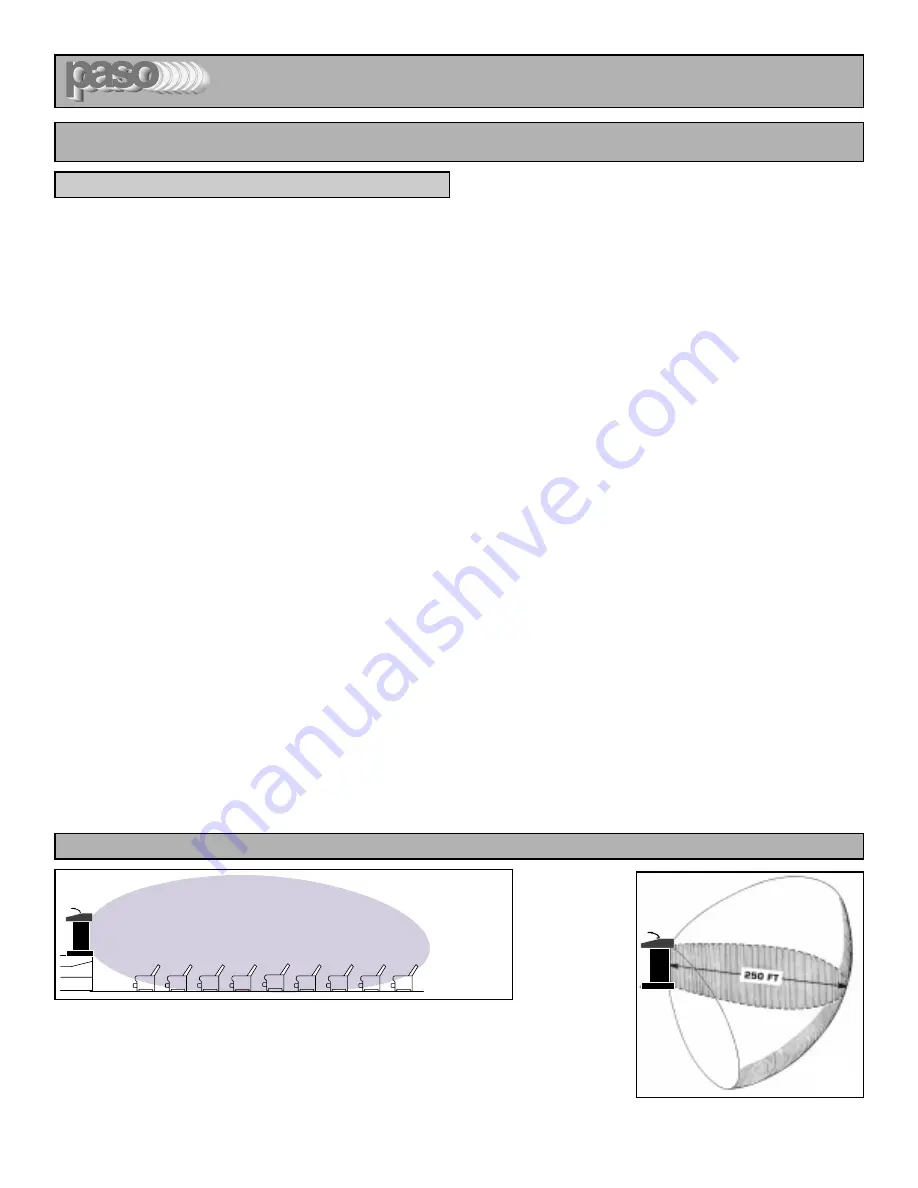
INPUTS - OUTPUTS - CONTROLS
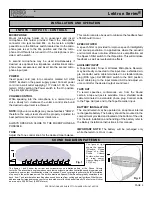
The figures 1 and 2 show the vertical and horizontal sound radiation pattern of the Sound Column
Lecterns. The acoustically engineered sound column enclosure provides controlled sound dispersion with
maximum power output concentration where it is needed. Sound coverage is uniform, with full articulation
of speech in the entire area served. The built-in electronic Speech-Filter Equalizer greatly minimizes feed-
back ``howl'' and reverberation resulting when sound bounces from ceiling and wall surfaces. Whether you
address small or large audiences, your voice is carried over effectively and efficiently. The Lectern will cover
an area up to 20,000² Feet (2,000² Meters).
The figure at right
shows the approx.
“Effective Sound
Range'' of a Paso
Sound Column
Lectern when used
at rated power.
Approx. Range: 250
Ft. (80 m.).
Fig. 1
SOUND RADIATION PATTERNS
Fig. 2


