background image

Summary of Contents for alinea

Page 1: ...Gebrauchsanweisung Mode d emploi Directions for use lnstrucciones para el uso 0 22534 5 12 76 ...

Page 2: ...tösser mit dem PASSAP JAC oder von Hand für den neuen Musterrapport einteilen Avec PASSAP ALINEA vous tricoterez vos dessins sans problemes en double vitesse ALINEA est un accessoire qui se fixe a gauche du chariot avant de la PASSAP DUOMATIC II sert a aligner les poussoirs automatiquement en position travail apres chaque quatrieme ou deuxieme rang pour le jacquard ou les dessins a brides Ainsi le...

Page 3: ...w pattern series either with PASSAP JAC or by hand Con PASSAP ALINEA tejer disefios es todavia mäs räpido mäs sencillo ALINEA es un pequeiio implemento quese sujeta a la izquierda en el carro delantero de PASSAP DUOMATIC Sirve al tejer jacquard y lazadas para subir los bajadores autornäticarnente a la posici6n trabajo antes de cada nueva disposici6n de diseiio Resulta asi un trabajo rnas rapide rn...

Page 4: ...D ...

Page 5: ...e son support pousser la petite manette noire vers la droite et avec la main gauche basculer l ALINEA de l arriere vers l avant pour le liberer de son support Suite page H ALINEA is a great improvement for pattern knitting with PASSAP DUOMATIC Fit ALINEA in this holder A slot on the underside at right of ALINEA is provided for the fitting Press ALINEA down until the small black key at right clicks...

Page 6: ...ätigung des ALINEA Schloss rechts für Stössereinteilung und Farbwechsel wie gewohnt Die Zählerkulisse 1 des Reihenzählers dient auch für die Betätigung des ALINEA und muss am F linken Rand vom Gestrick stehen Die Mitte der Zählerkulisse muss in Linie mit der letzten Arbeits ...

Page 7: ...den automatisch jede 2 Reihe bei Schlossbewegung von links nach rechts in Arbeitsstellung ausgerichtet Vorbereitung Schloss rechts Stösser mit PASSAP JAC oder von Hand einteilen ALINEA auf 0 1 Reihe stricken Schloss links ALINEA auf 2 1 Reihe stricken Nun fortlaufend Schloss rechts Stösser neu einteilen 2 Reihen stricken etc Die Stösser werden automatisch jede 4 Reihe bei Schlossbewegung von links...

Page 8: ...INEA Chariot a droite pour la selection des poussoirs et pour le changement des couleurs comme d habitude Le coulisseau du compte rangs 1 sert aussi au fonctionnement de ALINEA et doit se trouver H au bord gauche du tricot Le milieu du coulisseau doit etre a la rnerne hauteur que la derniere ...

Page 9: ...matiquement en position travail a chaque 2e rang au moment ou le chariot fait le mouvernent de gauche a droite Preparation Chariot a droite selectionner poussoirs avec PASSAP JAC ou a la main reqler ALINEA sur 0 tricoter 1 rang Chariot a gauche reqler ALINEA sur 2 tricoter 1 rang De suite Chariot a droite selectionner a nouveau poussoirs tricoter 2 rangs etc Les poussoirs sont aliqnes automatiquem...

Page 10: ...te ALINEA Lock must be at right as usual for pusher arrangement and colour change The trip cam 1 for the row counter serves also to operate ALINEA lt must be placed at the K left edge of the knitting The centre of the trip cam must be in line with the last working needle ...

Page 11: ... pushers will auto matically be aligned in Working Position Preparation lock at right arrange pushers with PASSAP JAC or by hand set ALINEA to 0 knit 1 row Lock at left set ALINEA to 2 knit 1 row From now on work continuously as follows lock at right arrange pushers knit 2 rows etc Every 4th row when moving the lock from left to right the pushers will automa tically be aligned in Working Position ...

Page 12: ...s y cambio de color como acostumbrado EI accionador 1 del contador sirve tambien para hacer funcionar ALINEA y debe encontrarse en el borde izquierdo del tejido EI centro del accionador debe estar en linea con la ultima aguja en M trabajo Con cada movimiento del carro se desliza el gatillo 2 de ALINEA sobre el accionador del ...

Page 13: ... trabajo cada 2a pasada al moverse el carro de izquierda a derecha Preparaci6n Carro a la derecha repartir bajadores von PASSAP JAC o a mano ALINEA en 0 tejer 1 pasada Carro a la izquierda ALINEA en 2 tejer 1 pasada Ahora seguidamente Carro a la derecha repartir de nuevo bajadores tejer 2 pas etc Los bajadores son alineados automaticarnente en posici6n trabajo cada 4a pasada al moverse el carro de...

Page 14: ... the holder to the PASSAP DUOMATIC Montaje del soporte en PASSAP DUOMATIC Passap eingetragene Schutzmarke Copyright 1976 by MADAG Maschinen und Apparatebau Dietikon AG CH 8953 Dietikon Z2 5 34 5 12 7 6 Für dieses Originalheft bleiben alle Rechte vorbehalten Printed in Switzerland by Madag ...

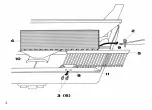
Page 15: ...m evtl Pinzette Übersicht Vorderes Schloss vom Apparat nehmen Pfeiltasten ausgeschaltet und umdrehen Schlosskupp lung rechts Halter 1 mit Nocken A und B für das Einrasten am Rand der Schlossplatte 11 Das kurze Ende ist mit Schraube 2 über dem Hilfsabweiser 7 und das lange Ende mit Schrauben 3 resp 6 hinter dem Niederhaltebügel 8 zu befestigen gemäss Anweisungen auf den nachfol 2 genden Seiten ...

Page 16: ...mb possibly a pair of tweezers Survey illustration 1 Remove front lock from the machine arrowed keys disconnected and turn round lock connection at right Holder 1 with pegs A and B to fit into rim of ground plate 11 The short end has to be fixed with screw 2 over auxiliary rejector 7 and the long end with screws 3 6 respectively behind strap 8 according to the instructions on the following pages P...

Page 17: ...10 2 4 s 3 4 ...

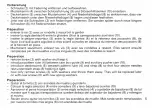
Page 18: ... vis 3 avec les rondelles a ressort Elles seront ensuite remplacees par de nouvelles vis plus lonques 6 avec des rondelles a ressort Preparation remove screw 2 with washer and keep it introduce pattern ruler 4 between cam box guide 9 and auxiliary pusher cam 10 introduce deckercomb 5 between pattern ruler 4 and strap 8 so that four decker needles rest underneath strap 8 holding it tight now only r...

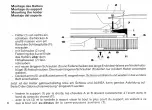
Page 19: ... Musterkamm 4 wegnehmen Schloss umdrehen und wieder in das vordere Bett einschieben Jetzt ist der Halter gebrauchsfertig links am Schloss und ALINEA kann gemäss Abbildung auf Seite D der Gebrauchsanweisung eingesetzt werden Montage des Halters Montage du support Mounting the holder Montaje del soporte 2 1 s 10 B 0 0 e 11 lnserer le support 1 par la droite les chevilles A et B doivent s enclencher ...

Page 20: ...n be fitted into the holder according to instructions for use lntroducir el soporte 1 desde la derecha las levas A y B deben engranar delante en el borde de la placa del carro 11 sujetar con tornillo 2 y arandela de muelle el extremo corto del soporte encima del desviador auxiliar 7 sujetar con nuevos tornillos mas largos 6 y arandelas de muelle el extremo largo del soporte al sujetador de bajador...

Reviews: