background image

Page 3

GETTING TO kNOW YOUR PASTA COOkER

OPERATING INSTRUCTIONS

BEFORE USING FOR THE FIRST TIME

Before using your pasta cooker for the first time, you should clean (see cleaning section) and 

then operate the appliance in the “Boil Water” cycle at least once (2 - 3 times recommended) 

following the instructions below.  This will remove any dust or residues remaining from the 

manufacturing process.

GENERAL

This appliance is an Cordless Electric Pasta Cooker, that cooks your pasta in five easy steps:

1.  Boil Water

2.  Add Pasta

3.  Cook

4.  Drain Water from Pasta

5.  Serve

BOIL WATER

1.  With the Cooking Tube removed from the Power Base, insert the Locking Pasta Tray 

into the bottom of the Cooking Tube and lock it into place by turning in a clockwise, 

direction then add up to 1.5 L. (6 cups) of water into the Cooking Tube.  Next place 

the Interlocking Strainer on the Cooking Tube and lock it into place by turning in a 

clockwise direction.  Lastly place the Interlocking lid onto the Interlocking Strainer 

and lock it into place by turning in a counter-clockwise direction.

2.  Place the Cooking Tube on the Power Base and plug the Power Base into a standard  

wall outlet.

3.  Press the “ON / OFF / BOIL” button on the Control Panel.  The display on the control 

panel will turn on and the unit will go into the water boil mode.  The timer’s display 

numbers will rotate in a clockwise direction indicating that the unit is in the boil 

mode.

4.  Once the water has boiled, the appliance’s power base will beep and flash “00” 

indicating the completion of the boil cycle.

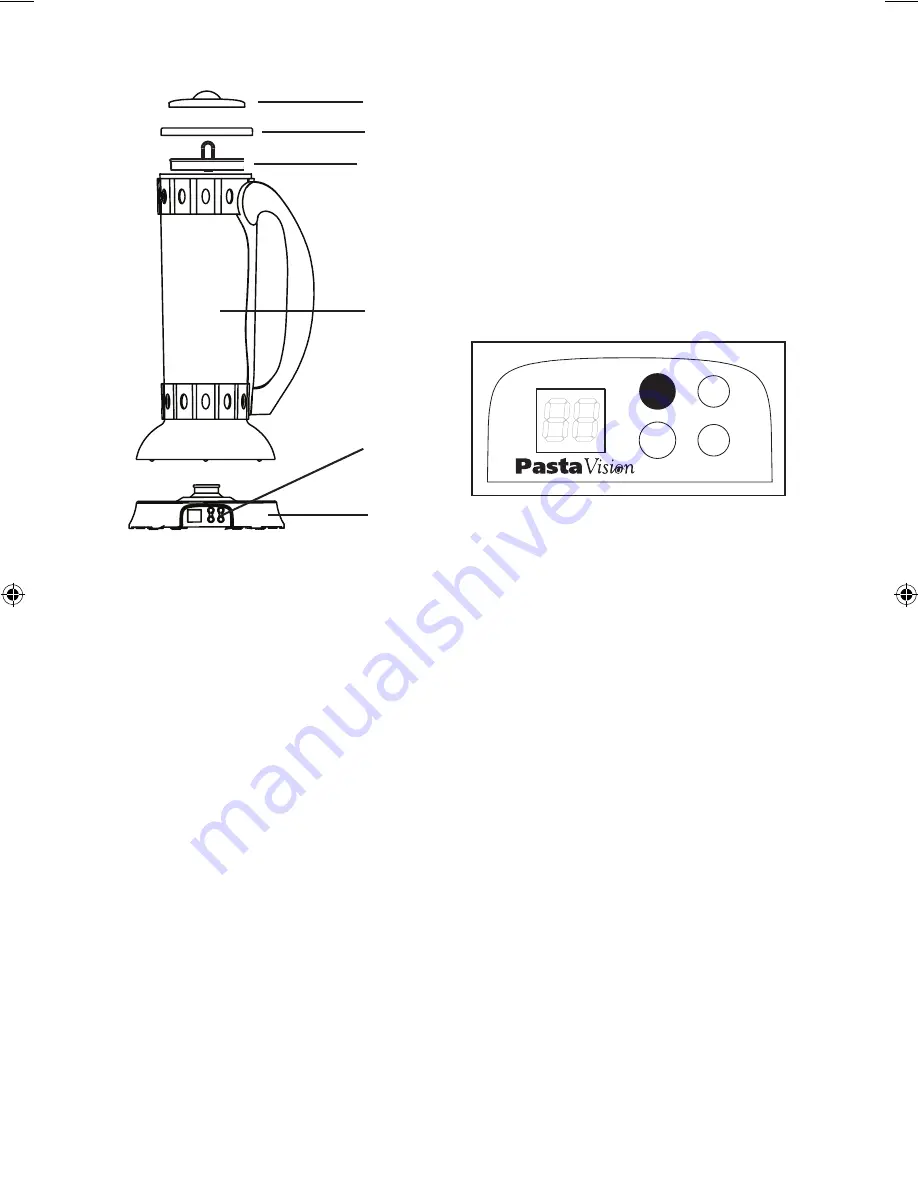
- Interlocking Lid

- Interlocking Strainer

C


- Locking Pasta Tray

D


- Cooking Tube

E

 - Control Panel

F

 - Power Base

A

B

C

D

F

/./&&

"OIL

#OOK4IME

#OOK

Control Panel close-up

E

Summary of Contents for PV100

Page 1: ...CORDLESS ELECTRIC PASTA COOKER CUISEUR A PATES ELECTRONIQUE ET SANS FIL Instruction Manual Guide d utilisation PV100...

Page 2: ...the appliance for other than intended use 13 High temperatures are generated during use which could cause burns Always lift the pasta cooker by the handle 14 Do not place the base of your appliance i...

Page 3: ...n then add up to 1 5 L 6 cups of water into the Cooking Tube Next place the Interlocking Strainer on the Cooking Tube and lock it into place by turning in a clockwise direction Lastly place the Interl...

Page 4: ...5 seconds after you select the desired cooking time your Pasta Cooker will start the cooking cycle As a guideline we recommend the following cooking times for different Pasta types SHAPE TYPE COOKING...

Page 5: ...violi for 9 10 mins or to desired tenderness 3 Drain the water from the cooked Ravioli 4 For best results heat your sauce prior to adding it to the cooked Ravioli 5 Add your hot pasta sauce to your Ra...

Page 6: ...l appareil d abord puis branchez le sur une prise de courant murale Pour tous les mod les pour d brancher l appareil teignez le d abord puis d branchez le cordon d alimentation de la prise murale 12 N...

Page 7: ...eau 6 tasses dans celui ci puis mettez en place le panier verrouillable et le couvercle verrouillable en les tournant dans le sens des aiguilles d une montre afin qu ils soient bien verrouill s en pl...

Page 8: ...nt le r glage de la dur e de cuisson appropri e le cuiseur p tes d butera le cycle de cuisson titre indicatif nous vous recommandons les dur es de cuisson suivantes FORME TYPE DUR E DE CUISSON Spaghet...

Page 9: ...aire l aide d un chiffon ou d une ponge humide Ass chez le tout avec un chiffon sec 3 Nettoyez l ext rieur du tube de cuisson l aide d un chiffon ou d une ponge humide Ass chez la paroi ext rieure l a...

Page 10: ...Having Trouble Need Help Please visit www pastavision com Probl mes Besoin d Aide S V P Visitez www pastavision com...

Reviews: