Contact us for assistance: (866) 985-7877 | www.wtliving.com
5
ASSEMBLY
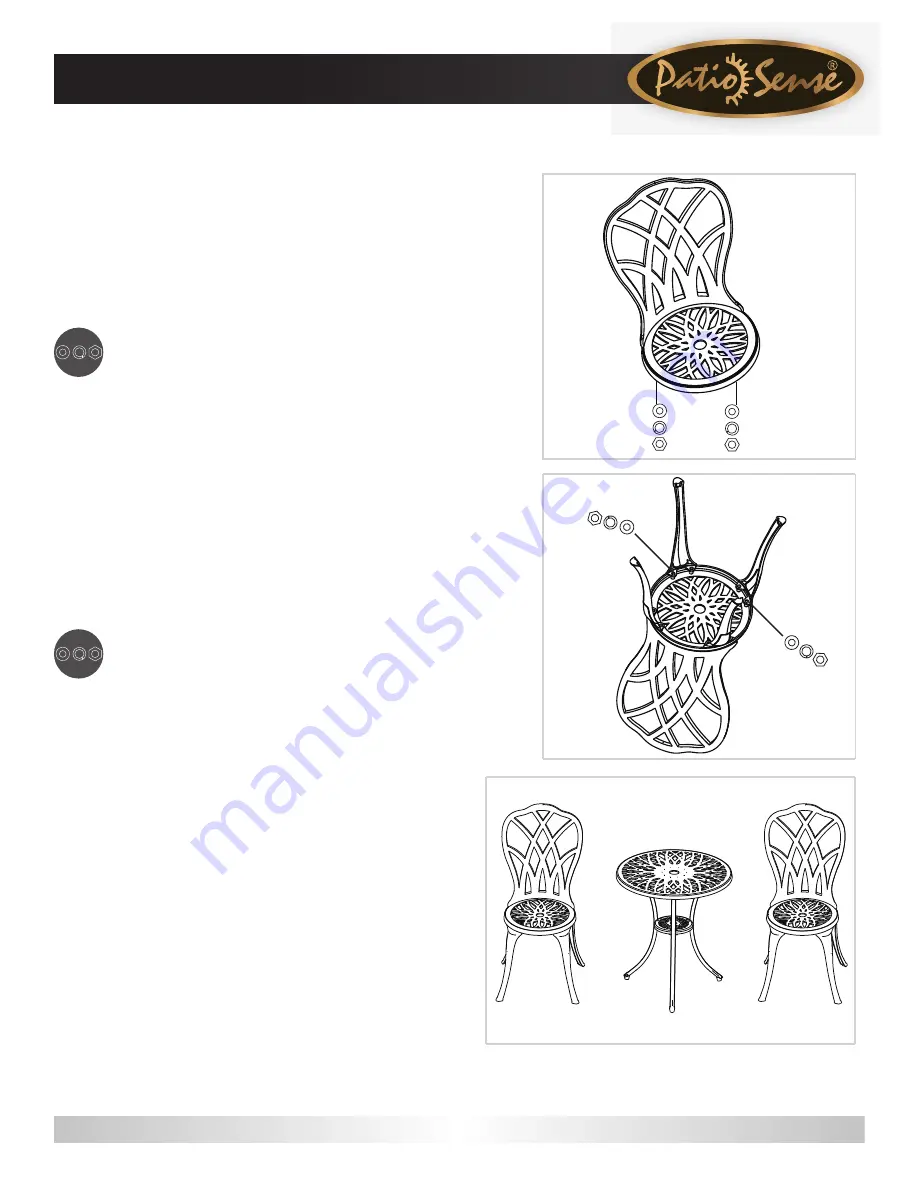
CHAIR ASSEMBLY
4
Attach the
Backrest
D
to the
Seat
E
by inserting the
pre-installed studs on the
Backrest
into the two holes
on
the
Seat
. Secure with a
Washer/Spring Washer/Nut
on
each stud. Tighten securely but do not overtighten.
Repeat to begin assembling second chair.
5
Turn the unit upside
-
down. Attach the
Chair Legs
F
to
the
Seat
E
by placing the holes in the top of each
Leg
over the
pre-installed studs on the bottom of the
Seat
. (NOTE: it is
easier to begin with the REAR legs and then attach the
FRONT legs.) Secure each
Leg
by sliding a
Washer/Spring
Washer
H
onto each stud, then tightening on a
Nut
H
.
Repeat to complete second chair.
6
Finally
,
cover all Nuts with
Plastic Caps
I
/
H
.
Tighten
ALL
nuts on table and chairs using
Wrench
K
.
H
E
D
H
E
F
4
5
6
H
D
Y
our Bistro Set is ready for use!
Hardware:
H
Washer/Spring Washer/Nut/Cap (
8
mm)
x
4
Hardware:
H
Washer/Spring Washer/Nut/Cap (
8
mm)
x
16


