background image


32 / 49 

EN 


Operation 

Check before use! 


DANGER! 
Danger of injury! 

Do not operate the machine unless you 
did not find any faults. If a part has 
become defective, make sure to replace it 
before you use the machine again. 

Check the safe condition of the machine: 
–  Check it for visual defects. 
–  Check that all parts of the machine have been 

securely fitted. 


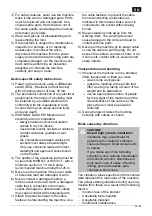
Adjusting the handlebar height 

 Page 2, Fig. 2 

–  Undo the clamping screw (10). 
–  Set the handlebar to the desired height. 
–  Retighten the clamping screw (10). 
 

Adjusting the working depth  

For the first operation of the new working drum, 
only working position 

1

 may be used. 

Settings 

2, 3, 4

 are only necessary after wear of 

the blades / aeration springs. 
Depending on the degree of wear, gradually set 
drum lower, starting from position 2. 


NOTICE! 
Risk of damage to the machine! 

The optimum working depth is obtained 
when the blades / aeration springs of the 
working drum are inserted 2-3 mm into 
the ground. Excessive working depth can 
result in overloading of the motor and 
damage. Be sure to set the working 
depth accordingly. 


 Page 2, Fig. 1 

–  Switch the machine off. 
–  Raise the machine at the front. 
–  Adjust the desired depth of the working drum 

using the rotary knob (6). 

–  Lower the machine again. 
 

Attaching the cuttings bag 

 Page 3, Fig. 4 

–  Lift the protective flap (5) and hold. 
–  Slot the collecting bag (7) into place. 
–  Ensure that the bag has slotted into place 

securely. 


Connecting the product 

 Page 4, Fig. 5 

–  Pull the extension cable through the cable grip 

(8) as illustrated, and connect it to the terminal 
on the machine's switch. 

–  Insert the extension cable coupling into the 

mains. 


De-thatching/aerating 


DANGER! 
Danger of injury! 

Before starting work, always check the 
ground and remove all objects which 
could be thrown by the machine.


DANGER! 
Danger of injury! 

Never release the operating lever while 
working. 


Scarification: 

The working (raker) drum rotates and removes the 
felt layer formed by moss, lichen and weeds and 
conveys the scarified material to the outside or into 
the collecting bag. During working the knives 
penetrate the ground and therefore ensure that the 
lawn is loosened and absorbs nutrients better. 
We recommend scarifying the lawn in spring 
(April/May) and autumn (October). 
 

Aerating: 

The working (aerator) drum rotates and combs the 
lawn or aerates the slightly mossy areas. The 
removed moss is conveyed outwards or into the 
grass catcher. During aeration the surface of the 
ground is scratched; this improves water drainage 
and facilitates the absorption of oxygen. 
We recommend aerating the lawn during the entire 
growing period as and when required. 


Note: 

The combined work cylinder combines 
both work activities together. 


 Page 4, Fig. 6 

–  Position the machine on a level lawn surface. 
–  Tilt the machine back so that both front wheels 

are free and the working roller does not touch 
the ground. 

–  Press the operating safety lock (9) and hold 

down. 

–  Pull and keep hold of the operating lever (1). 
–  Release the operating safety lock. 
–  Wait until the motor has reached its maximum 

Summary of Contents for S 1600

Page 1: ...m tohto n radia si pozorne pre tajte tento n vod na pou itie EN Electric Lawn Rake Scarifier Operating Instructions Warning Read carefully operating instructions before using this tool DE Elektrische...

Page 2: ...2 49 1 2...

Page 3: ...3 49 3 4...

Page 4: ...4 49 7 S 1600 8 S 1600 5 6 a b...

Page 5: ...zkosti stroje nach zej osoby p edev m d ti nebo zv ata kdy u ivatel po il l ky nebo l tky kter maj kodliv vliv na jeho reflexn schopnosti a pozornost 5 Pamatujte e obsluha nebo u ivatel nese odpov dn...

Page 6: ...t te se e jsou v echny pohybuj c se sou sti pln zastaven p i ka d m ponech n stroje bez dozoru p ed odstran n m p in zablokov n p ed kontrolou i t n m nebo prov d n m jak chkoliv prac na stroji b hem...

Page 7: ...ikdy neumo n te styk z suvky elektrick ho rozvodu nebo kabelu s mokrou z nou kalu nebo vlhkou tr vou spojen mezi kabely a z suvkami mus b t vodot sn Pou vejte prodlu ovac kabely s vestav n mi vodot sn...

Page 8: ...plevele za p tomnosti stoj c obsluhy na soukrom ch pozemc ch a rekrea n ch zahrad ch R zn p soben v robkem na povrch ter nu je dosahov no odli n m uspo d n m pracovn ch prvk vym niteln ho v lce a hlo...

Page 9: ...bezpe nostn obuv Pou vejte ochrann br le Pou vejte ochrann rukavice Sou sti stroje Strana 2 obr 1 1 Ovl dac p ka 2 Madlo 3 Madlo prost edn st 4 Madlo spodn st 5 Ochrann klapka 6 Oto n ovlada nastaven...

Page 10: ...jte do koncovky na vyp na i Vidlici prodlu ovac ho kabelu zapojte do elektrick z suvky Vertikutace provzdu ov n NEBEZPE Nebezpe razu P ed zah jen m pr ce v dy zkontrolujte tr vn k a odstra te v echny...

Page 11: ...n nejtvrd vrstvy ter nu a sou asn se dosahuje odd len ko en tr vy a zv en jejich po tu s v hodou zhu t n tr vn ku d ky vy mu po tu st bel tr vy Vypr zdn n sb rn ho ko e Za elem vyjmut a vypr zdn n sb...

Page 12: ...sluze Ostatn kony zvl t pak dr bu a opravy motoru nechte prov st v autorizovan m servisn m centru Pokud je po adov na v m na nap jec ho kabelu pak mus b t provedena v robcem nebo jeho z stupcem aby ne...

Page 13: ...Nama te kloubov body a oto nou pru inu na ochrann klapce Stroj ulo te na such m a dob e v tran m m st P eprava K p eprav pokud mo no pou ijte origin ln obal Servis a n hradn d ly Servis a n hradn d l...

Page 14: ...tujte servisn centrum Je pracovn v lec ohnut Kontaktujte servisn centrum Nedostate n v sledek Je tr va p li vysok P ed vertikutac pose te tr vu Je po kozen hnac emen Kontaktujte servisn centrum Je pra...

Page 15: ...ti zahrnuj typ prostoru a ostatn zdroje hluku jako jsou nap klad jin v okol provozovan stroje a prob haj c procesy Povolen hodnoty pro pracovi t se v jednotliv ch zem ch li elem t chto informac je po...

Page 16: ...nok ak sa v jeho bl zkosti nach dzaj osoby predov etk m deti alebo zvierat ak u vate po il lieky alebo l tky ktor maj kodliv vplyv na jeho reflex a pozornos 5 Pam tajte e obsluha alebo u vate nesie zo...

Page 17: ...ebo neprev ajte stroj ak je motor v chode 16 Zastavte stroj a odpojte nap jac k bel Uistite sa e v etky pohybuj ce sa s asti s plne zastaven pri opusten stroja a jeho ponechan bez dozoru pred odstr ne...

Page 18: ...ich zap janie musia by vykon van na suchu nikdy neumo nite styk elektrickej z suvky alebo k bla s mokrou z nou ml kou alebo vlhkou tr vou spojenie medzi k blami a z suvkami mus by vodotesn Pou vajte...

Page 19: ...v ase jeho uvedenia na trh Tento stroj bol navrhnut a vyroben pre prevzdu ovanie a prerez vanie tr vnikov odstra ovanie machu a plytko zakorenenej buriny za pr tomnosti stojacej obsluhy na s kromn ch...

Page 20: ...iavajte bezpe nostn pokyny 2 Nebezpe enstvo Rotuj ce no e Nepribli ujte ruky ani nohy do bl zkosti no ov Predt m ne budete opravova vykon va dr bu alebo isti stroj v dy vypnite stroj odpojte nap jac...

Page 21: ...ZORNENIE Riziko po kodenia stroja Optim lne pracovnej h bky sa dosiahne ke no e prevzdu ovacie pru iny pracovn ho valca zasahuj do p dy 2 3 mm Pr li ve k pracovn h bka m e ma za n sledok pre a enie mo...

Page 22: ...uj cich smeroch Rady pre starostlivos o tr vnik asom sa na ter ne vytvor povrchov vrstva machu a zvy kov tr vy ktor obmedzuje pr sun kysl ka a br ni prieniku vody a v ivn ch l tok a sp sobuje oslabeni...

Page 23: ...l vi obr 8 krok 4 Skontrolujte oba konce pracovn ho valca i s spr vne usaden v stroji potom pooto te istiacou p kou do zaistenej polohy a zasu te ju vi obr 8 krok 5 6 istenie a dr ba NEBEZPE ENSTVO Ne...

Page 24: ...nstvo razu Stroj ukladajte tak aby k nemu nemali pr stup a nemohli ho spusti neopr vnen osoby a mimo dosahu det Prijmite tak opatrenia ktor zabr nia zraneniu os b sp soben odstaven m strojom UPOZORNEN...

Page 25: ...e S povolen skrutkov spoje Skrutkov spoje dotiahnite Je uvolnen motor Kontaktujte servisn centrum Je pracovn valec ohnut Kontaktujte servisn centrum Nedostato n v sledok Je tr va pr li vysok Pred vert...

Page 26: ...estoru a ostatn zdroje hluku ako s napr klad in v okol prev dzkovan ho stroja a prebiehaj ce procesy Povolen hodnoty pre pracovisko sa v jednotliv ch krajin ch l ia elom t chto inform ci je pom c pou...

Page 27: ...y are not able to play with this product Cleaning and maintenance cannot be performed by children 4 Never use the machine when people especially children or pets are nearby if the operator has taken m...

Page 28: ...or working on the machine when transporting the machine after striking a foreign object Inspect the machine for any damages and make the necessary repairs before using it again if the machine begins t...

Page 29: ...to a mains socket and never touch a damaged cable that is connected to the mains socket Damaged or deteriorated cables may cause contact with energised parts 7 Attach the extension lead to the cable f...

Page 30: ...mage Any use that deviates from its intended use and is not included in these instructions is considered unauthorised use and relieves the manufacturer from his or her legal liability What are the mea...

Page 31: ...ting safety lock 10 Clamping screw What is included Instructions for use Scarifier Handle bar Handle bar middle part Handle bar bottom part 2x Collection bag Scarifier drum only S 1600 Mains plug stra...

Page 32: ...the product Page 4 Fig 5 Pull the extension cable through the cable grip 8 as illustrated and connect it to the terminal on the machine s switch Insert the extension cable coupling into the mains De t...

Page 33: ...emoval action involves the harder ground layer and at the same time separates grass roots and increases them This makes your lawn thicker with more blades of grass Emptying the collecting bag To remov...

Page 34: ...of the connection cable is required this must be carried out by the manufacturer or his representative in order to avoid safety hazards Improperly performed work may cause damage to the machine and ma...

Page 35: ...ate the joints and twist springs on the protective flap Store the machine where it is dry and well ventilated Transport If shipping use the original packaging wherever possible Service and spare parts...

Page 36: ...w the grass before de thatching Whistling noise Drive belt slipping Contact your local assistance Neobvykl zvuky ot esy vibrace Is the screws and nuts loose Tighten all loosed connections Is the motor...

Page 37: ...mission levels this cannot be used to infer whether additional safety measures are necessary or not Factors which affect the current immission levels at the workplace include the type of room other so...

Page 38: ...htigt oder erhielten von ihr Anweisungen wie das Ger t zu benutzen ist rtliche Bestimmungen k nnen das Mindestalter des Benutzers festlegen 3 Kinder sollten beaufsichtigt werden damit sie nicht mit de...

Page 39: ...nsportiert wird 10 Benutzen Sie die Maschine niemals mit besch digten Schutzeinrichtungen bzw ohne Fangkorb oder Prallblech 11 Starten Sie den Motor vorsichtig entsprechend den Anweisungen Achten Sie...

Page 40: ...ersetzt und d rfen niemals repariert werden Original Ersatzteile verwenden Nicht gleichwertige Ersatzteile k nnen die Maschine besch digen und Ihre Sicherheit gef hrden 4 Ziehen Sie feste Arbeitshand...

Page 41: ...en des Transportmittels bzw der Aufstellposition entsprechende Anzahl von Personen einsetzen 2 Sichern Sie die Maschine w hrend des Transports mit geeigneten Seilen oder Ketten Von Schwingungen ausgeh...

Page 42: ...fugte Verwendung und enthebt den Hersteller jeglicher gesetzlichen Haftung Erl uterung der in dieser Bedienungs anleitung verwendeten Symbole Hinweise und Informationen zu den Gefahren sind in dieser...

Page 43: ...g 9 Sicherheitstaster 10 Spannschraube Lieferumfang bersetzung der Original Bedienungsanleitung Vertikutierer Halteb gel Halteb gel Mittelteil Halteb gel Unterteil 2x Fangkorb Bel ftungswalze nur S 16...

Page 44: ...Abb 5 F deln Sie das Verl ngerungskabel nach der Abbildung in die Kabelhalterung 8 ein Schlie en Sie den Stecker des Verl ngerungskabels an die Steckdose an Vertikutieren L ften GEFAHR Unfallgefahr V...

Page 45: ...feuchtes Gras dar da die Arbeit auf einem zu trockenen oder durch Wasser aufgeweichten Boden das Sammeln des Materials verhindert und den Rasen besch digen kann Noch vor dem Bel ften oder Vertikutiere...

Page 46: ...itzen richtig einrasten zu lassen siehe Abb 8 Schritt 4 Beide Enden der Arbeitswalze auf richtigen Sitz berpr fen anschlie end den Sicherheits hebel in die verriegelte Stellung drehen und einstecken s...

Page 47: ...lgefahr Das Ger t au erhalb der Reichweite von unbefugten Personen und Kindern aufbewahren gesch tzt vom unbefugten Einschalten Treffen Sie Ma nahmen zur Vorbeugung von Personenverletzungen durch abge...

Page 48: ...ssen Rasen zu hoch Vor dem Vertikutieren rasenm hen Pfeifen Rutscht der Zahnriemen durch Kontaktieren Sie das Service Zentrum Au erge w hnliche Ger usche St e Vibrationen Lose Schraubverbindungen Schr...

Page 49: ...ren welche aktuelle Immissionen auf dem Arbeitsplatz beeinflussen umfassen die Raumart und sonstige L rmquellen wie beispielsweise andere in der Umgebung betriebene Maschinen und laufende Prozesse Zul...

Reviews: