EN
129
2
1
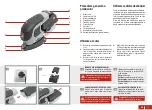
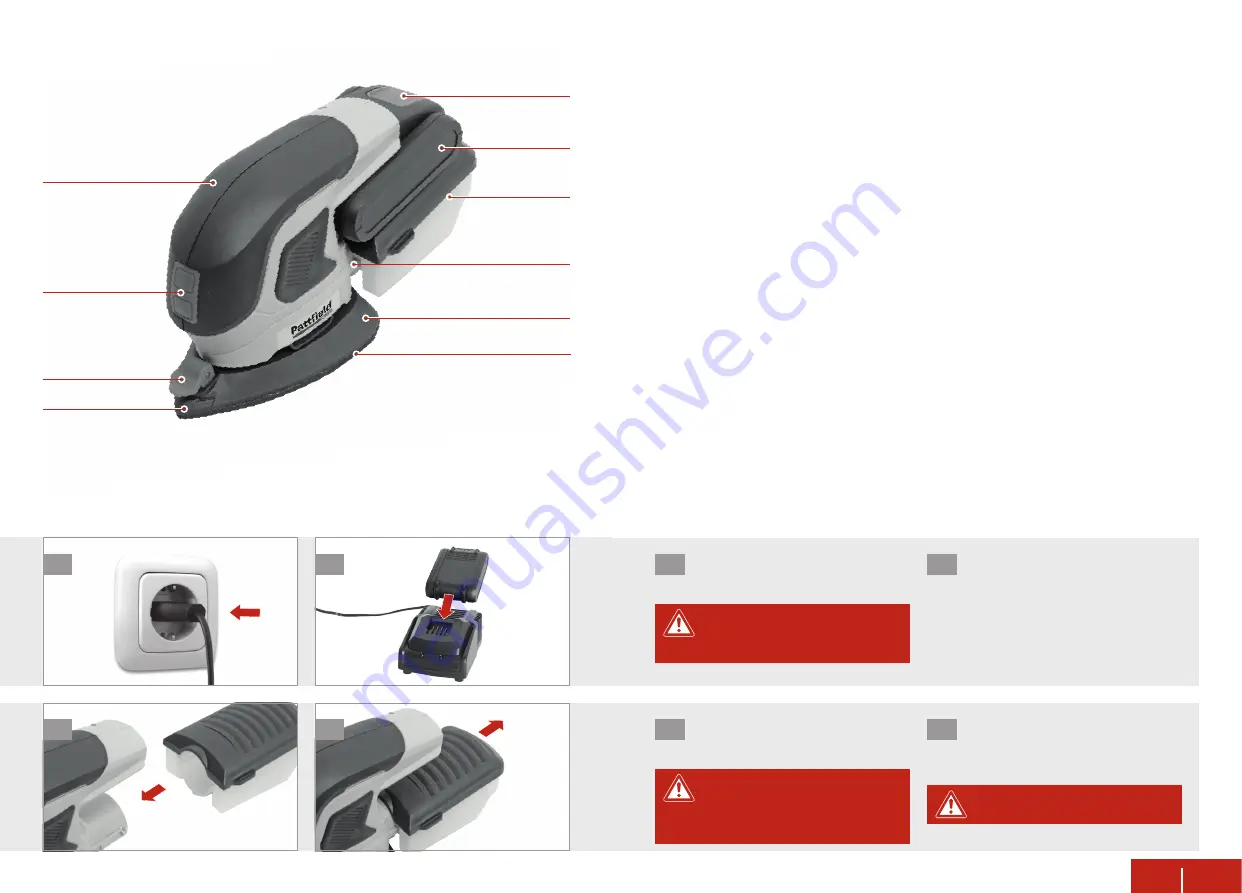
Product overview
1
Soft grip handle
2
On / Off switch
3
Locking lever
4
SDS finger pad
5
Sanding paper
6
Sanding plate
7
Dust port
8
Dust box
9
Battery (not included)
10
Battery release switch
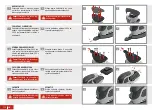
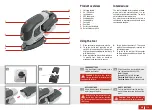
APPLY DUST BOX
Attach the dust box
8
to the dust port
7
until it snaps into place.
Never use the tool without dust col-
lection box. Dust involves hazards,
e.g. for the eyes due to particles suspended
into the air.
1
EMPTY DUST BOX
Pull the dust box
8
from the tool. Re-
move the box cover and shake out the
dust.
Caution!
Make sure the tool is
switched off and the battery removed.
2
Using the tool
1.
Make sure your workpiece can not slip.
2.
To switch on the tool, press the on/ off
switch
2
at the position
I
. Only thereafter
start working while holding the tool firmly
with both hands.
3.
Move the tool slowly over the workpiece
in parallel lines, circles or crosswise
movements and successive passes.
Intended use
The tool is intended for dry sanding of wood,
plastic, metal and coated surfaces. It is not
suitable for plaster or drywall filler. The tool is
not intended for commercial use.
Any other use or modification to the tool is
considered as improper use and could cause
considerable dangers.
Slide the battery (not included) onto
the charger and check its LED:
Red:
Charging
Green:
Battery is fully charged
Flashing Red:
Battery is defective
Flashing Green:
Battery is too hot/ cold
2
4.
Empty the dust box every 5-10 min and
replace the sanding paper regularly for
efficient operation.
5.
To switch off the tool, first lift the sander
off the workpiece and then switch off the
on / off switch
2
.
CHARGE BATTERY
Plug the charger (not included) into a
suitable wall socket.
Caution!
Only use the battery
charger specified in technical data
to charge the battery.
1
1
1
2
9
10
4
8
3
2
6
5
7

