EN
86
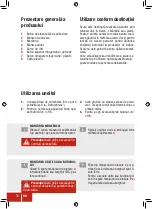
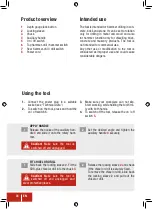
Product overview
1
Depth gauge lock button
2
Locking sleeve
3
Chuck
4
Auxiliary handle
5
On / Off switch
6
Top hammer-drill / hammer switch
7
Rear hammer-drill / drill switch
8
Power cord
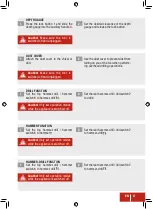
APPLY HANDLE
Release the noose of the auxiliary han-
dle
4
and slide it onto the rotary ham-
mer.
Caution!
Make sure the tool is
switched off and unplugged.
1
Set the desired angle and tighten the
auxiliary handle
4
securely.
2
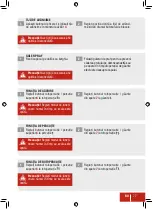
FIT CHISEL OR DRILL
Slide back the locking sleeve
2
. Fit the
SDS-plus chisel or drill into the chuck
3
.
Caution!
Make sure the tool is
switched off and unplugged and
wear protective gloves.
1
2
Release the locking sleeve
2
and check
if the chisel or drill is securely fixed.
To remove the chisel or drill, slide back
the locking sleeve
2
and pull out the
chisel or drill.
2
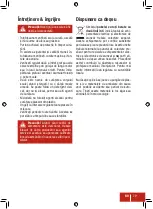
Using the tool
1.
Connect the power plug to a suitable
socket (see “Technical Data”)
2.
To switch on the tool, press and hold the
on / off switch
5
.
Intended use
The tool is intended for hammer drilling in con-
crete, brick and stone. It can be set to rotation
only for drilling in metal and wood and also
for hammer function only for chiselling brick,
concrete and masonry products. The tool is
not intended for commercial use.
Any other use or modification to the tool is
considered as improper use and could cause
considerable dangers.
3.
Make sure your workpiece can not slip.
Start working, while holding the tool firm-
ly with both hands.
4.
To switch off the tool, release the on / off
switch
5
.

