EN
128
EN
129
1
2
1
3
2
1
2
1
2
3
4
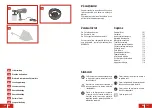
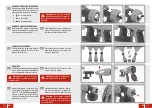
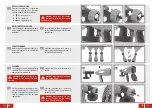
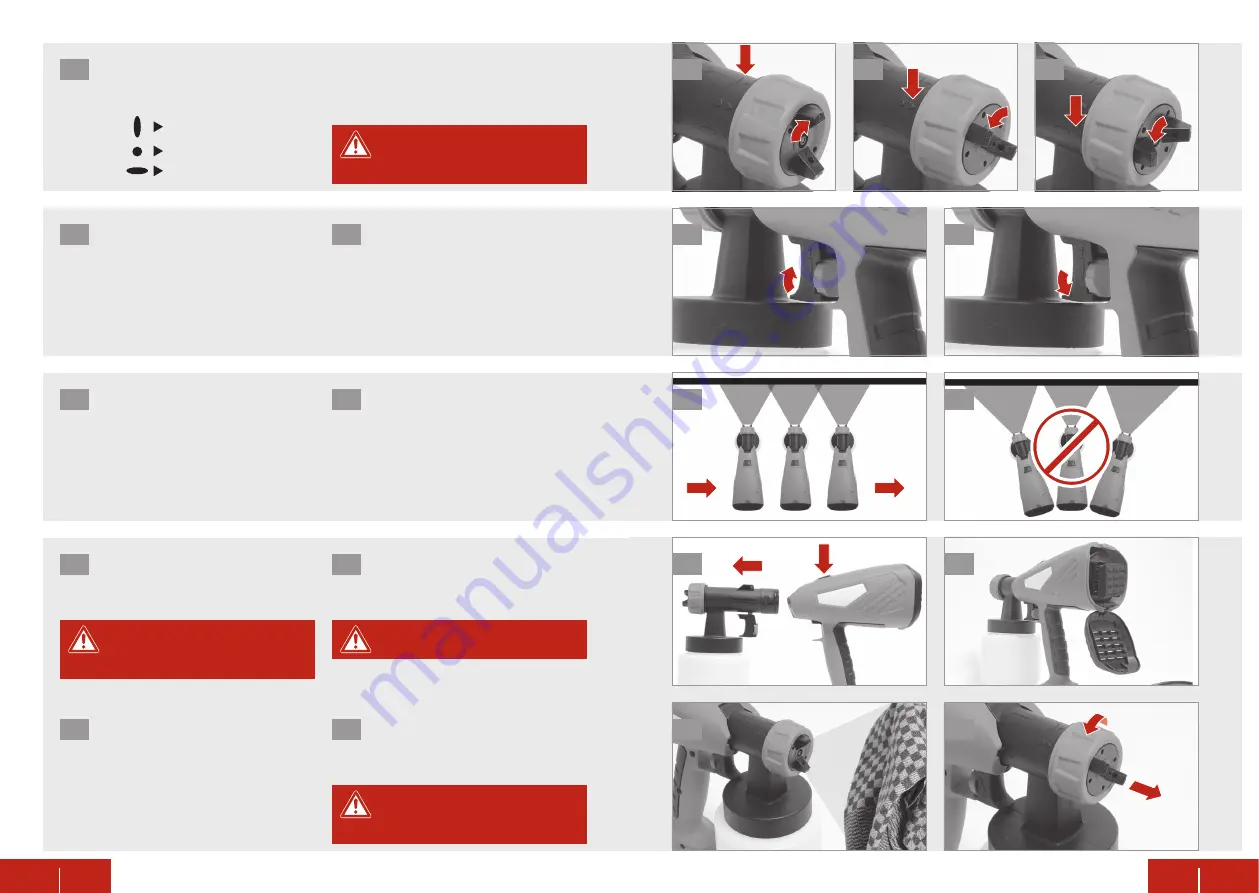
SPRAY TECHNIQUE
Hold the gun evenly and steadily at a
distance of approx. 10-30 cm from the
target object.
1
ADJUST SPRAY SETTING
Unscrew the union nut
1
slightly and
turn the air cap
2
to select the spray
settings, aligning it to the markings.
1
vertical fat jet
2
circular jet
3
horizontal fat jet
1
ADJUST MATERIAL VOLUME
Turn the material volume adjustment
8
on the trigger
5
upward for more mate-
rial output.
1
CLEANING
The spray gun can be dismounted for
cleaning. Press the unlock-button
11
and pull out the front part
4
.
Caution!
Make sure the tool is un-
plugged before dismounting and
cleaning.
1
Turn the material volume adjustment
8
on the trigger
5
downward for less ma-
terial output.
2
Unsteady movements will cause a
heavy spray fog build-up and result in
an uneven surface quality.
2
Change the air filter whenever it is
soiled.
Caution!
Never operate the spray
gun without filter!
2
Unscrew the union nut
1
, remove air
cap
2
, pull out nozzle
3
and clean with
solvent or water.
Caution!
Never immerse the rear
part of the spray gun into liquids.
Only clean with moistened cloth.
4
Fill the container
6
with water or sol-
vent (flashpoint over 55 °C). Assemble
the gun and spray the content into a
cloth or container until the emerging
liquid is clear.
3
Caution!
Never pull the trigger
guard while adjusting the air cap.
Danger of injury!

