SmartNode devices overview
20
SmartNode 5541 & 4141 Series User Manual
1
• General information
Port descriptions
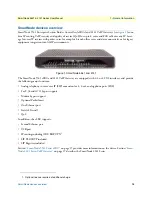
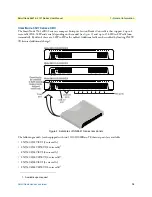
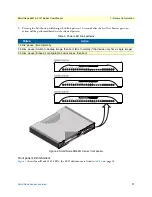
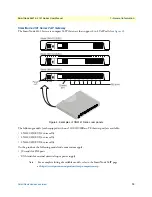
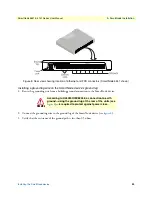
The SmartNode 4141 Series rear panel ports are described in
Reset button behavior
For those SmartNode devices that have a
Reset
button on the rear panel, its behavior is as follows:
•
To restart the unit with the current startup configuration—Press for less than 1 second and release the
Reset
button. The SmartNode will restart with the current startup configuration.
•
To restart the unit with factory default configuration—Press the
Reset
button for 5 seconds until the Power
LED starts blinking. The unit will restart with factory default configuration.
•
To restart the unit in bootloader mode (to be used only by trained SmartNode technicians)—Start with the
unit powered off. Press and hold the
Reset
button while applying power to the unit. Release the
Reset
button
when the
Power
LED starts blinking so the unit will enter bootloader mode.
Furthermore the
Reset
button may be used to perform a system software image switch as follows:
1.
Hold the
Reset
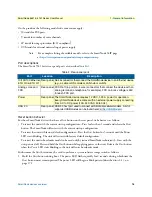
button during boot. The power LED flashes quickly for 2 seconds, during which time the
Reset
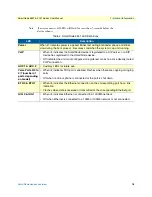
button must remain pressed The power LED will begin a blink pattern (described in
).
2.
Pressing the
Reset
button will change the blink pattern. 10 seconds after the last
Reset
button press, an
action will be performed based on the selected pattern.
Table 5. Rear panel ports
Port
Location
Description
10/100 Ethernet
ETH 0/0
Rear panel RJ-45 connector that connects the SmartNode device to an Ethernet
device (a cable or DSL modem, LAN hub or switch, for example).
Analog voice port,
FXS
Rear panel FXS RJ-11(6 position, 4 wire) connectors that connect the SmartNode
device with an analog terminal (a telephone, for example) FXO port.
EuroPOTS support (ETSI EG201 188). FXS on-hook voltage is 48V for
each FXS port.
Power
Rear panel The SmartNode device requires 12 VDC, 1.25 A power for operation.
Every SmartNode device comes with an external power supply converting
from AC to DC power (100–240 VAC, 50/60 Hz).
Table 6. Power LED blink patterns
Pattern
Action
1 blink, pause
Boot normally
2 blinks, pause Switch to backup image, then boot (Boot normally if the device only has a single image)
3 blinks, pause Erase all configuration and licenses, then boot

