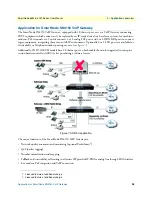
Connecting the SN4150 to a laptop PC
42
SmartNode 5550 & 4150 Series User Manual
4
• Initial Configuration
172.16.1.99(if-ip)[WAN]#ping <IP Address of the host>
Note
If the WAN address is
not
set to DHCP, to ping a device outside your local
LAN you must first configure the default gateway. (For information on con-
figuring the default gateway, refer to section “Set IP addresses” in the Trinity
Software Configuration Guide.)
Note
IP Routing is disabled on SN4150/2ETH models. See Software license
options to enable it.
Note
Connecting both Ethernet ports to the same switch will only work if the
switch has separate ARP tables for each connection.
“Loading the Configuration (optional)”
Connecting the SN4150 to a laptop PC
First, the SmartNode device must be connected to the main power supply with the power cable. Wait until the
Power
LED stops blinking and stays lit constantly. Now the SmartNode device is ready.
Note
The SmartNode device has a fixed IP and a DHCP client setup to simplify
configuration. The Ethernet port is equipped with Auto-MDX so you can
use a straight-through cable for host or hub/switch connection.
There are two options for configuring the SmartNode device
:
•
The SmartNode device is connected to a laptop PC (see
) that is configured with a fixed IP in the
same range as the SmartNode device’s IP address (for instance: PC’s IP address; 192.168.1.10; mask:
255.255.255.0).
Figure 13. Connecting the SmartNode to a laptop PC
•
The SmartNode device is connected to a local area network (LAN) that has a DHCP server running which
assigns an IP address to the SmartNode device (see
, the SmartNode
device’s IP can be determined.
The interconnecting cables shall be acceptable for external use
and shall be rated for the proper application with respect to volt-
age, current, anticipated temperature, flammability, and
mechanical serviceability.
CAUTION


