19.
20.
21.
22.
23.
24.
25.
26.
27.
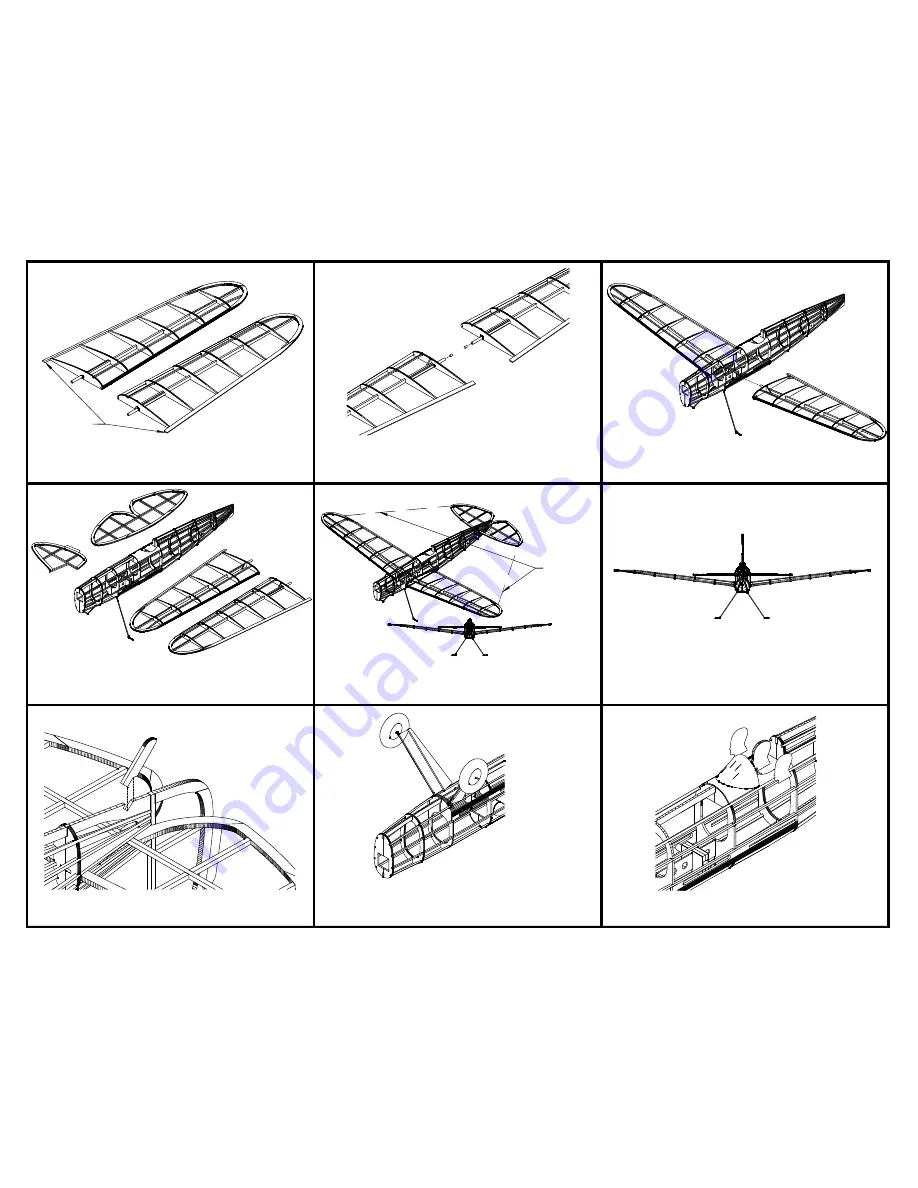
Remove the wing panels from the plan when the glue is dry. Shape
the LE, TE, and tips. Do not sand the TE extensions beyond rib A.
They ride in the wing plate slot and should remain rectangular.
A .1" x 1/8" round magnet is glued in center section end of each
wing panel aluminum tube. Orient the magnets so the wing panels
will attract each other. The tubes will have to drilled out for the
mgnets.
Check the fit of each wing panel in the wing joiner and the trailing
edge slots in the fuselage. Make any necessary adjustments.
Cover the wings, tail surfaces, and fusealge with tissue. Cut the
fuselage tissue away from the openings in the wing plates. This
illustration and subsequent illustrations will not show the tissue
covering.
Insert the wings into the wing joiner. Slide the stab into the stab
slot. Check to be sure the stab is square with the wings when
viewed from the rear. Adjust the stab slot if necessary. When the
alignment is correct, glue the stab in place.
Glue the fin to the fuselage. When viewed from the rear, make sure
the fin is vertical.
Glue the tail skid into the slot at the rear of the bottom fuselage keel
piece B-4.
Install the wheels. The original plan called out 1 1/2" diameter
wheels. Using 1" diameter wheels will be lighter and less drag. Also
install the landing gear leg covers. Wrap tissue around the covers
and leg wire to add strength.
Glue the pilot profiles to each side of the 1/16" balsa profile pilot
head. Glue the pilot head to the pilot platform. Also glue the
windshield to the fuselage using an adhesive like Forumula 560.
Equal
Lengths
DO NOT SAND
THE TE EXTENSIONS


