44
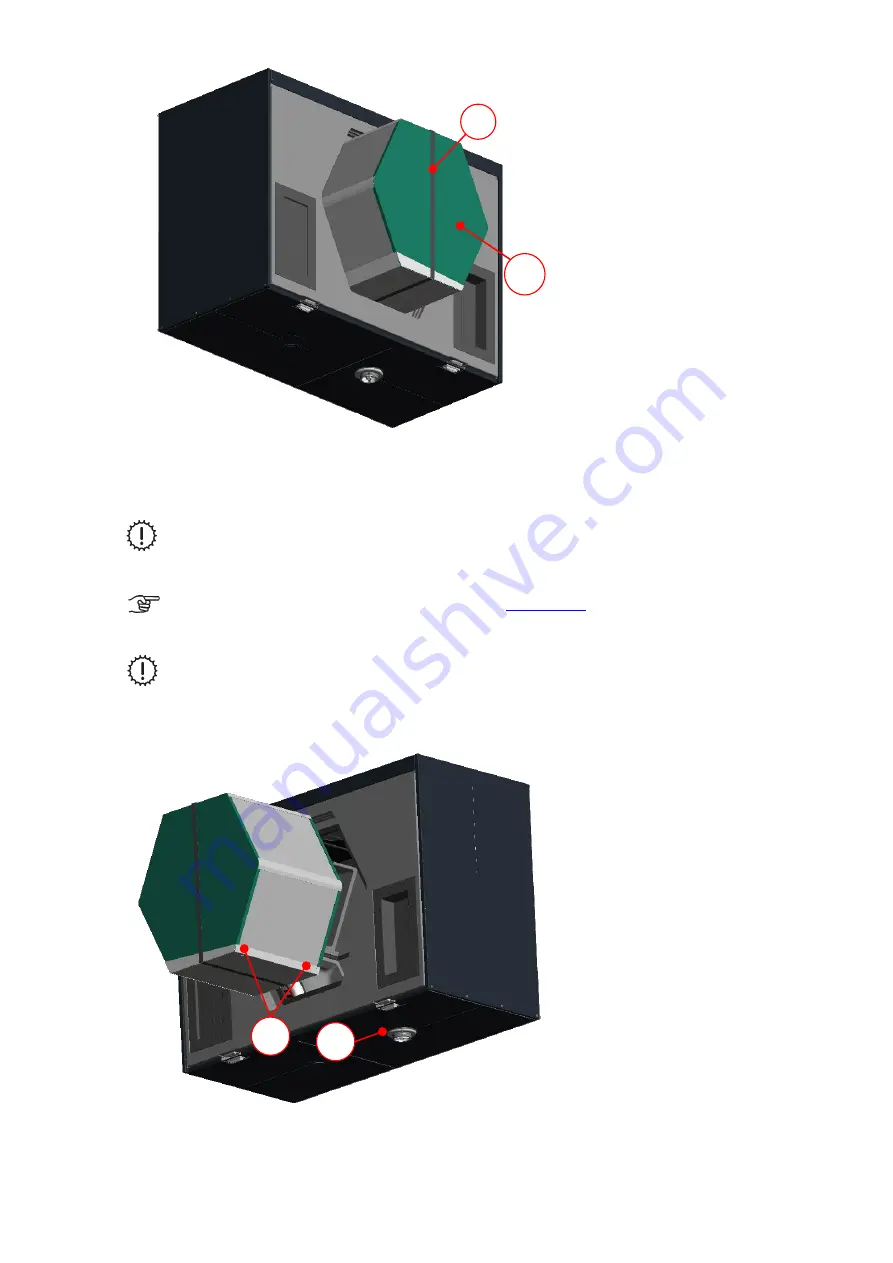
Fig. 41: Removing the heat exchanger
7. Clean the heat exchanger. In doing so, proceed as follows:
•
Dip the heat exchanger several times in warm water (max. 40 °C).
•
Then rinse off the heat exchanger thoroughly with warm tap water (max. 40 °C).
Do not use aggressive or dissolving cleaning agents!
•
In order to dry it, position the heat exchanger such that residual water can run out of the openings.
•
Leave the heat exchanger to dry fully before reinstalling it.
Instructions for proper disinfection can be found at
8. Install the heat exchanger.
Take care when installing the heat exchanger!
On the bottom side of the heat exchanger there is a condensate tray with two recesses
H
. When inserting the
heat exchanger into the unit make sure that the two recesses of the condensate tray face the condensate
drain
I
!
Fig. 42: Position of condensate tray when sliding in the heat exchanger
9. Following the inspection, install all parts in the reverse order.
10. Reconnect the unit to the mains.
F
G
H
I
Summary of Contents for FOCUS 200 Base
Page 1: ...Translation of the original instruction manual Heat Recovery Unit FOCUS F 200...
Page 49: ...49 Dimensions Fig 43 Dimensional drawing FOCUS...
Page 50: ...50 FOCUS circuit plan Fig 44 Terminal assignment circuit diagram FOCUS...
Page 51: ...51 Master Controller terminal assignment Fig 45 Master Controller terminal assignment...


