background image

                                                                                                         3  


Assembly Instructions: 


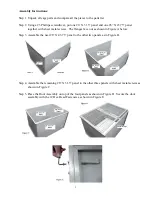
Step 1. Unpack all cage parts and compare all the pieces to the parts list. 


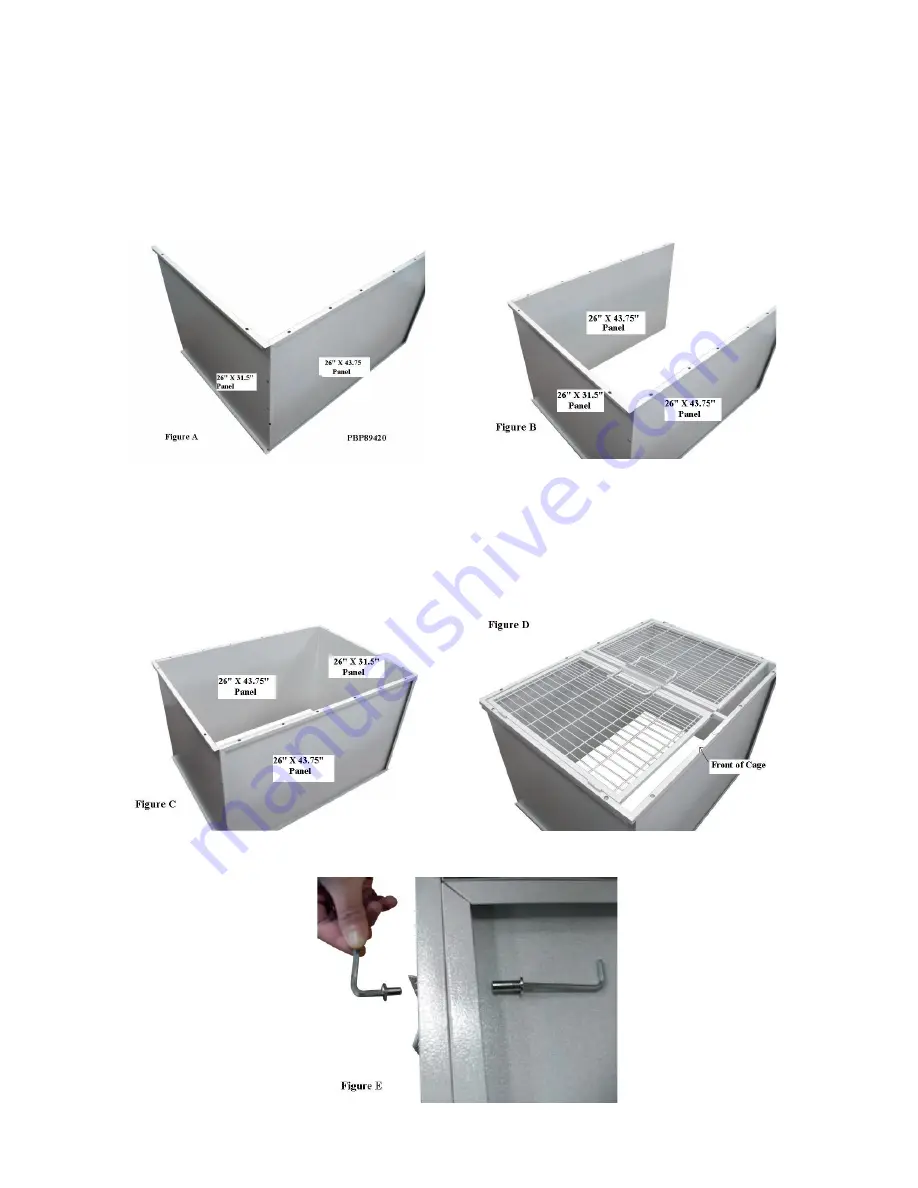
Step 2. Using a #3 Phillips screwdriver, put one 26” X 31.5” panel and one 26” X 43.75” panel 


together with sheet metal screws.  The flanges face out as shown in Figure A below. 


Step 3. Assemble the next 26” X 43.75” panel to the other two panels as in Figure B. 


Step 4. Assemble the remaining 26” X 31.5” panel to the other three panels with sheet metal screws as 


shown in Figure C. 


Step 5. Place the Door Assembly on top of the four panels as shown in Figure D.  Secure the door    


assembly with the 12 Hex Head Fasteners as shown in Figure E.  


Summary of Contents for PBP89440C

Page 1: ...Paw Brothers Professional Hybrid Cage PBP89440C Assembly Instructions Copyright 2013 G G Distribution Inc All Rights Reserved ...

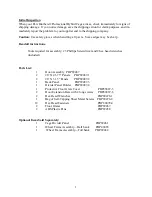
Page 2: ...Screwdriver and 2 hex head wrenches included Parts List 1 Door Assembly PBP89487 2 26 X 43 75 Panels PBP89487 1 2 26 X 31 5 Panels PBP89487 2 1 Back Panel PBP89487 3 1 Divider Panel Holder PBP89487 4 1 Protective Floor Grate Cover PBP89487 5 2 Door Extension Bars with 4 long screws PBP89487 6 2 Hex Head Wrenches PBP89478 1 1 Bag of Self Tapping Sheet Metal Screws PBP89478 2 12 Hex Head Fasteners P...

Page 3: ...al screws The flanges face out as shown in Figure A below Step 3 Assemble the next 26 X 43 75 panel to the other two panels as in Figure B Step 4 Assemble the remaining 26 X 31 5 panel to the other three panels with sheet metal screws as shown in Figure C Step 5 Place the Door Assembly on top of the four panels as shown in Figure D Secure the door assembly with the 12 Hex Head Fasteners as shown i...

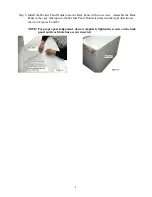
Page 4: ...two screws Assemble the Back Panel to the cage making sure the Divider Panel Holder is placed in the right direction as shown in Figures F and F1 NOTE For proper panel alignment do not completely tighten the screws on the back panel until each hole has a screw inserted ...

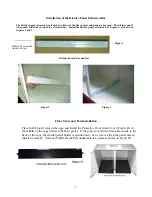
Page 5: ...remove the back panel and re install it correctly Slide each ABS Plastic Pan underneath the grates as shown in Figure H1 Installation of the Divider Panel Extension Bar The divider panel extension bar is needed whenever the floor grates and pans are not used The divider panel when used will slide on top of the extension bar Install the divider panel extension bar Figure 1 as shown in Figures 2 and...

Reviews: