PawPail.com
3
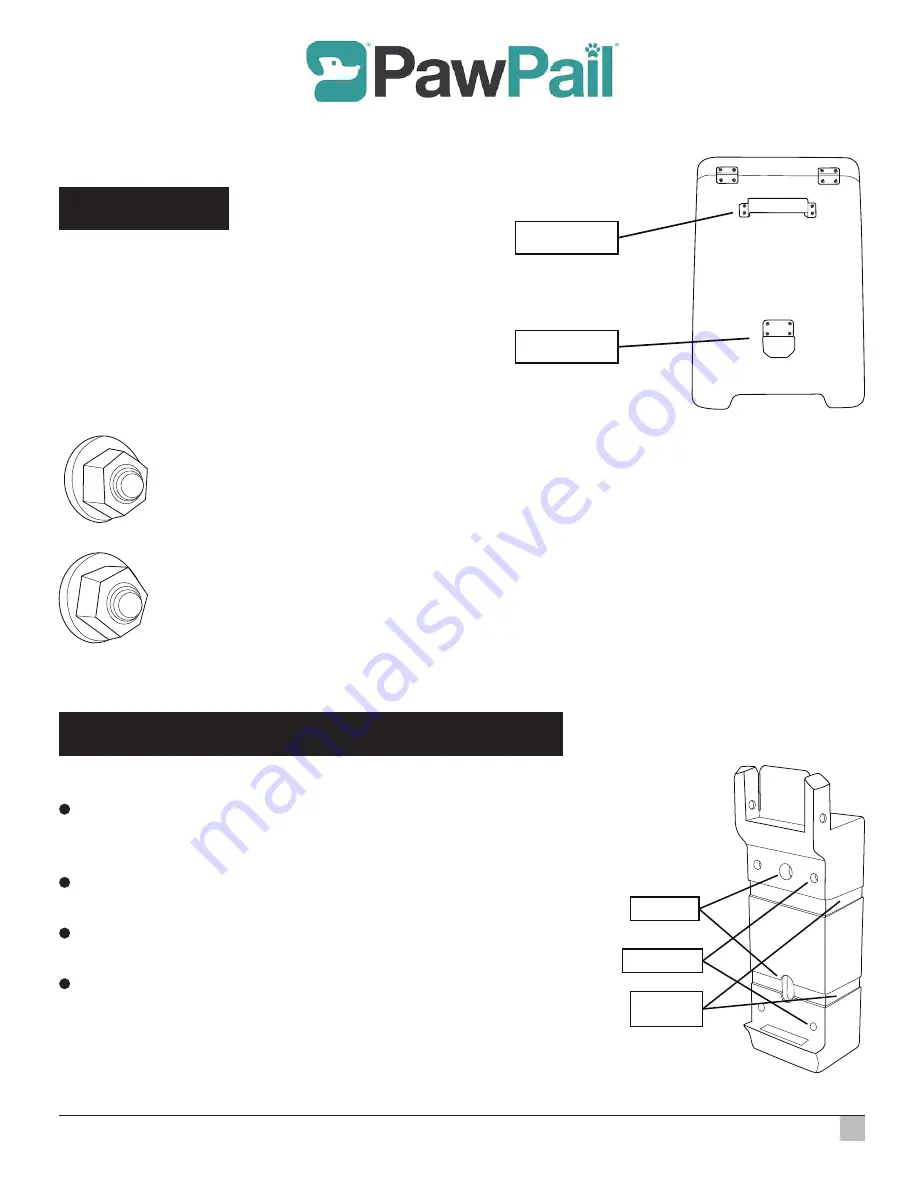
Align the upper and lower mounting hardware with
the pilot holes as shown and insert screws using
the screw driver.
Next, flip your PawPail over, open it and secure the hex nuts to each screw
location inside the container using either pliers, a wrench or an M3 (5.5mm)
hex nut driver. It may be necessary to secure the screw head using the screw
driver to prevent it from turning.
ASSEMBLY
Upper mounting
hardware
Lower mounting
hardware
AFFIXING THE MOUNTING BRACKET
Select a stable surface in a well-ventilated area to affix the
Mounting Bracket. The surface must be capable of sup-
porting at least 25 lbs. of loading.
The Mounting Bracket can be secured with screws,
bolts or bands/straps (not included).
The minimum screw/bolt length to be used is 3" although
4"+ is recommended.
The 2 Bolt Holes can accept bolts up to 21/64" diameter
and washers up to M8 or 1/4". 1/4" diameter bolts and
washers are sufficient for most applications.
Bolt holes
Screw holes
Band/strap
channels


