Chapter 6
How to Set the POS terminal
NOTE: This document is CONFIDENTIAL and must be used exclusively for the operation of PAX programs. It may not be
duplicated, published, or disclosed without PAX prior written permission.
108
Current Report, Continued
S
TEP
A
CTION
D
ISPLAY
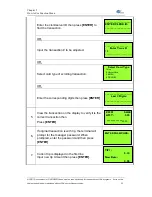
3.
Scroll through the EDC Type options then press
[ENTER]
to select.
OR
Press the number corresponding with your
selection.
4.
Scroll through the Card Type options then press
[ENTER]
to select.
OR
Press the number corresponding with your
selection.
5.
Scroll through the options then press
[ENTER]
to
select.
OR
Press the number corresponding with your
selection.
6.
If a specific clerk/server is selected, terminal
prompts for clerk/server ID. Otherwise, skip to Step
5.
Enter clerk/server ID then press
[ENTER].
7.
If clerk/server mode is not enabled, By
Clerk/Server# will not be a choice.
Scroll through Sorting Options then press
[ENTER]
to select.
OR
Press the number corresponding with your
selection.
8.
Transaction types include All, Sale, Forced, Return,
Void Sale, Void return and Void Forced.
Scroll through the Transaction Type options then
press
[ENTER]
to select.
OR
Press the number corresponding with your
selection.
SELECT PMT TYPE:
1. ALL
2. CREDIT
3. DEBIT
4. EBT
ENTER CARD TYPE:
1. ALL
2. Visa
3. MasterCard
4. AMEX
SORT METHOD:
1. By Trans #
2. By Card Type
(3. By Srvr/Clerk#)
SELECT TRAN. TYPE
1. ALL
2. SALE
3. FORCED
4. RETURN
SELECT CLERK
1. ALL
2. Spec. Servr/Clerk
___________________
ENTER CLERK ID:
1
___________________


