7.
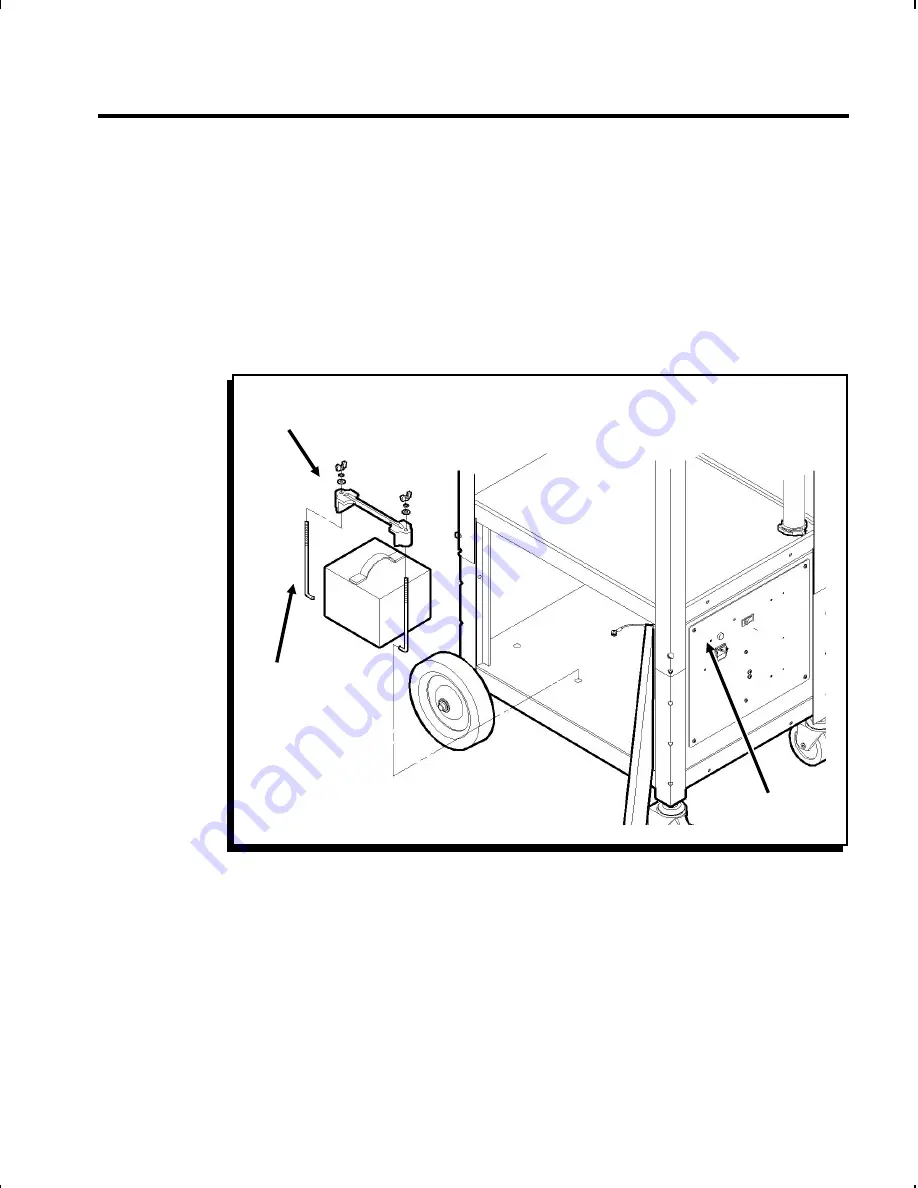
Position the charger between the retainer rods so the back
of the charger rests against the metal L-bracket. The
status lights on the front of the charger should face out.
(Figure 15.)
8.
Place the rubber bracket across the top of the charger.
Use 1/4"-20 wing nuts, washers, and lockwashers to
attach the retainer rods to the rubber bracket as shown.
Tighten both wing nuts equally to secure the charger.
(Figure 15.)
9.
Plug the charger’s power cord into the power outlet on the
inside wall of the cabinet.
Figure 15
Retainer
Rod
External Power
Socket
Rubber
Bracket
Chapter 1. Assembling the Station
1-21
Summary of Contents for Mobile Printing Station Monarch 9476
Page 54: ...9476 Assembly and Setup Instructions 3 4 ...
Page 60: ...9476 Assembly and Setup Instructions 4 6 ...
Page 63: ......


