background image

PAGE 2

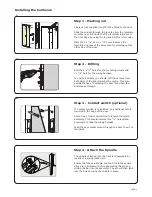
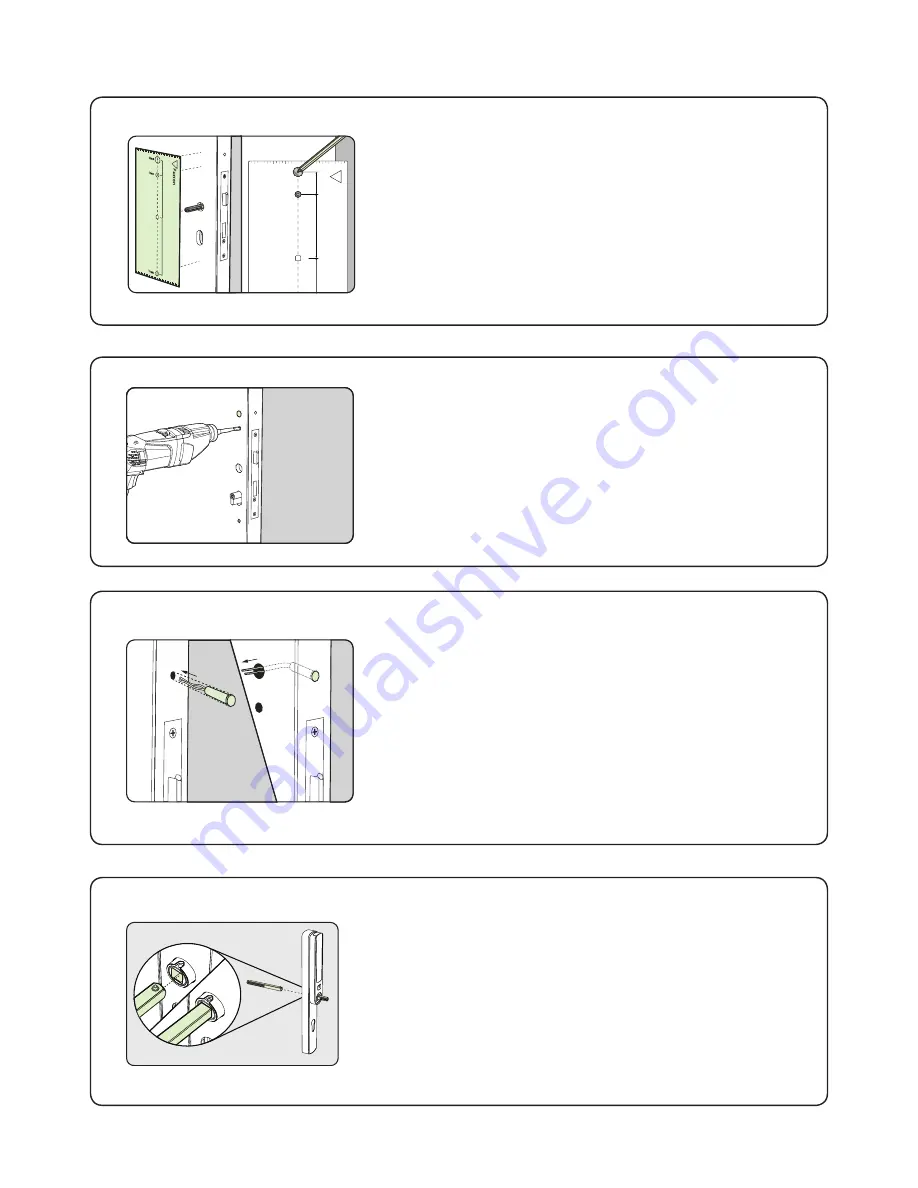
The lock (not supplied) must first be fitted to the door.

Slide the spindle through the lock to allow the template 

to locate over it. Ensure that the template is square to 

the door edge by using the top and bottom ruler scales.

Mark the 2 x 

3

/

8

" and 1 x 

5

/

8

" holes. Remove the 

template and repeat the procedure for marking out the 

other side of the door.

Installing the hardware 

Step 1 - Marking out

Step 2 - Drilling

Drill the 2 x 

3

/

8

" holes for the mounting screws and 

1 x 

5

/

8

" hole for the wiring harness.

To ensure accuracy you should drill these holes from 

both sides of the door towards the centre. This also 

avoids the risk of damaging the door face when the 

drill breaks through.

Step 3 - Contact switch (optional)

If a contact switch is to be fitted, an additional hole is 

required in the edge of the door.

Drill a hole of the required size to receive the switch 
assembly. This should intersect the 

5

/

8

" hole drilled 

previously to take the wiring harness.

Feed the door contact wires through the door to exit on 

the inside.

Ø 16 

37

105

Ø 10

Pax

ton

70

60

50

40

30

10

5

5

15

15

0

20

25

25

35

35

45

55

65

75

45

55

65

75

10

20

30

40

60

70

50

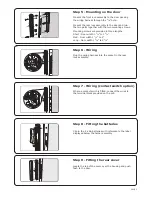
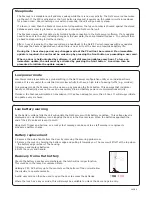
The spindle is locked into the front lock assembly by 

means of a spring loaded pin.

Ensure that the spindle pin and the hole in the square 

drive are in alignment before depressing the pin and 

sliding the bar into the assembly. The pin will then latch 

into the hole securing the spindle in place.

Step 4 - Attach the Spindle

Summary of Contents for Net2 PaxLock

Page 1: ... com Net2Air Site Surveyor 690 200 US This access control unit uses wireless communication It is recommended that a Net2Air site surveyor is used to determine the best position for the bridge and control units This wireless unit requires a Net2Air bridge to communicate with the server PC Paxton 1 2 3 4 5 6 7 8 9 AA AA 1 Front Lock Assembly 2 Rear Lock Assembly 3 Door Handle x 2 4 Mounting screw 1 ...

Page 2: ...of damaging the door face when the drill breaks through Step 3 Contact switch optional If a contact switch is to be fitted an additional hole is required in the edge of the door Drill a hole of the required size to receive the switch assembly This should intersect the 5 8 hole drilled previously to take the wiring harness Feed the door contact wires through the door to exit on the inside Ø 16 37 1...

Page 3: ... into the socket in the rear lock assembly Locate the top of the cover over the housing and push flush to the door Clip in the 4 x AA batteries with reference to the label displayed below the holder assembly Step 8 Fitting the batteries Where a contact swich is fitted connect the wires to the terminal block provided on the pcb Step 7 Wiring contact switch option Mounting screws are provided in thr...

Page 4: ...r and waits for a response from Net2 If more than one bridge replies the unit checks the signal strength and selects the strongest bridge to communicate with The Net2 software confirms that the token number is in the database and registers the PaxLock bridge binding The LED s will go out when the process has finished The software must be in commissioning mode which is the default setting If this h...

Page 5: ... handle is engaged An invalid user card has been presented No access granted LED indications Green flash The unit is configuring Please wait The access control unit connects to the Net2 software running on the PC using Paxton Net2Air proprietary wireless technology A Net2Air bridge enables communication from the Net2 software to the Paxton wireless products Radio signals do not always behave as yo...

Page 6: ... to the Net2 PC which responds with any updates This keeps the PaxLock updated even when there is no activity at the door and maximises battery life Sleep mode As the battery voltage falls the unit will update the Net2 server with its battery condition This voltage level is displayed as a colored battery icon alongside the door in the Doors screen When the batteries approach the end of their life ...

Page 7: ...Dimensions Features External use Min Width Height Max Depth Min Max Access Levels Time Zones Door open time ACU s per Net2Air bridge Recommended Events stored in ACU with no server connection Number of Cards Specifications Yes Net2Air bridge data lines per system Net2Air wireless range to ACU The declaration of conformity is available on request Contact details are provided at http paxton info 596...

Reviews: