background image

1

PaxLock Mortise - Installation 
and Commissioning Guide

Overview

Checks to make prior to installation

Through door holes

When installing a PaxLock Mortise it is important to 
ensure the environment the PaxLock Mortise is to 
be installed in is fit for purpose.

This application note covers the preparation that 
should be carried out before, during and after 
installation to ensure the longevity of the Net2
PaxLock Mortise as well as correct installation.
This application note also covers a few common 
problems which may impact the performance and 
quality of the PaxLock Mortise.

Before installing the PaxLock Mortise onto the door it is important to check that the door, frame and any 
relevant door furniture are in good working order. This is important to ensure both the longevity and 
smooth operation of the PaxLock Mortise once installed.

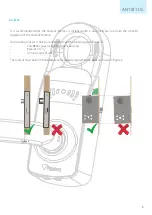
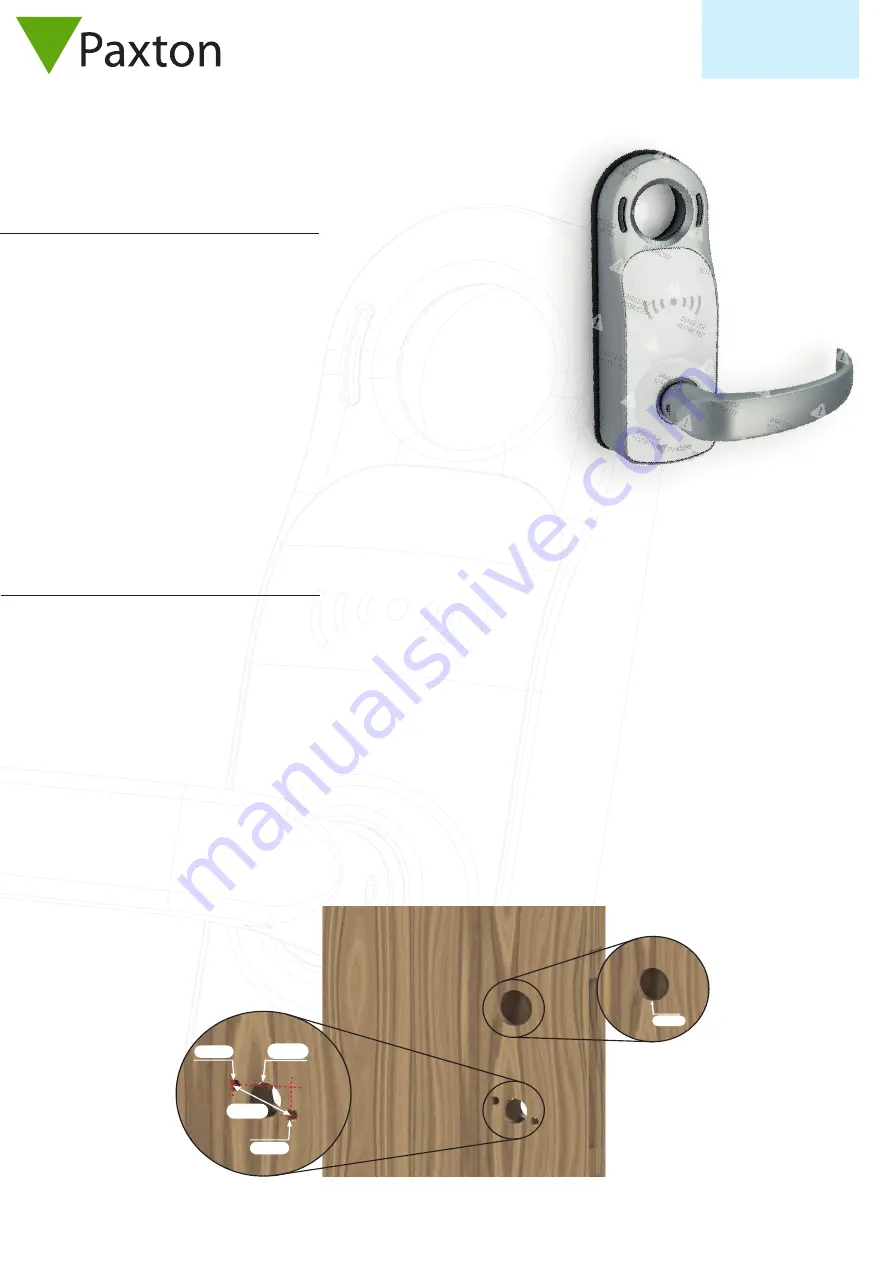
The PaxLock Mortise has been designed to work with the Yale 8800 series lockset as shown in Figure 1.

The through door holes must be 5/16" diameter and the central follower must have at least 15/16" 
clearance around it.

Figure 1 

AN1181-US

Net2

015/16"

05/16"

1-21/32"

05/16"

013/8"

Summary of Contents for PaxLock Mortise

Page 1: ...s application note also covers a few common problems which may impact the performance and quality of the PaxLock Mortise Before installing the PaxLock Mortise onto the door it is important to check that the door frame and any relevant door furniture are in good working order This is important to ensure both the longevity and smooth operation of the PaxLock Mortise once installed The PaxLock Mortis...

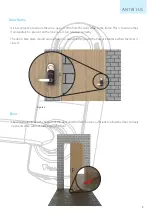
Page 2: ...nsure the smooth operation of the PaxLock Mortise If an existing lock set is being used it must meet the following specifications Yale 8800 series lockset for American doors Backset of 2 Turning angle of 45 The lockset must be both horizontally and vertically aligned to the door as shown in figure 2 Figure 2 ...

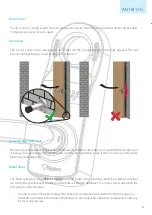
Page 3: ... an deadlatch is present on the lock case it can function correctly The door strike plate should also be 5 8 in to avoid clashing with the PaxLock Mortise when the door is closed Figure 3 Floor The distance between the bottom of the door and the floor must be sufficient to allow the door to freely open and close without rubbing on the floor ...

Page 4: ...ions outlined on the PaxLock Mortise datasheet To ensure correct operation the following must be checked If using in online mode the bridge may have to be positioned well within the 50ft of range as a metal door will reduce the range of the bridge To ensure reliable operation standalone mode may be more appropriate Door Closer If a door closer is being used it must be adjusted to ensure the door c...

Page 5: ...e site is suitable for the PaxLock Mortise you will need to ensure you have the right information to order the correct products There are 4 sales codes to chose from for PaxLock Mortise You ll need to know if you prefer the Galaxy or Eclipse handle as well as if you would like the black or white fascia The supplied template paxton info 3586 should be used to check that the holes in the door are in...

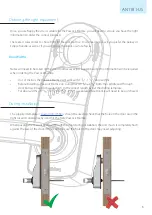
Page 6: ...Failure to do this can in some cases can cause lock case issues or compromise the security of the door Once the PaxLock Mortise has been installed there are several checks that can be made to ensure the PaxLock Mortise has been installed and is functioning correctly When the PaxLock Mortise is first powered up it will remain in an unlocked state This will give you the chance to check the following...

Page 7: ...his may be because the door is too narrow for the bolts that have been used Refer to the template for the correct bolt and spindles sizes for each door thickness It is important the grub screws on both handles are fully tightened to remove any free play Make sure the secure side handle assembly is installed This is required for the PaxLock Mortise to function The door is hitting the wall when open...

Reviews: