Ⅶ
Ⅶ
Ⅶ
Ⅶ
. LCD DISPLAY DESCRIPTION
Un
Ov
Un
Ov
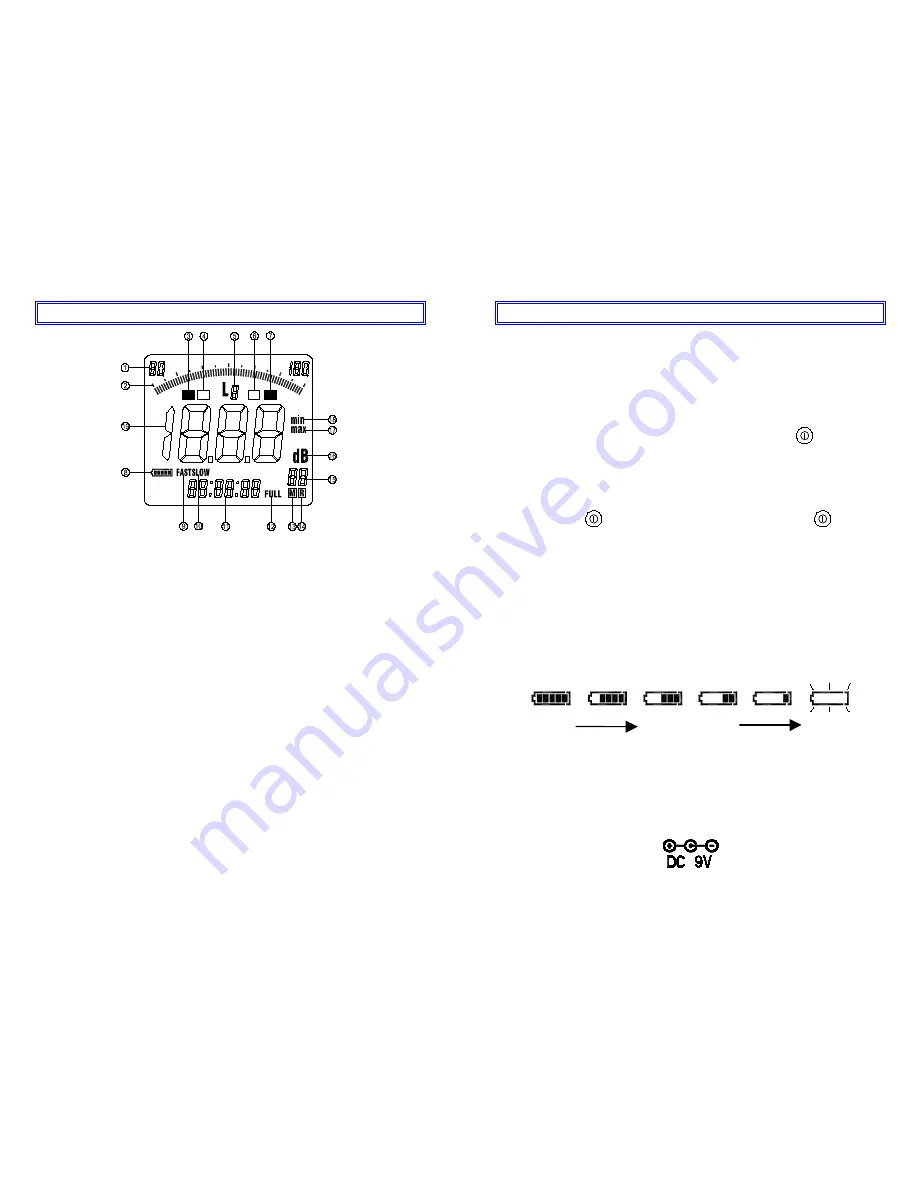
1. Sound level range indicator (6 ranges).
2. Bar graph.
3. Under-range indicator.
4. Under-range indicator for processed value.
5. Frequency weighting indicator.
6. Over-range indicator for processed value.
7. Over-range indicator.
8. Battery capacity indicator.
9. Fast time weighting indicator.
10. Slow time weighting indicator.
11. Elapsed time indicator (max. 100hours).
12. Full data memory indicator.
13. Data memory indicator.
14. Data read indicator.
15. Memory address display (max. 99 sets).
16. Sound level reading.
17. Maximum sound level reading.
18. Minimum sound level reading.
19. Sound pressure level reading.
-8-
Ⅷ
Ⅷ
Ⅷ
Ⅷ
. PREPARATION
Power Supply
The meter can be powered by one 9V battery or by the
specified optional AC adaptor (DC 9V).
Before inserting or replacing the battery and before
connecting the AC adaptor, be sure to turn off the meter.
1. Battery Loading
Before replace the batteries, must press
key turn off
the meter.
Remove the cover of the battery compartment.
Insert the new 9V battery.
Replace the battery cover.
Press
key turn on the meter then press
key turn
off the meter.
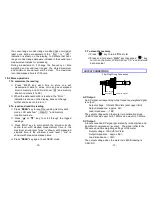
2. Battery capacity indicator
When use battery operating the meter, periodically check
this indicator to determine the remaining battery capacity.
The number of segments decreases as the battery are
used up. When the display starts to flash, correct
measurement is no longer possible. Replace the battery
with a new one. The indicator is also displayed while the
meter is powered from the AC adaptor.
Battery Battery partly Flashing
good depleted replace battery
3. Use AC adaptor
Insert the 3.5mm
φ
plug of the AC adaptor into the DC 9V
jack on the side panel. When the AC adaptor is
connected, the unit will be powered from the adaptor, also
when battery is inserted, the AC adaptor has priority.
-9-


