Manual
11
4
– Back
You now have the opportunity to change the interval in line with your requirements.
Select the suitable interval by means of the related number and co
nfirm with “ENTER”. When the settings
are finished, you will return to the main menu.
Note
: The value in brackets is the recording interval which is currently set.
Note
: You get the best measurement result when the recording interval is 1 or 10 minutes.
5.2.2.5 Anemometer setup
When you are in the main menu, press “2” and “ENTER” to enter the menu for setting the wind sensors.
5.2.2.5.1
Setup of standard wind sensor
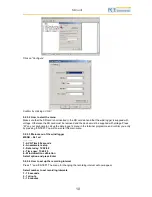
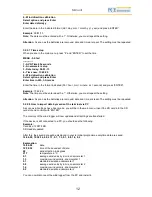
After selecting the menu, the following will appear on your PC screen:
ANEMOMETER A1 = LE-Basic
Select type:
------------
Anemometer LE-Vortex > 1
Anemometer LE-Pro > 2
Anemometer PCE-KWG > 3
Anemometer Raw Hz > 4
Anemometer custom > 5
Exit >6
Now select the wind sensor PCE-
KWG. To do so, press “3” and confirm your entry with “ENTER”.
Note
: “ANEMOMETER A1” indicates which anemometer has been selected.
5.2.2.5.2
Setup of own wind sensor
In case you use another wind sensor or other sensors (such as a revolution sensor, …), select “5” and
press “ENTER” in order to set the conversion factor of the frequency into the desired unit:
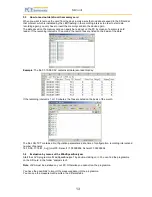
The conversion factor is calculated as follows:
Wind sensors:
Other sensors:
Confirm the value with “ENTER”. The same menu will appear for the second sensor.
5.2.2.6 Date setup
Press “3” and “ENTER” to set the date:
MENU - 5.4.1sd
------------
1 - AVG Time 60 seconds
2 - Anemometer setup
3 - Date today: 09-01-13
4 - Time now: 13:49:25

