background image

Manual 


System description 

4.1 

Installation of hardware 

4.1.1 

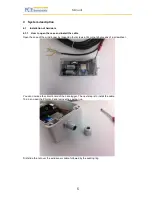
How to open the case and install the cable 

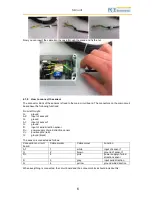
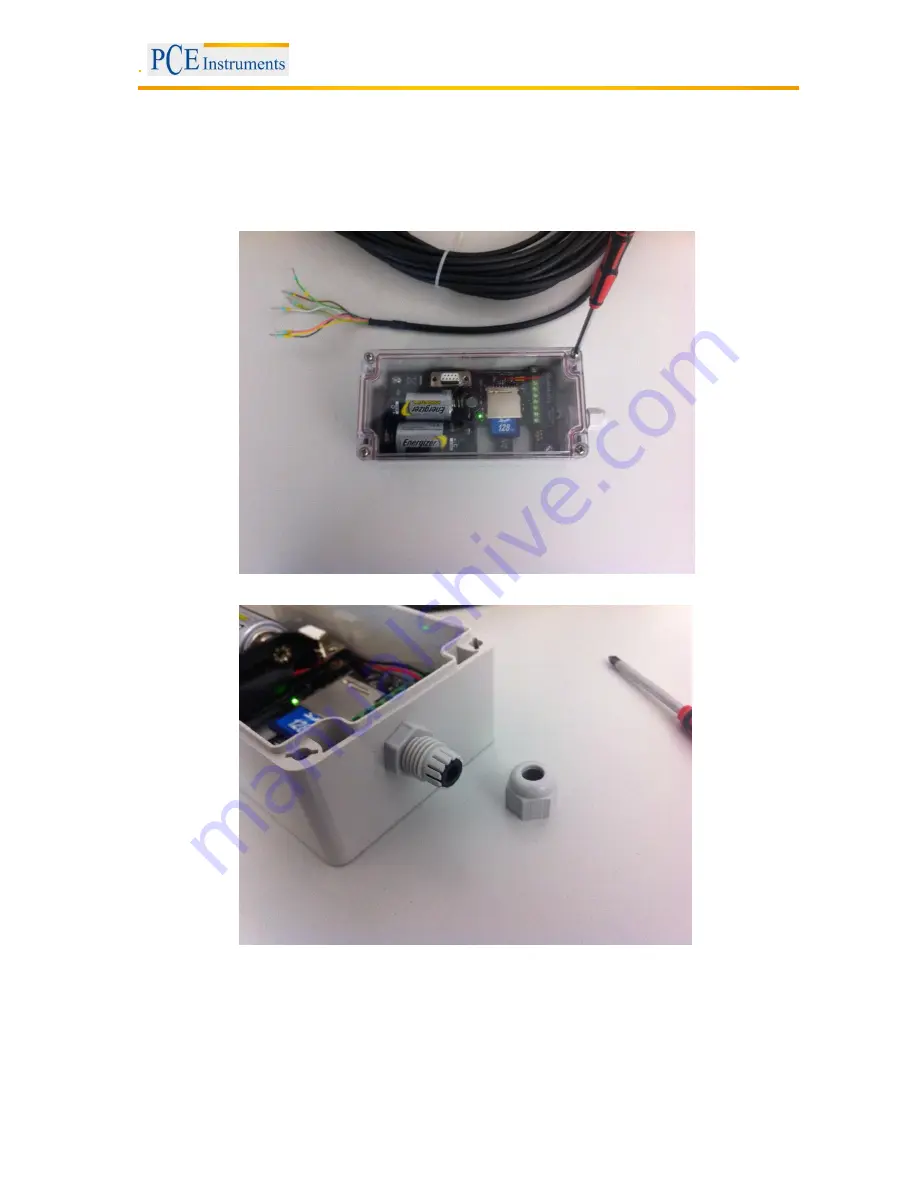
Open the case of the wind logger by loosening four screws at its corners by means of a screwdriver. 


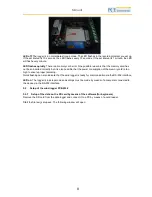
You can now see the circuit board of the data logger. The next step is to install the cable. 
To do so, open the PG gland and remove the sealing ring. 


First slide the nut over the wind sensor cable, followed by the sealing ring. 

Summary of Contents for PCE-WL 2

Page 1: ...58 USA From outside US 1 Tel 561 320 9162 Fax 561 320 9176 info pce americas com www pce instruments com english www pce instruments com PCE Instruments UK Ltd Units 12 13 Southpoint Business Park Ensign way Hampshire Southampton United Kingdom SO31 4RF From outside UK 44 Tel 0 2380 98703 0 Fax 0 2380 98703 9 info pce instruments com ...

Page 2: ...the waterproof box to the wall 7 4 2 Power supply 7 5 Instructions 7 5 1 Device status 7 5 2 Setup of the wind logger PCE WL2 8 5 2 1 Setup of the data on the SD card by means of the software for beginners 8 5 2 2 Setup by means of the terminal programme for experts 9 5 3 How to read out data from the memory card 13 5 4 Evaluation by means of the WindSpeedAnalyser 13 5 5 How to import records into...

Page 3: ...nge Do not expose it to extreme temperatures such as direct sunlight extreme air humidity or moisture The limit values for operating temperature and humidity must be within the specifications Never use the instrument with wet hands The case should only be opened by qualified personnel of PCE Instruments The instrument should never be placed with the user interface facing an object e g keyboard or ...

Page 4: ...rmat CSV file ASCII format Case resilient plastic case Protection class IP65 Dimensions 160 x 80 x 55 mm Weight 450 g Wind sensor Wind velocity Output 0 100 Hz at 40 m s Measurement range 0 8 40 m s Capacity 10 VA max 0 5 A max 42 V Wind direction Measurement range 10 350 Accuracy 5 Output signal 1 kΩ Potentiometer capacity 0 3 W Temperature Measurement range 30 60 C Sensor NTC 10 kΩ General Opera...

Page 5: ...the case of the wind logger by loosening four screws at its corners by means of a screwdriver You can now see the circuit board of the data logger The next step is to install the cable To do so open the PG gland and remove the sealing ring First slide the nut over the wind sensor cable followed by the sealing ring ...

Page 6: ...2 G ground A1 input of sensor 1 G ground D input of wind direction sensor D power supply of wind direction sensor V positive pole red G ground black The sensor is connected as follows Connection to circuit board Cable marker Cable colour Function A1 1 white input of sensor 1 G 2 brown ground of sensor 1 D 6 pink power supply of wind direction sensor D 5 grey input wind direction G 4 yellow ground ...

Page 7: ...nd whether the batteries are charged Otherwise there might be some problems with the memory We recommend to replace the batteries every 3 months Attention When replacing the batteries date and time are reset You have to make the date and time setting again We recommend to make a backup of the SD card on another SD card Before replacing the batteries make all SD card settings by means of the config...

Page 8: ...le that the power consumption of the memory card is too high to ensure proper recording Quick flashing can also indicate that the wind logger is ready for communication via the RS 232 interface LED on The logger is in setup mode and settings must be made by means of a computer connected to the device via the RS 232 interface 5 2 Setup of the wind logger PCE WL2 5 2 1 Setup of the data on the SD ca...

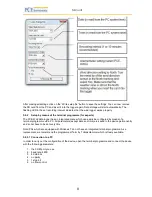
Page 9: ... can easily be configured by means of a terminal programme via a PC All parameters except date and time are saved to the device permanently and so not have to be set every time Note PCs which are equipped with Windows 7 do not have an integrated terminal programme As a replacement we recommend the programme HTerm by Tobias Hammer which is freely available 5 2 2 1 Connection to a PC In order to car...

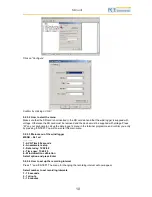
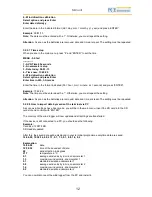
Page 10: ...p the data logger s menu in the terminal programme and confirm you entry by pressing ENTER You will now enter the main menu 5 2 2 3 Main menu of the wind logger MENU 5 4 1sd 1 AVG Time 60 seconds 2 Anemometer setup 3 Date today 12 09 08 4 Time now 13 49 25 6 Wind direction calibration Select option and press Enter 5 2 2 4 How to set up the recording interval Press 1 and ENTER The menu for changing...

Page 11: ...our PC screen ANEMOMETER A1 LE Basic Select type Anemometer LE Vortex 1 Anemometer LE Pro 2 Anemometer PCE KWG 3 Anemometer Raw Hz 4 Anemometer custom 5 Exit 6 Now select the wind sensor PCE KWG To do so press 3 and confirm your entry with ENTER Note ANEMOMETER A1 indicates which anemometer has been selected 5 2 2 5 2 Setup of own wind sensor In case you use another wind sensor or other sensors su...

Page 12: ...tteries are removed date and time are reset The setting must be repeated 5 2 2 8 How to import data by means of the terminal via PC As soon as all settings have been made you will be in the main menu Insert the SD card into the SD card slot and confirm with ENTER The memory of the wind logger will now update and all settings are transferred If the device is still connected to a PC you should see t...

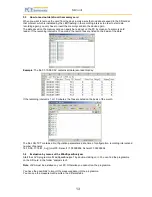
Page 13: ... The file 01 10 08 CSV contains all data recorded this day If the recording interval is 1 or 10 minutes the files are listed on the basis of the month The file LOG TXT contains all configuration parameters date time of configuration recording interval and number of sensors 16 10 08 17 16 51 Avg_time 10 Sensor1 1 05999994 Sensor2 1 05999994 5 4 Evaluation by means of the WindSpeedAnalyser Start the...

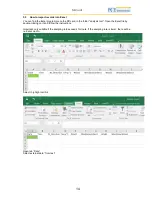
Page 14: ...rd in the folder analysis tool Open the Excel file by double clicking on it and follow the instructions Important only suitable if the sampling rate exceeds 1 minute If the sampling rate is lower there will be no date column Select highlight cell A2 Open tab Date Select external data from text ...

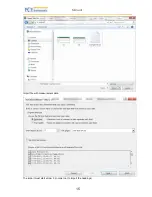
Page 15: ...Manual 15 Import file with measurement data The import must start at row 3 in order not to import the headings ...

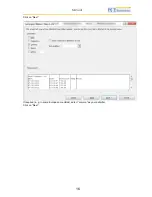
Page 16: ...Manual 16 Click on Next If required e g in some European countries select comma as your delimiter Click on Next ...

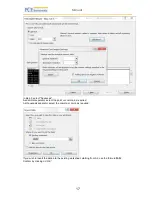
Page 17: ... decimal separator select the point or comma as required As thousands separator select the comma or point as required If you wish to insert the data into the existing worksheet starting from A2 use the formula A 2 Confirm by clicking on OK ...

Page 18: ...e contact PCE Instruments 6 1 PCE Instruments UK By post PCE Instruments UK Ltd Units 12 13 Southpoint Business Park Ensign Way Southampton Hampshire United Kingdom SO31 4RF By phone 02380 987 035 6 2 PCE Americas By post PCE Americas Inc 711 Commerce Way Suite 8 Jupiter 33458 FL USA By phone 561 320 9162 ...

Reviews: