© PCE Instruments
10
7
Operation
1.
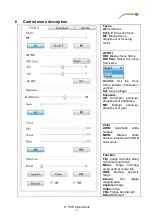
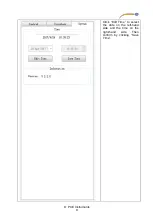
In "AF" mode, the program will automatically re-focus whenever the image is fuzzy. In "Click
F" mode, the AF ROI range is focused and the focus will be locked, which means that if you
change the sample, the system will not re-focus
unless you click on “Click F” again. In "MF"
mode, you can manually adjust the motor position within a range of -200
… 200, by moving
the slide bar.
2.
In some special scenarios (such as smooth surface), auto focus may not work properly. In
this case, focus the edge of the object by using the "Click F" function in order to lock the
focus. If this is not sufficient, enter "MF" to manually re-focus the sample.
3.
By using the "AE" function, you can adjust the brightness (0
… 100, default value: 56). By
using the "ME" function, you can adjust the gain
(0 … 50, default value: 1).
4.
To ensure correct white balance, target a pure white object with the camera (such as the
white standard that comes with the microscope) and set the exposure mode to "AE". With
the "MWB" function, you can adjust the RGB color value (0
… 4095) manually.
5.
Via the “AWB” function, you can start automatic white balance.
6.
When you click on "Capture", the
icon will appear in the middle of the display, which
means that the image is automatically saved to the microSD card as a jpg file.
7.
When you click on "Video",
a text box will appear. Click on “OK” (Capture start) to start
recording. Click on “Video” and then on “OK” again (Capture stop) to stop recording and
automatically save the video to the microSD card in H.264 format.
8.
After completing the capture / recording operation, wait for some time before you remove
the microSD card.
9.
When the image / video is saved, the folder is named by date and the file is named by time.
10.
When the lens sharpness needs to be corrected, the FBL function can be used. The focus
will then have to be adjusted manually.


