GRL-PCIE5-CEM-RXA User Guide and MOI
Rev7.0
© Granite River Labs 2022 Version 7.0, June 2022. Updated 06.29.2022
Page 112 of 123
10.3.3
Operation Guide
The following procedure will prepare the Re-Driver for operation.
1.
Install the GUI software to a Host PC or the MP1900A.
2.
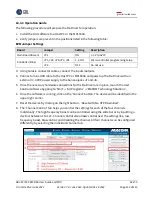
Verify jumpers are present in the positions listed in the following table:
EVM Jumper Settings
Board
Jumper
Setting
Description
Main Board (Green)
JP1
ON
3.3 V to AVCC
Controller (Blue)
JP1, JP2, JP8, JP3, JP4
1-2, ON
Micro-controller programming setup
JP6
OFF
Do not use.
3.
Using Carlisle connector cables, connect the inputs/outputs.
4.
Connect a mini-USB cable to the Host PC or MP1900A and power up the Re-Driver with an
ex3.3 VDC power supply to the banana jacks J1 and J8.
5.
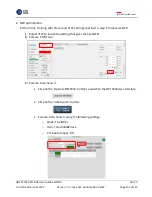
Once the necessary hardware connections for the Re-Driver are in place, launch the User
Cont
rol software by going to ‘Start’ → ‘All Programs’ → ‘MACOM Technology Solutions’.
6.
Once the software is running, click on the ‘Connect’ button. The device will be identified in the
upper right corner.
7.
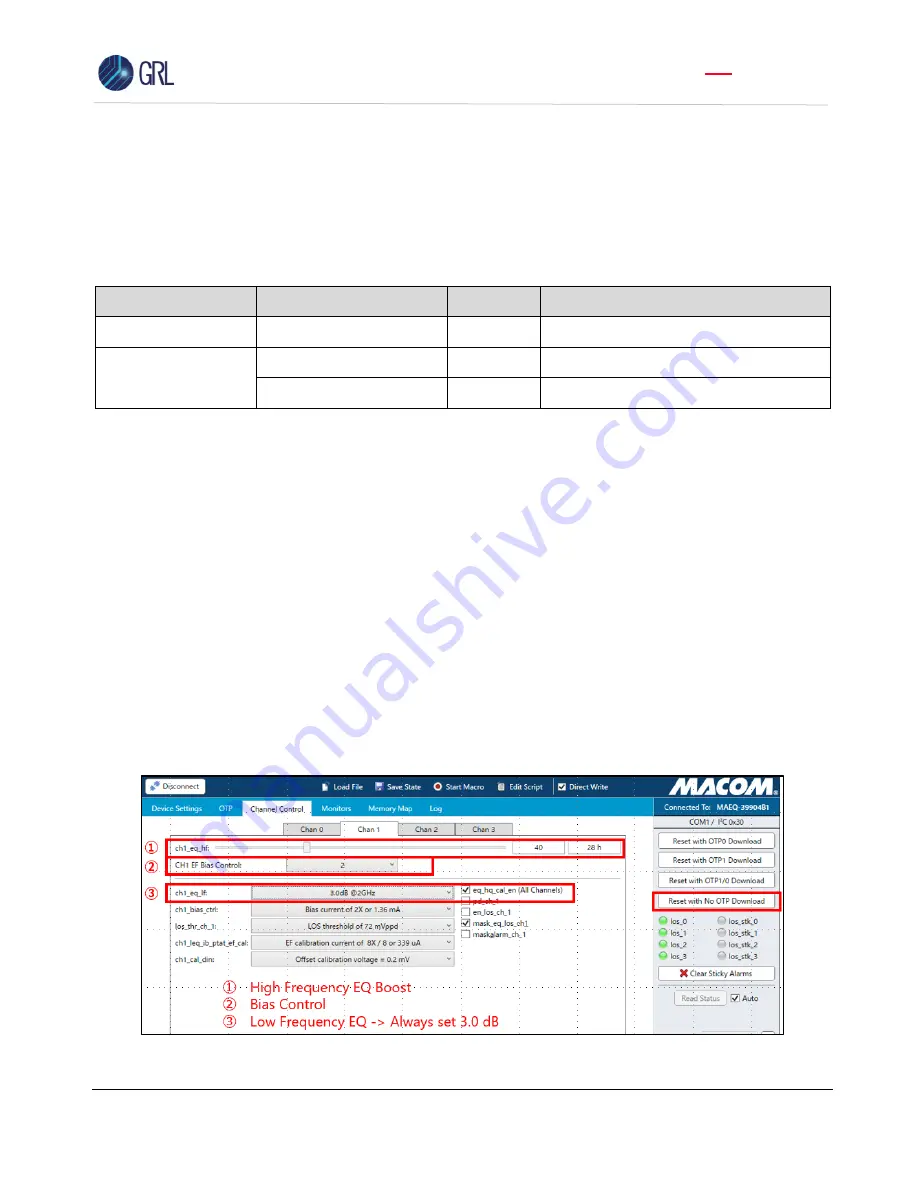
Reset the device by clicking on the right button
–
‘Reset with No OTP Download’.
8.
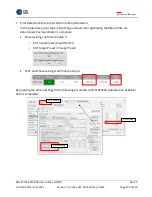
The ‘Channel Control’ tab helps you control the settings for each of the four channels
individually. The high frequency boost can be controlled using the slide bar or by inputting a
decimal between 1 to 127. Channel control also allows control over the settings like, low
frequency boost, bias control, and disabling the channel. All four channels can be configured
differently, by selecting the individual channel tab.


