Model: PIM-U
Powerline Interface Module
Installation Guide and
Owner’s Manual
The Inventors Of:
19215 Parthenia St. Suite D
Northridge, CA 91324
P: 818-701-9831
Select the correct
Interface Type
and then press the “
Find UPB
Interface port
” button. UPStart will automatically find the
Communication Port that the PIM-U is connected to. Next,
press the “
Connect
” button to have UPStart connect and test
the PIM-U
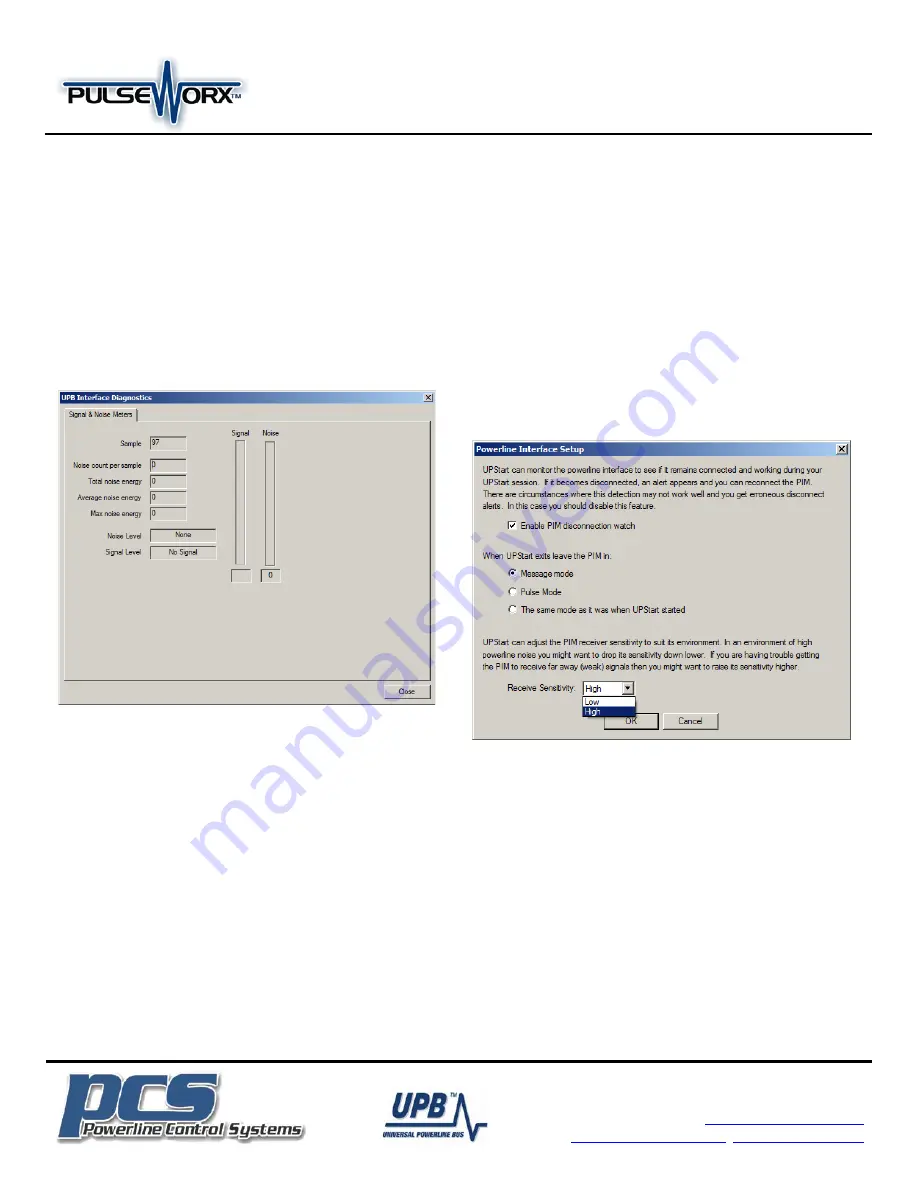
Signal & Noise Meters
Once connected, the PIM-U will constantly send reports to
UPStart as to what is currently happening on the powerline.
You can get a peek into the results of these reports by pressing
the
Signal & Noise Meters
button to bring up the UPB
Interface Diagnostics shown below.
The meters will display a real-time indication of what the PIM-
U is reporting. UPStart will also classify the reports as either
“Signal” or “Noise” and display them on the proper meter.
The meters are very useful for troubleshooting problems on
the powerline.
Status LED Indications
The PIM-U contains a bi-color (blue/red) Status LED that will
also give a visual indication of what UPB information is
currently on the powerline.
Blue:
No UPB Signal
Magenta:
Received a UPB Message
Red:
Transmitted a UPB Message
Push-button
The push-button on the front of the PIM-U is used to put the
device back to its factory default condition. To set the PIM-U
back to factory defaults first press the pushbutton
5
times
rapidly. The Status LED will blink blue. Next, press the
pushbutton
10
times. The Status LED will blink red. Finally, press
the pushbutton
2
times. The Status LED will stop blinking. The
device is now restored to its factory default state.
CONFIGURATION
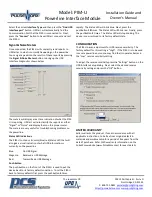
The PIM-U has an adjustment for UPB receive sensitivity. The
factory default for this setting is “High”. If the PIM-U is to be used
in severe powerline noise, you may find that it operates better in
the “Low” receive sensitivity setting.
To adjust the receive sensitivity press the “Settings” button on the
UPB Interface Setup dialog. Next, select the desired receive
sensitivity setting and press the “OK” button.
LIMITED WARRANTY
Seller warrants this product, if used in accordance with all
applicable instructions, to be free from original defects in
materials and workmanship for a period of five years from the
date of purchase. Refer to the warranty information on the
PulseWorx website (www.PulseWorx.com) for exact details.


