DRAFT DRAFT
page
14
page
15
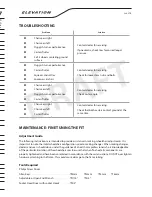
TROUBLESHOOTING
Problems
Solution
6
Chair veers right
Contact dealer for servicing.
If pneumatic, check tires for correct/equal
pressure.
6
Chair veers left
6
Sluggish turn or performance
6
Casters flutter
6
3 of 4 wheels contating ground
surface
6
Sluggish turn or performance
Contact dealer for servicing.
Check for loose stem nuts and bolts.
6
Casters flutter
6
Squeaks and rattles
6
Looseness in chair
6
Chair veers right
Contact dealer for servicing.
Check caster angle.
6
Chair veers left
6
Sluggish turn or performance
6
Casters flutter
6
Chair veers right
Contact dealer for servicing.
Check that both casters contact ground at the
same time.
6
Chair veers left
6
Casters flutter
MAINTENANCE: FINE TUNING THE FIT
Adjustment Guide
The following instructions are intended to provide assistance in making wheelchair adjustments. It is
important to note the initial wheelchair configuration prior to making changes. When making changes,
dealers and users should do so under the guidance of a health care professional who is knowledgeable
of the particular limitation of the wheelchair user. Be sure that when finished, all components are
properly tightened and have been completed in accordance with these instructions. DO NOT over tighten
hardware attaching to the frame. This could cause damage to the frame tubing.
Tools Required
Philips Screw Driver
Allen Keys: . . . . . . . . . . . . . . . . . . . . . . . . . . . . . . . . . . . .
r
3mm
r
4mm
r
5mm
r
6mm
Adjustable or Open End Wrench . . . . . . . . . . . . . . .
r
7/16”
r
3/4”
Socket Head Driver with socket Heads . . . . . . . . .
r
3/4”
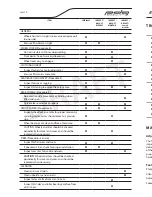
ITEM
INITIALLY
INSPECT/
ADjUST
WEEKLY
INSPECT/
ADjUST
MONTHLY
INSPECT/
ADjUST/
every 6
months
GENERAL
Wheelchair rolls straight (no excessive drag or pull
to one side).
6
6
Ensure all hardware is tight.
6
6
WHEEL LOCKS (Procedure 6)
Do not interfere with tires when rolling.
6
6
Pivot points free of ware and looseness.
6
6
Wheel locks easy to engage.
6
6
CLOTHING GUARDS
Inspect for bent or protruding metal.
6
6
Ensure all fasteners are secure.
6
6
SEAT/BACK UPHOLSTERY (Procedure 3)
Inspect for rips or sagging.
6
Inspect fastening to ensure they are secure.
6
6
6
REAR WHEELS (Procedure 4)
No excessive side movement or binding when
lifted and spun.
6
6
Quick-release axles lock properly.
6
6
6
FRONT CASTER (Procedure 5)
6
6
6
Inspect wheel/fork assembly for proper tension by
spinning caster; caster should come to a gradual
stop.
6
6
Wheel bearings are clean and free of moisture.
6
6
CAUTION: Wheels and tires should be checked
periodically for cracks and wear, and should be
replaced when necessary.
6
6
TIRES (Procedures 5 and 6)
Inspect for flat spots and wear.
6
6
If pneumatic tires, check for proper installation.
6
6
Inspect rear tires for cracks and wear.
6
6
CAUTION
: Wheels and tires should be checked
periodically for cracks and wear, and should be
replaced when necessary.
CLEANING
Clean and wax all parts.
6
Clean upholstery and armrests.
6
Inspect axles are free from dirt, lint, etc.
6
Inspect tilt slides and roller bearings are free from
dirt, lint, etc.
6


