– 9 –
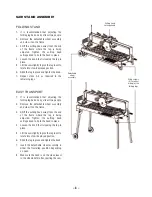
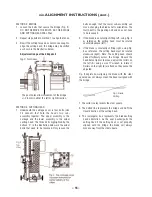
Knurled
Nuts
vii. BLADE INSTALLATION
viii. MOTOR CAPACITOR INSTALLATION
Disconnect
the power plug before installing
the blade onto the blade shaft.
WARNING!
Disconnect the
power plug before servicing the motor.
WARNING!
Setting the
blade too low may damage the
cutting table and if set too high,
the blade may grab the material
being cut, causing damage and
possibly injury.
WARNING!
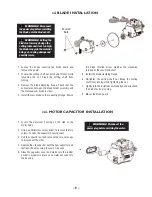
1. Loosen the knobs securing the blade guard and
remove the guard.
2. Loosen the cutting shaft nut (left-hand thread); while
loosening the nut, block the cutting shaft from
turning.
3. Remove the blade clamping flange. Check that the
contact area between the blade holder assembly and
the diamond saw blade is clean.
4. Install the saw blade on the supporting flange. Ensure
the blade rotation arrow matches the clockwise
rotation of the saw blade shaft.
5. Install the blade clamping flange.
6. Re-tighten the cutting shaft nut. Block the cutting
shaft from turning while tightening the nut.
7. Lightly turn the installed saw blade by hand and check
the blade for true running.
8. Mount the blade guard.
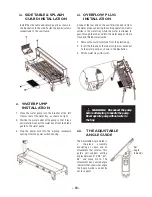
1. Locate the aluminum housing on the side of the
motor body.
2. Using a phillip/cross screw driver to remove the two
screws to open the capacitor housing cover.
3. Pull the capacitor out and remove the two wire caps
to disconnect the wires.
4. Replace the old capacitor with the new capacitor and
reattach the wires using the same wire caps.
5. Close the capacitor cover and make sure the rubber
gasket is properly in place so no water can seep into
the housing.


