Cautions
The unit must be disconnected from the AC power source before any work is done on it. Refer all servicing to
qualified service personnel.
The back plate can become hot to the touch. Do not block or cover the fan or the exhaust louvers from ventila-
tion. There must be a minimum of 12” of space behind the fan. Do not allow the airflow to be become blocked
by objects such as curtains or drapes, thermal building insulation, etc. It is recommended that the rear of the
PVs 12 Sub not be placed in a closed space or a space that has no fresh, cool airflow.
DO NOT connect the inputs of the PVs 12 Sub to the output of a power amplifier. The inputs are meant to be
driven from a line-level strength signal.
DO NOT remove the protective metal grilles.
WARNING! The PVs 12 Sub is very efficient and powerful! This sound system can permanently damage hearing!
Use extreme care setting the overall maximum loudness!
The apparent sound level of the PVs 12 Sub can be deceiving due to its clear, clean sound output and lack of high
frequencies. The lack of distortion or obvious distress can make the sound level seem much lower than it actually
is. This system is capable of SPL in excess of 125 dB at 1 M from the speaker!
Placing A Satellite Speaker System On Top Of The PVs 12 Sub
The PVs 12 Sub has a threaded pole mount built-in to the top of the unit, and this is designed to mate with an
M20 threaded pole of adjustable length. This pole is designed to be used with speaker systems less than 29” high
and less than 44 lbs. in weight. Do not place a taller/larger or heavier speaker system than this on the top pole
mount and pole, or it may be unsafe due to the potential to tip over.
The adjustable pole should only be used with the PVs 12 Sub in the upright orientation with an adjusted length
of 36.88” (93.6 cm), which is the first pin position exposed when the center pole is pulled out from the base pole
section.
DO NOT USE A LONGER POLE LENGTH IN THIS ORIENTATION, AS IT MAY BE UNSAFE AND ALLOW
THE SUB AND SATELLITE SPEAKER TO TIP OVER!
There is also a threaded pole mount built-in to the right side of the unit. This can be used when the PVs 12 Sub
is placed on it’s left side, and the adjustable pole set to no longer than 44.75” (113.7 cm), which is the third pin
position as you pull the center pole out from the base pole section. This is the middle hole of the 5 sets of holes
in the center pole.
DO NOT USE A LONGER POLE LENGTH IN THIS ORIENTATION, AS IT MAY BE UNSAFE AND ALLOW
THE SUB AND SATELLITE SPEAKER TO TIP OVER!
Setting the Adjustable Pole Length
The adjustable pole will ship in the shortest position possible for packing reasons. To use the pole safely, follow
the instructions for setting it’s length as follows.
1. Keeping the pole upright, loosen the position hold knob till the center pole can move freely, but not too much,
as the lock knob friction plate may fall out with too much space between the knob bolt threads and the center
pole. Keep the pole upright while this procedure is being performed.
2. Pull the center pole out from the base pole section until the desired set of holes is exposed. DO NOT PULL
Summary of Contents for PVs 12 Sub
Page 1: ...www peavey com PVs 12 Sub Enclosure Operating Manual ...
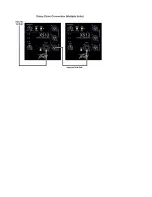
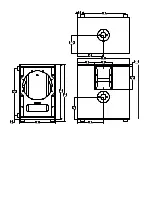
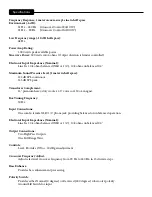
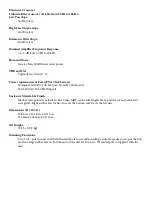
Page 17: ...Typical Hook up Connections Loudspeaker System Specifications ...
Page 20: ...19 50 768 224 8 819 ...
Page 23: ......
Page 24: ......


