8
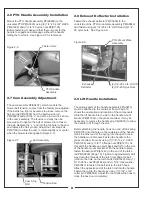
2-6 PTO Handle Assembly Installation
Mount the PTO handle assembly P#(A0603) to the
universal PTO P#(A0623) using (3) 1/4”-20 x 3/4” HHCS
P#(K1222) and (3) 1/4”-20 nyloc nuts P#(K1128).
Before fastening, make sure that there is room for the
handle to engage and disengage without the handle
hitting the fuel tank. See Figure 2-6 for reference.
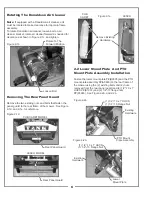
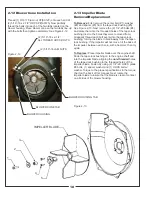
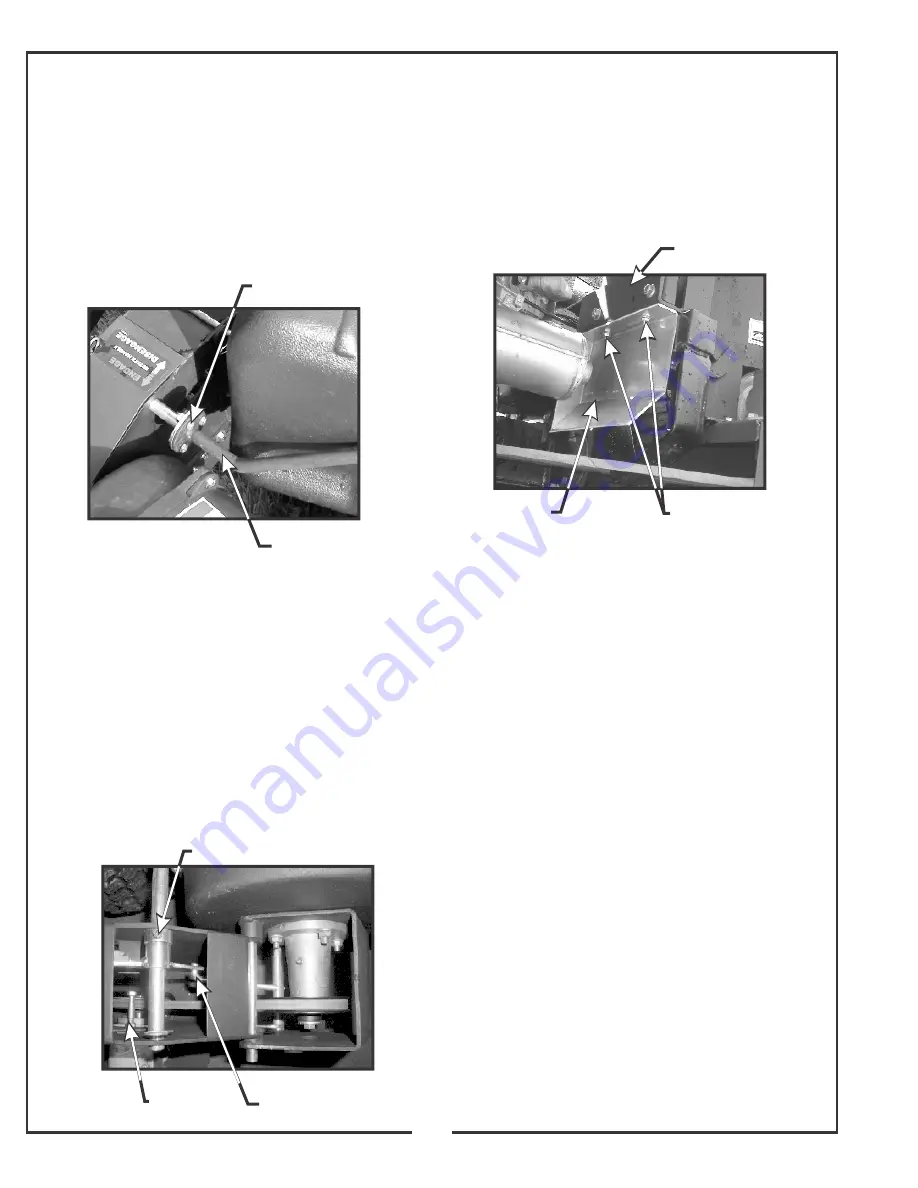
2-7 Cam Assembly Adjustment
The cam assembly P#(A0422), which controls the
blower belt tension, comes from the factory pre-adjusted.
If the belt is too tight or becomes too loose, remove the
hair pin clip P#(K0099) from the belt tension rod
P#(K0326) and pull the “L” end of the rod out of it’s hole
in the cam assembly. The tension rod may then be
screwed out to tighten the belt or screwed in to loosen
the belt. Replace the “L” end into the top hole in the cam
and replace the hair pin clip. Adjust the cam stop bolt
P#(K1159) to allow the cam to rotate slightly over center
when the blower is disengaged (Figure 2-7).
2-8 Exhaust Deflector Installation
Fasten the exhaust deflector P#(C0058) to the
underside of the PTO mount plate assembly P#(A0846)
and fasten using (2) 1/4”-20 x 3/4” HHCS and (2) 1/4”-
20 nyloc nuts. See Figure 2-8.
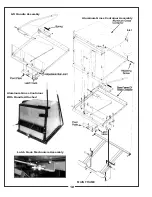
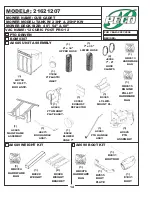
2-9 Lift Handle Installation
The various parts of the handle assembly P#(A0273)
must be attached to the container frame. Page 10
shows the orientation and location of the components.
Slide the lift handle into the slot in the handle mount
bracket P#(B1730) on the grass container. It may be
necessary to remove the handle grip P#(J0522) to allow
the handle to fit through the slot.
Before attaching the handle, hook one end of the spring
P#(J0176) into the hole on the underside of the handle.
Hook the other end of the spring into the open hole in
the handle mount bracket. Fasten the handle to the
grass container frame by using (1) 3/8”-16 x 2” HHCS
P#(K1208) and (2) 3/8”-16 flange nuts P#(K1215). At
this point the handle can pivot back and forth in the slot
of the handle mount bracket. With the handle in place,
fasten the ball joint P#(K1442) to the end of the latch
rod P#(A0260) (Page 10). Tighten to approximately half
way down the threads of the latch rod. Slide the ball
joint into the hole on the latch hook P#(B1529). Use (1)
5/16”-24 hex nut P#(K1444) and (1) 5/16” lock washer
P#(K0043) to fasten the ball joint to the latch hook.
Attach the opposite end of the latch rod into the handle.
Fasten the rod to the handle by using (1) 3/32” x 3/4”
cotter pin P#(K0094). Adjust the rod to allow the hook to
close the box door completely.
Tension Rod
Figure 2-7.
Cam Stop
Bolt
Cam Assembly
Figure 2-8.
PTO Mount Plate
Assembly
(2)1/4”-20 x 3/4” HHCS
(2)1/4”-20 Nyloc Nuts
Exhaust
Deflector
Figure 2-6.
PTO Handle
Assembly
Fasten Here
Summary of Contents for 21621207-08
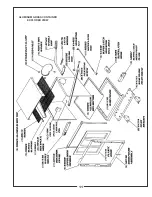
Page 11: ...ALUMINUM GRASS CONTAINER EXPLODED VIEW 11 ...
Page 17: ...PTO Parts List 17 ...
Page 24: ...24 ...
Page 25: ...25 NOTES ...


